Backend workflows
Backend (BE) Workflows is a tool for creating backend workflows as Directed Acyclic Graphs (DAGs). You can trigger a workflow via an API call, and the response is returned in JSON format. This Section will walk you through the features and functionalities of backend workflow creation and management.
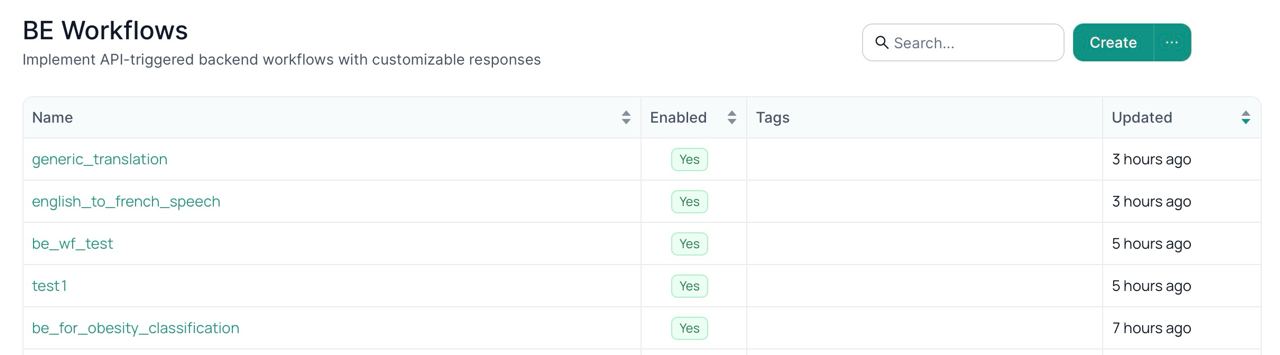
Main Page - Workflows List
Upon accessing the Main Page, you'll find an interface designed to simplify backend workflow creation and management. Below the top bar, a table displays all the backend workflows you've created, providing essential details about each workflow.
Main page - Top Bar
The top bar includes Import, Clone and Export options for the workflows:

Create Workflows
To create a workflow click create and fill-in the form:

Each workflow has the following parameters:
- Label: This is the project name you can esily read. Field has no restrictions on entered charactersю
- Name: This column displays the name of each backend workflow. It can't include spaces. It can't contain spaces and any signs expect letters, numbers and underscore.
- Description: It provides a brief description of the workflow's purpose or functionality.
- Enabled: This column indicates whether the workflow is currently "enabled" or "disabled." A disabled workflow will not be triggered until it's re-enabled.
- Response Validation Enabled: This column indicates whether the response validation of the workflow is enabled or not. Enabling response validation allows for better error handling and validation.
- Request Method: It shows the HTTP request method used in the workflow, such as GET, POST, PUT, DELETE, etc.
- Background Task: This column indicates whether the workflow will be executed in the background or not. An asynchronous workflow is marked as a background task.
- Tags: Telp to organize, categorize, and quickly retrieve relevant information about the workflow.
Import Backend Workflows
Import existing backend workflows from a JSON file. The JSON file should contain information about the backend workflow in a specific format, including details like background task, workflow functions, tasks, dependencies, etc.
Clone Backend Workflows
Create a copy of an existing backend workflow within the same application using the "Clone Backend Workflow" functionality. This allows for easy duplication of workflows, saving time when creating similar or derivative workflows.
Export Backend Workflow
Selected backend workflows can be exported to a JSON file. This feature allows you to share workflows between applications or keep backups for later use.
Delete Workflows
To delete the workflow use the delete button in workflow settings. Deleting a workflow will impact any module using it.
Backend workflows page
After successfully creating your backend workflow, you will be seamlessly directed to the page that offers a top bar with various functionalities and a main canvas that empowers you to effortlessly drag and drop nodes, enabling the construction of a robust backend workflow. For more comprehensive insights into backend workflow concepts and its seamless functionality, please consult the detailed concept documentation: Backend Workflows Concepts.
1 Workflow
Edit backend workflows by clicking the terminal icon. There you can add or change the code.
Link nodes to each other to set the dependecies:
Backend workflows example:
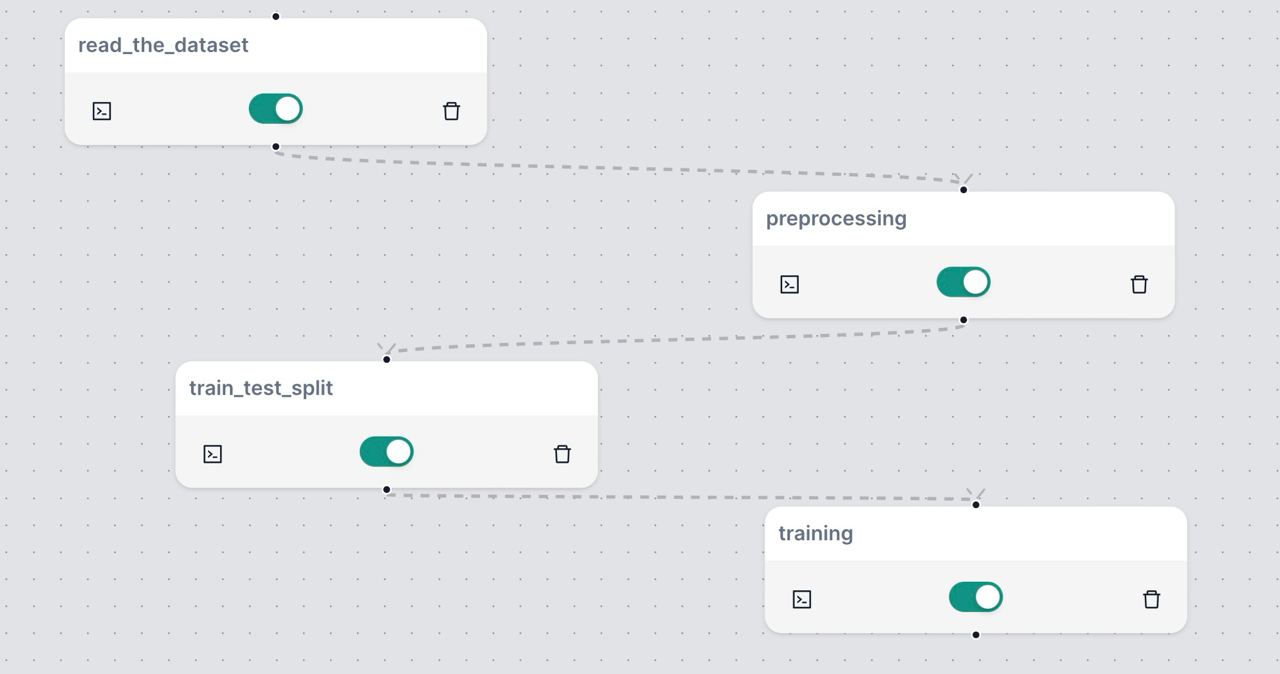
To disable the backend workflow use toggle.
2. Schema
Use schemas to ensure consistency and integrity of data by defining the format of request and response data in backend workflows:
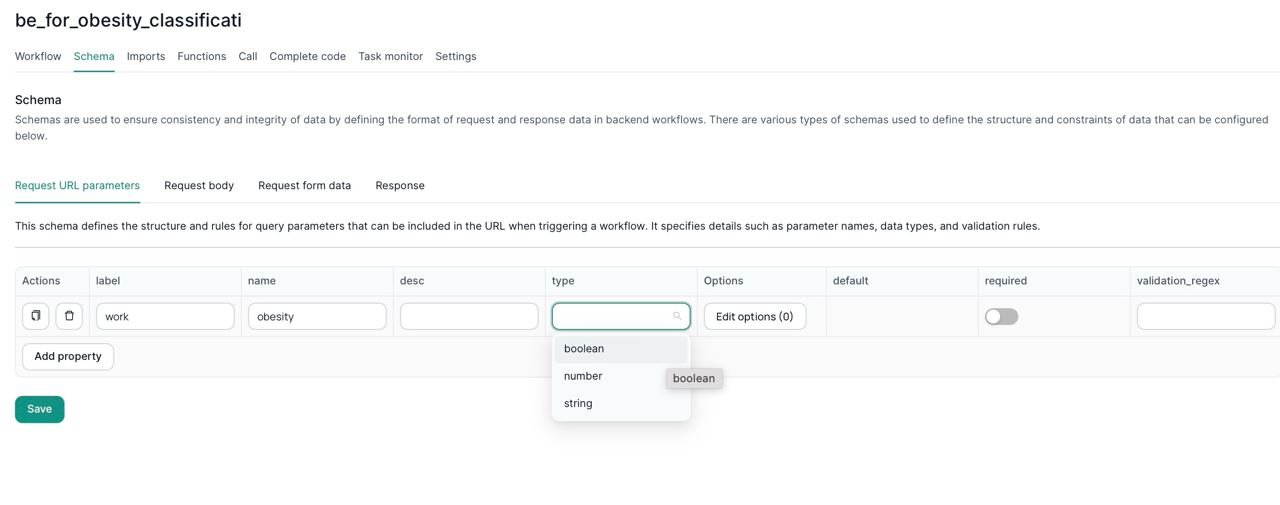
Schemas include these parameters:
- Label: assign a unique identifier to the parameter (ensure it is in lowercase and contains no spaces).
- Name: provide a descriptive name for the parameter.
- Description: craft a concise and informative description of the parameter.
- Type: choose the appropriate type for the parameter based on the schema's requirements.
- Options: for enhanced user interactions, set predefined options for the parameter.
- Required: when essential, mark the parameter as required to ensure its inclusion.
- Validation Regex: for precise data validation, employ a regular expression to ensure data conformity.
Request URL parameters schema defines the structure and rules for query parameters that can be included in the URL when triggering a workflow. It specifies details such as parameter names, data types, and validation rules.
Request body schemas define the format and constraints of data that can be included in the HTTP request body when triggering a workflow. They specify how data should be structured, what data types are allowed, and any validation criteria.
Similar to request body schemas, request form data schemas define the structure and constraints of data that can be sent as form data in an HTTP request. They specify the names, types, and validation rules for form fields.
Add multiple response schemas using keys to identify them.
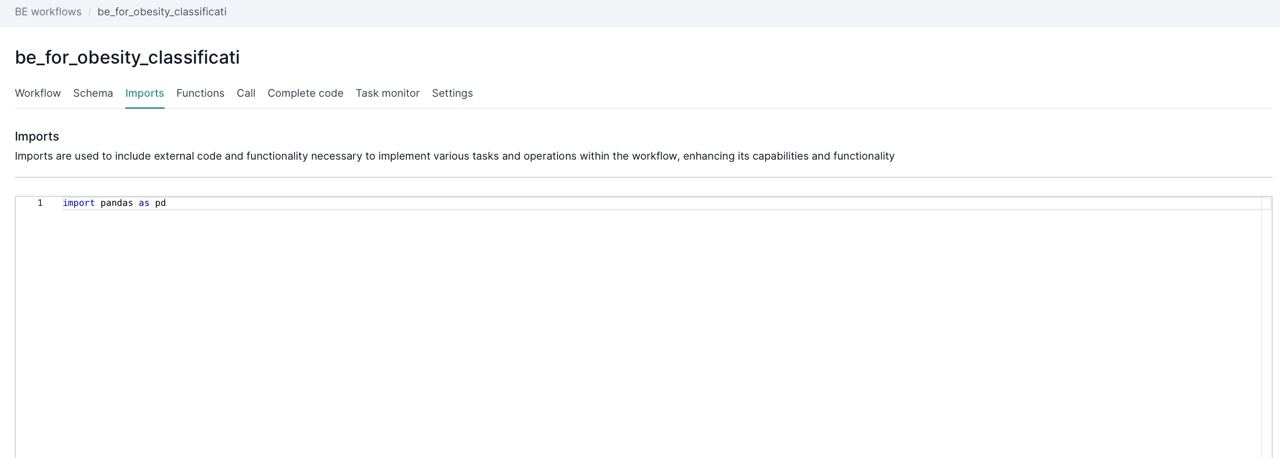
3. Imports
Use Imports to include external code and functionality necessary to implement various tasks and operations within the workflow, enhancing its capabilities and functionality:
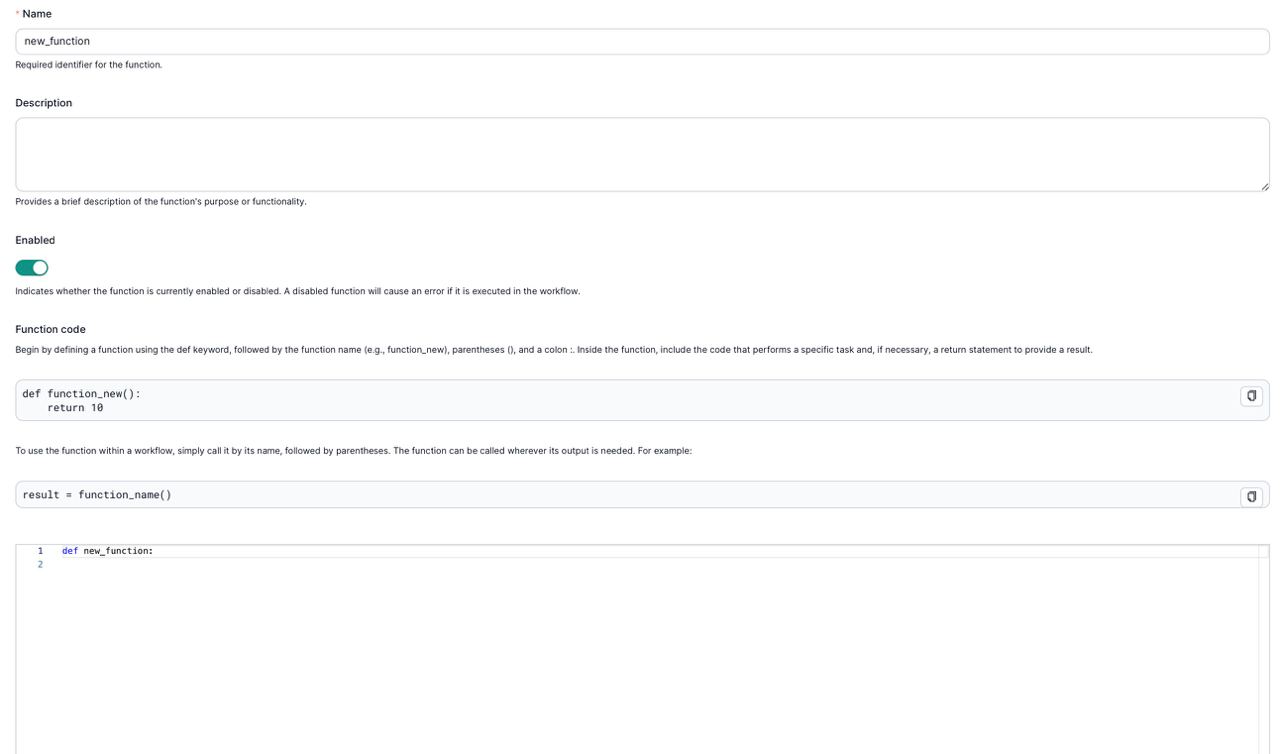
4. Functions
Use Functions to enhance the functionality of a workflow by providing a set of pre-defined, reusable operations or tasks. Add name and description, use toggle to enable the function and edit the function code:
5. Call
Use calls to test the backend workflow. You'll see URL paramentrs once set in Schema. Rsponse logs are also available.
6. Complete code
Inspect the full code of the workflow to facilitate debugging and troubleshooting processes efficiently. This screen only demonstartes the preview of the complete code - no edit available.
7. Task monitor
Workflows can be executed as background tasks either through the scheduler or by configuring them accordingly. Use task monitor for a comprehensive view of the status and detailed information about executed tasks. This tool serves as a debugging aid, allowing you to investigate and troubleshoot failures efficiently.
8. Settings
Change workflow parameters in Settings or delete the workflow is needed.