Model Bundles
Model bundles are containers for your external model artifacts, making it easy to deploy models trained outside the OICM platform. See the GitHub Examples for sample configurations using common ML libraries.
1. Model Bundle Module
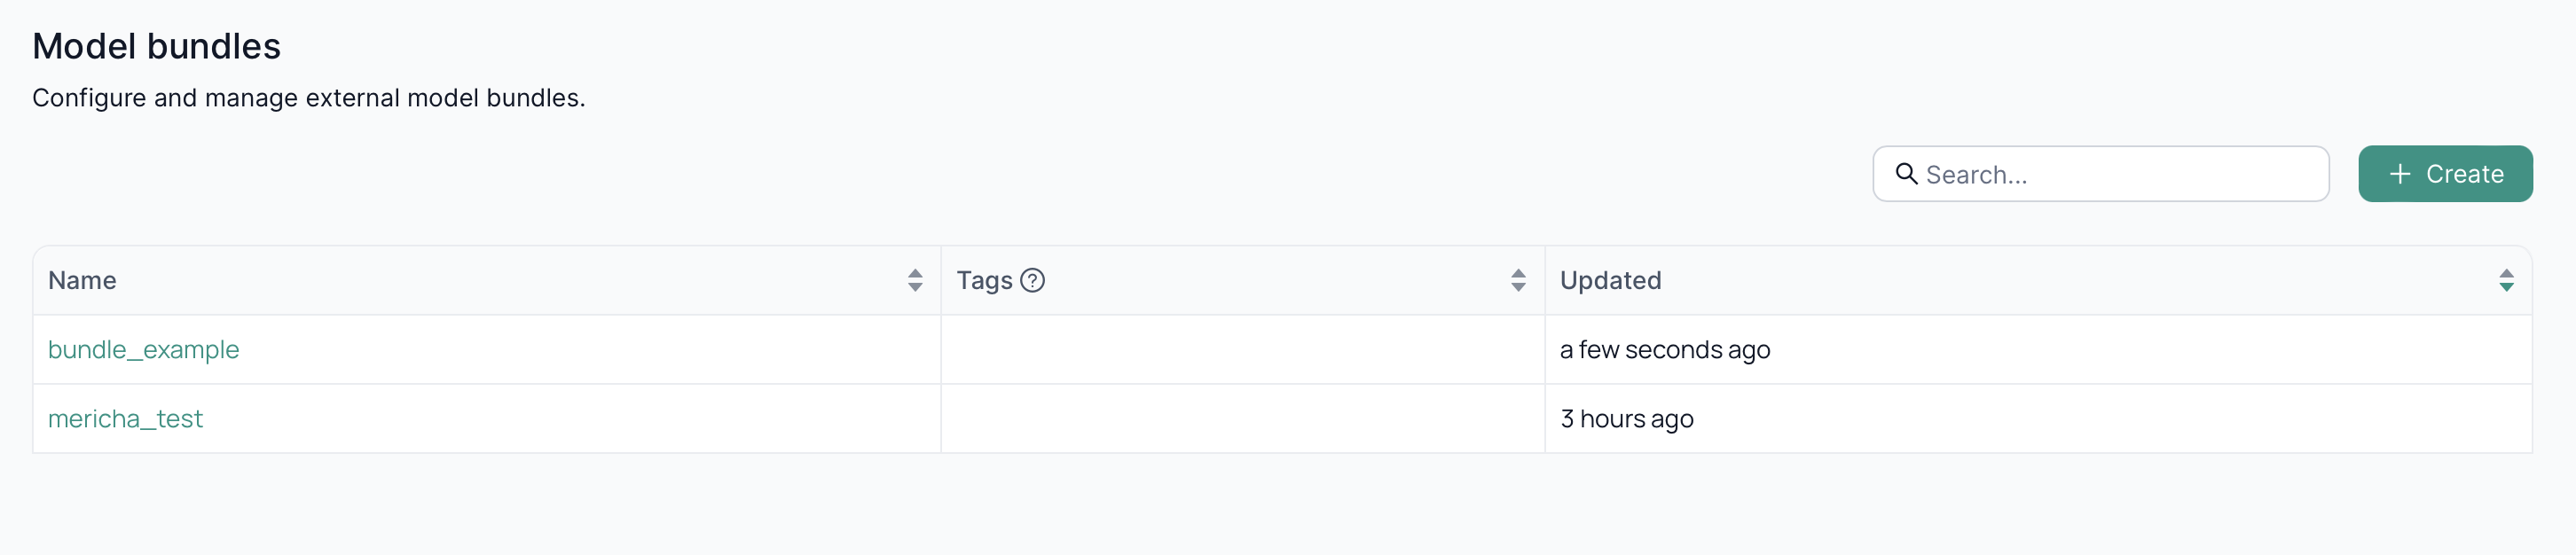
In the Model Bundle module screen, you can view existing model bundles or create a new one.
1.1. Creating a Model Bundle
The Create Model Bundle button appears in the center of the screen if no model bundles exist, otherwise it is at the top right of the main content window.
Clicking on Create Model Bundle reveals a modal window that allows you to:
- name your model bundle,
- describe your model bundle in detail, and
- add tags to your model bundle.
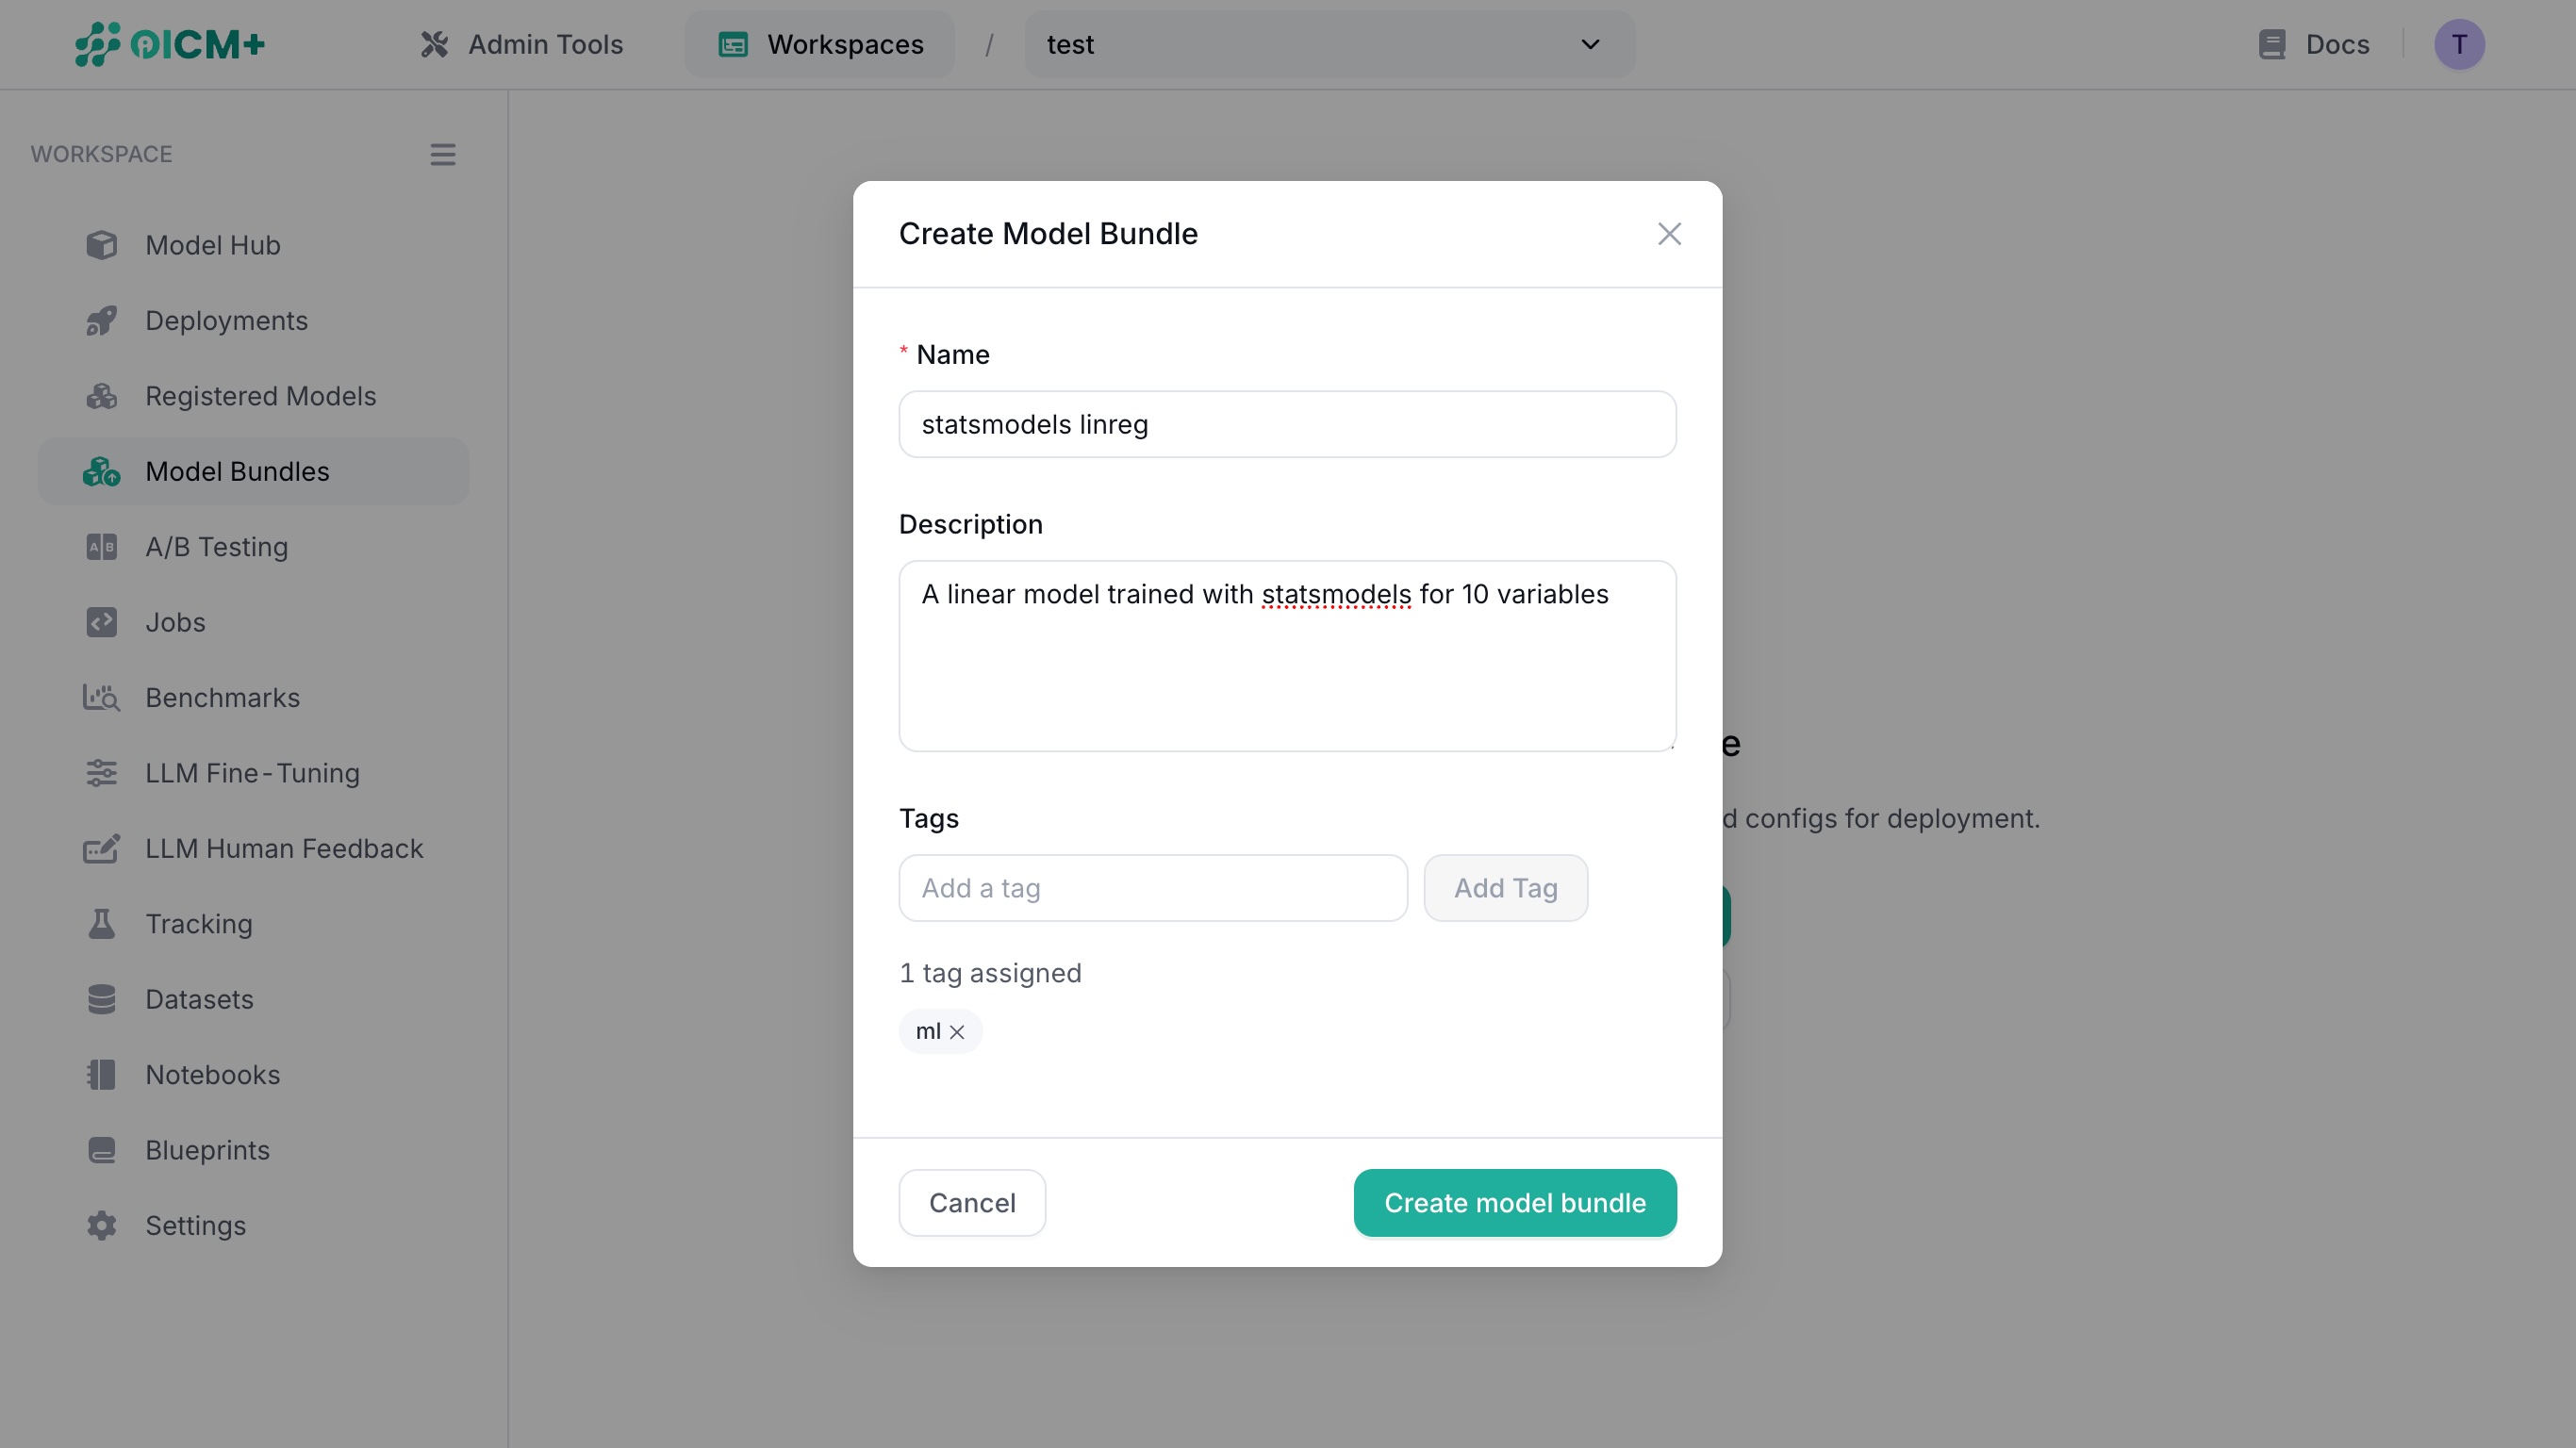
Once complete, click on the Create model bundle button in the modal window to see the overview of the model bundle.
1.2. Viewing a Model Bundle
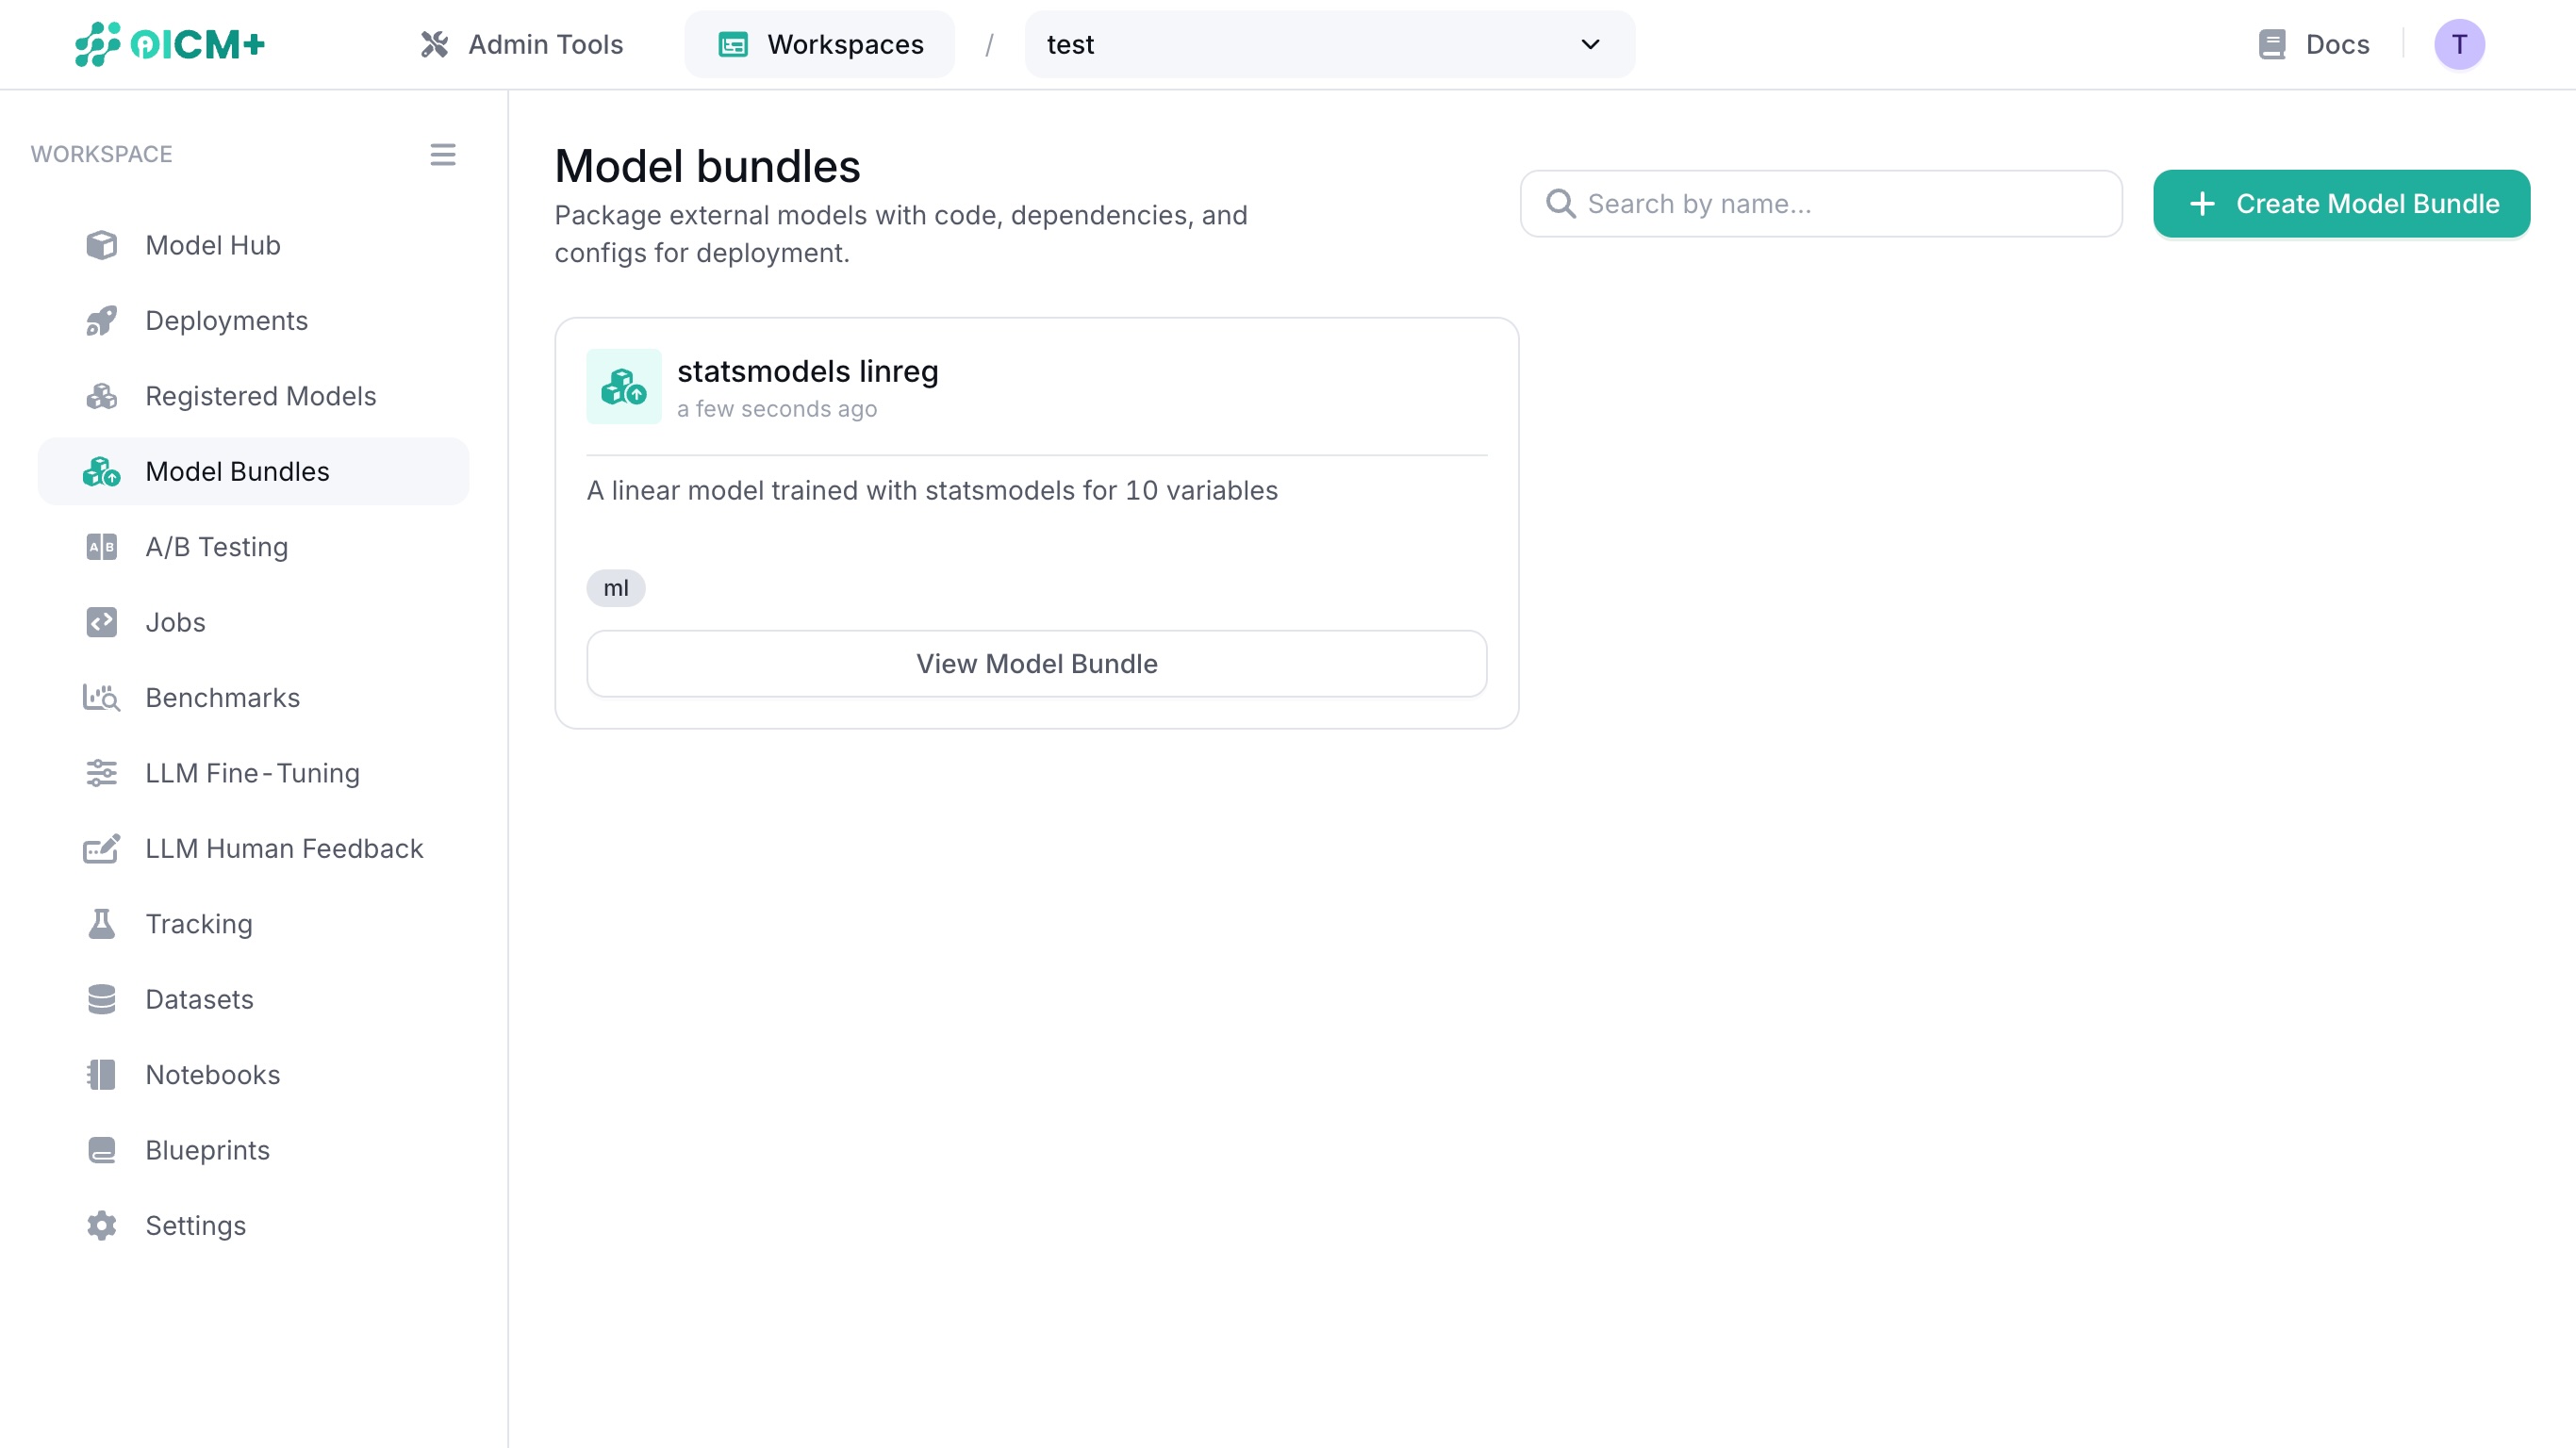
Click on View Model Bundle on an existing model bundle to see its overview.
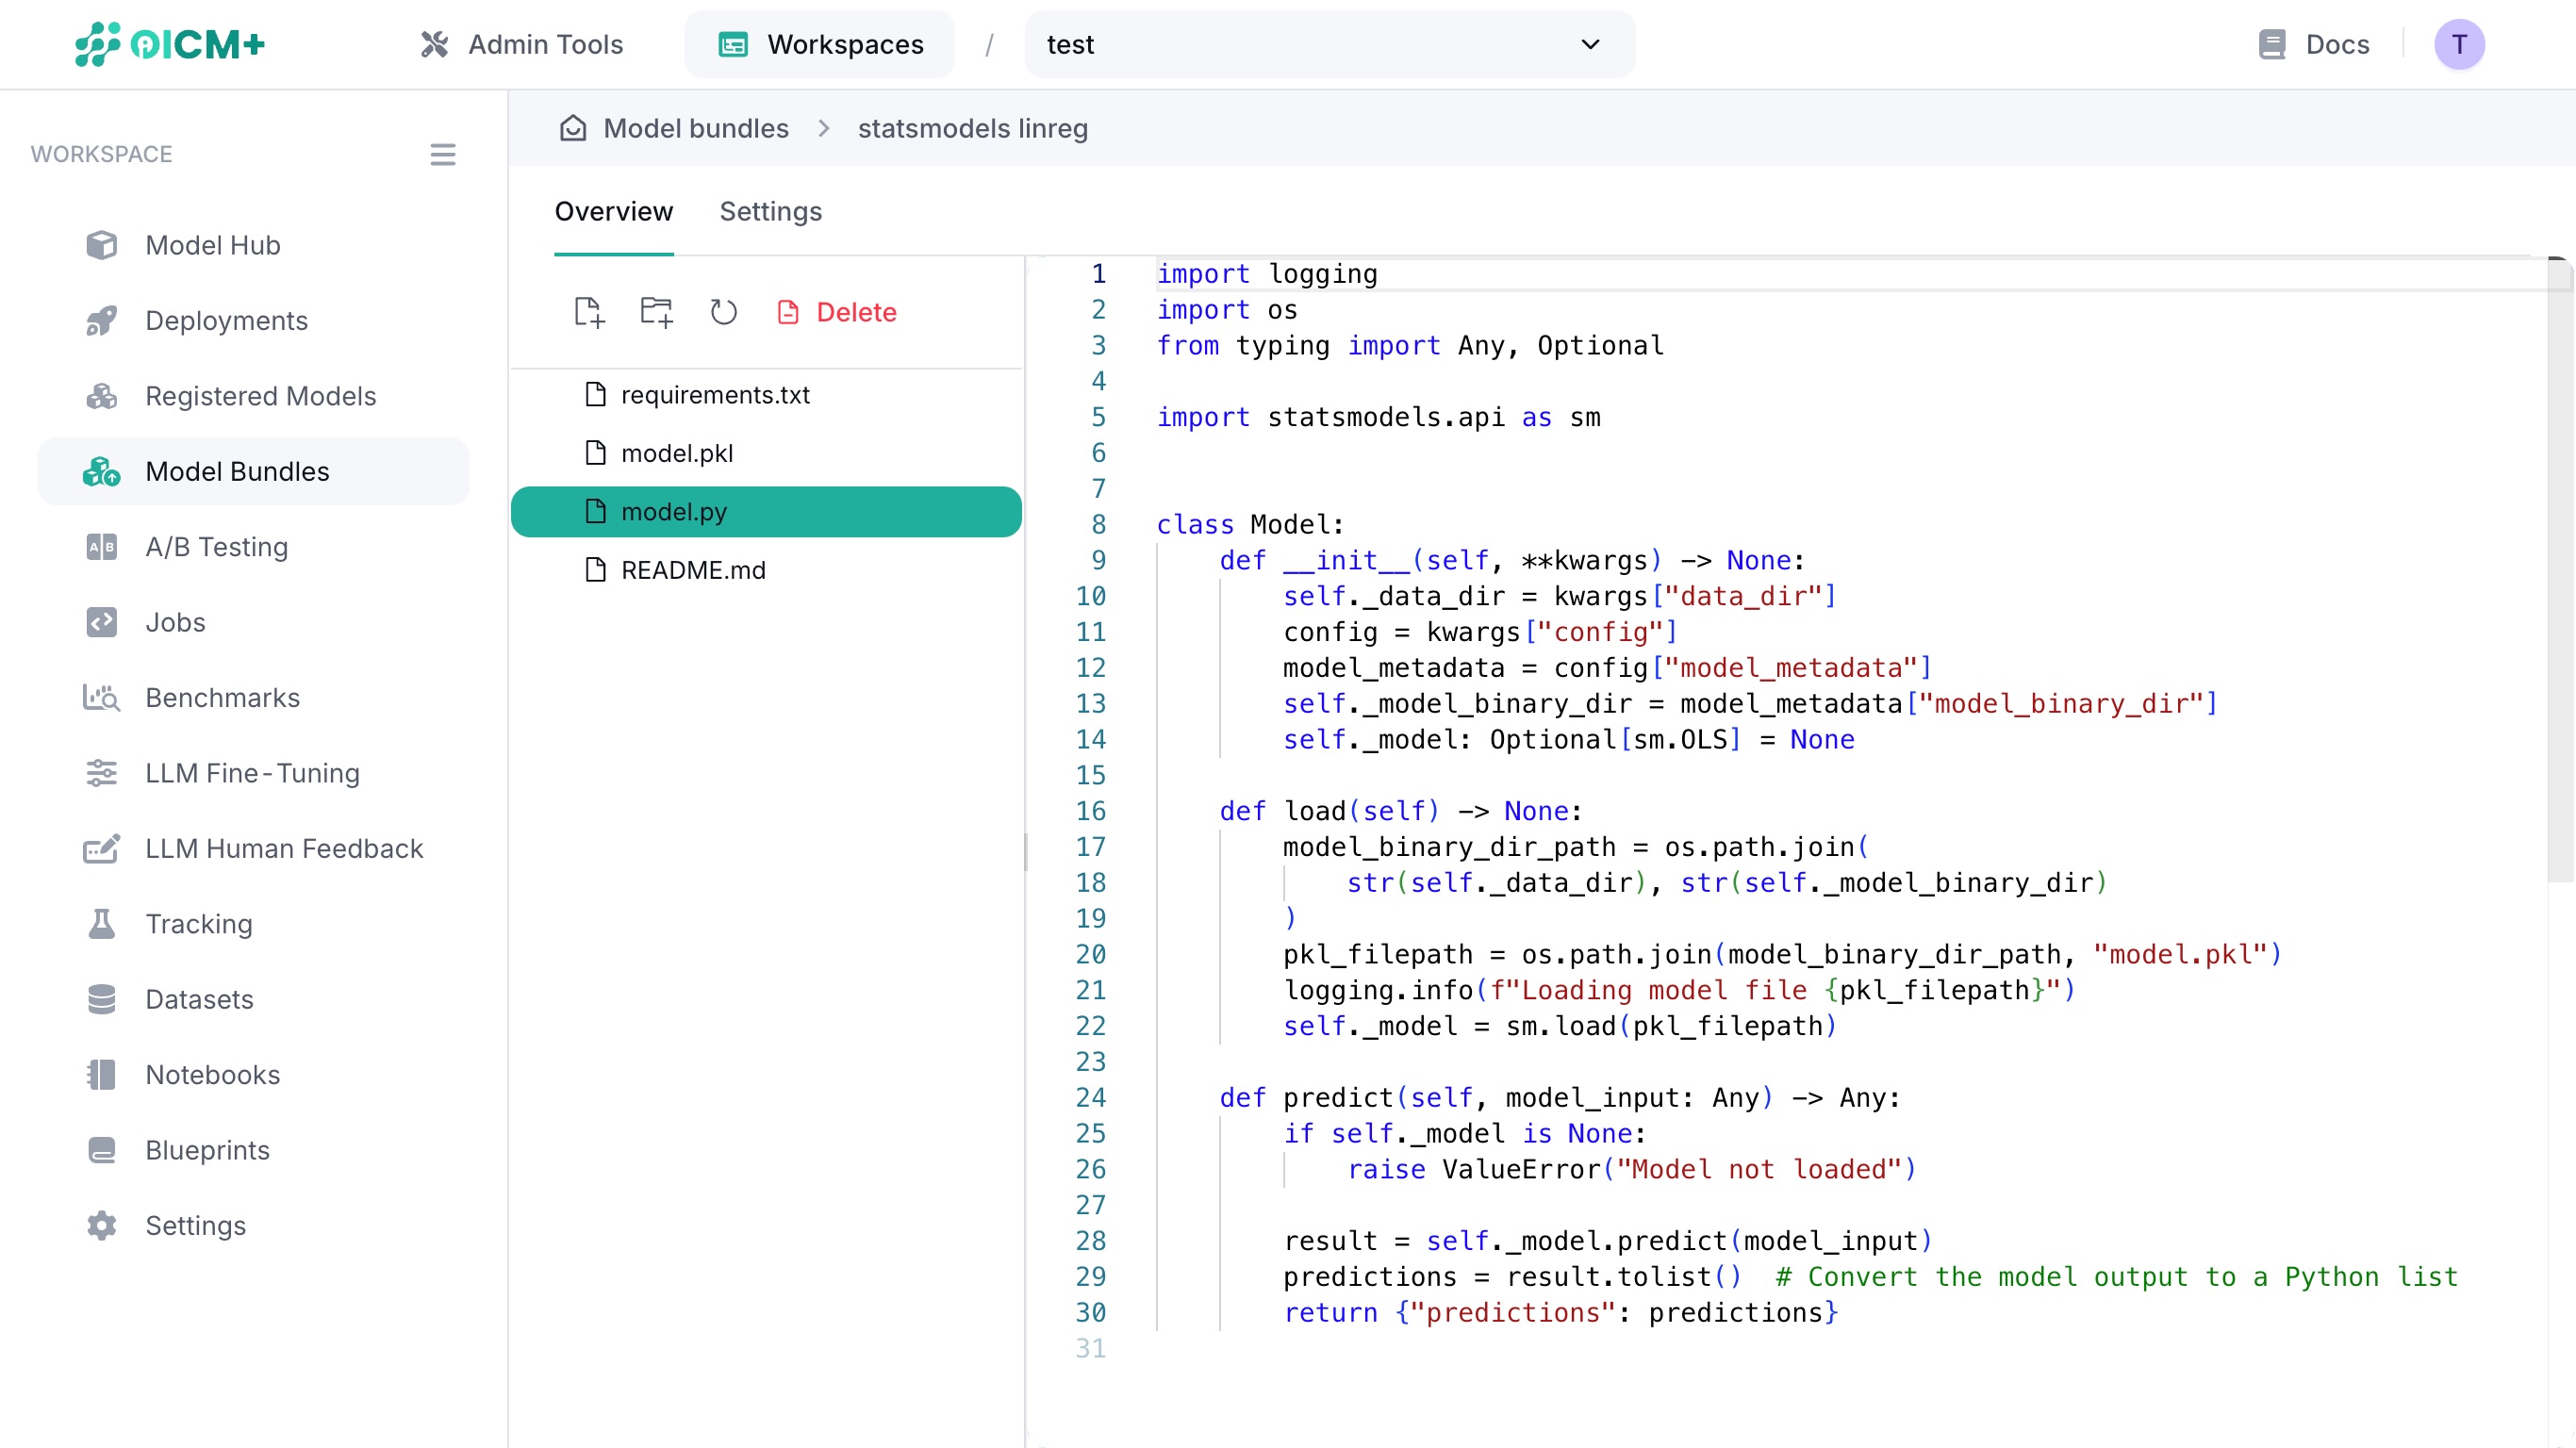
2. Overview
Creating a new model bundle or selecting a model bundle takes you to the overview page where you can:
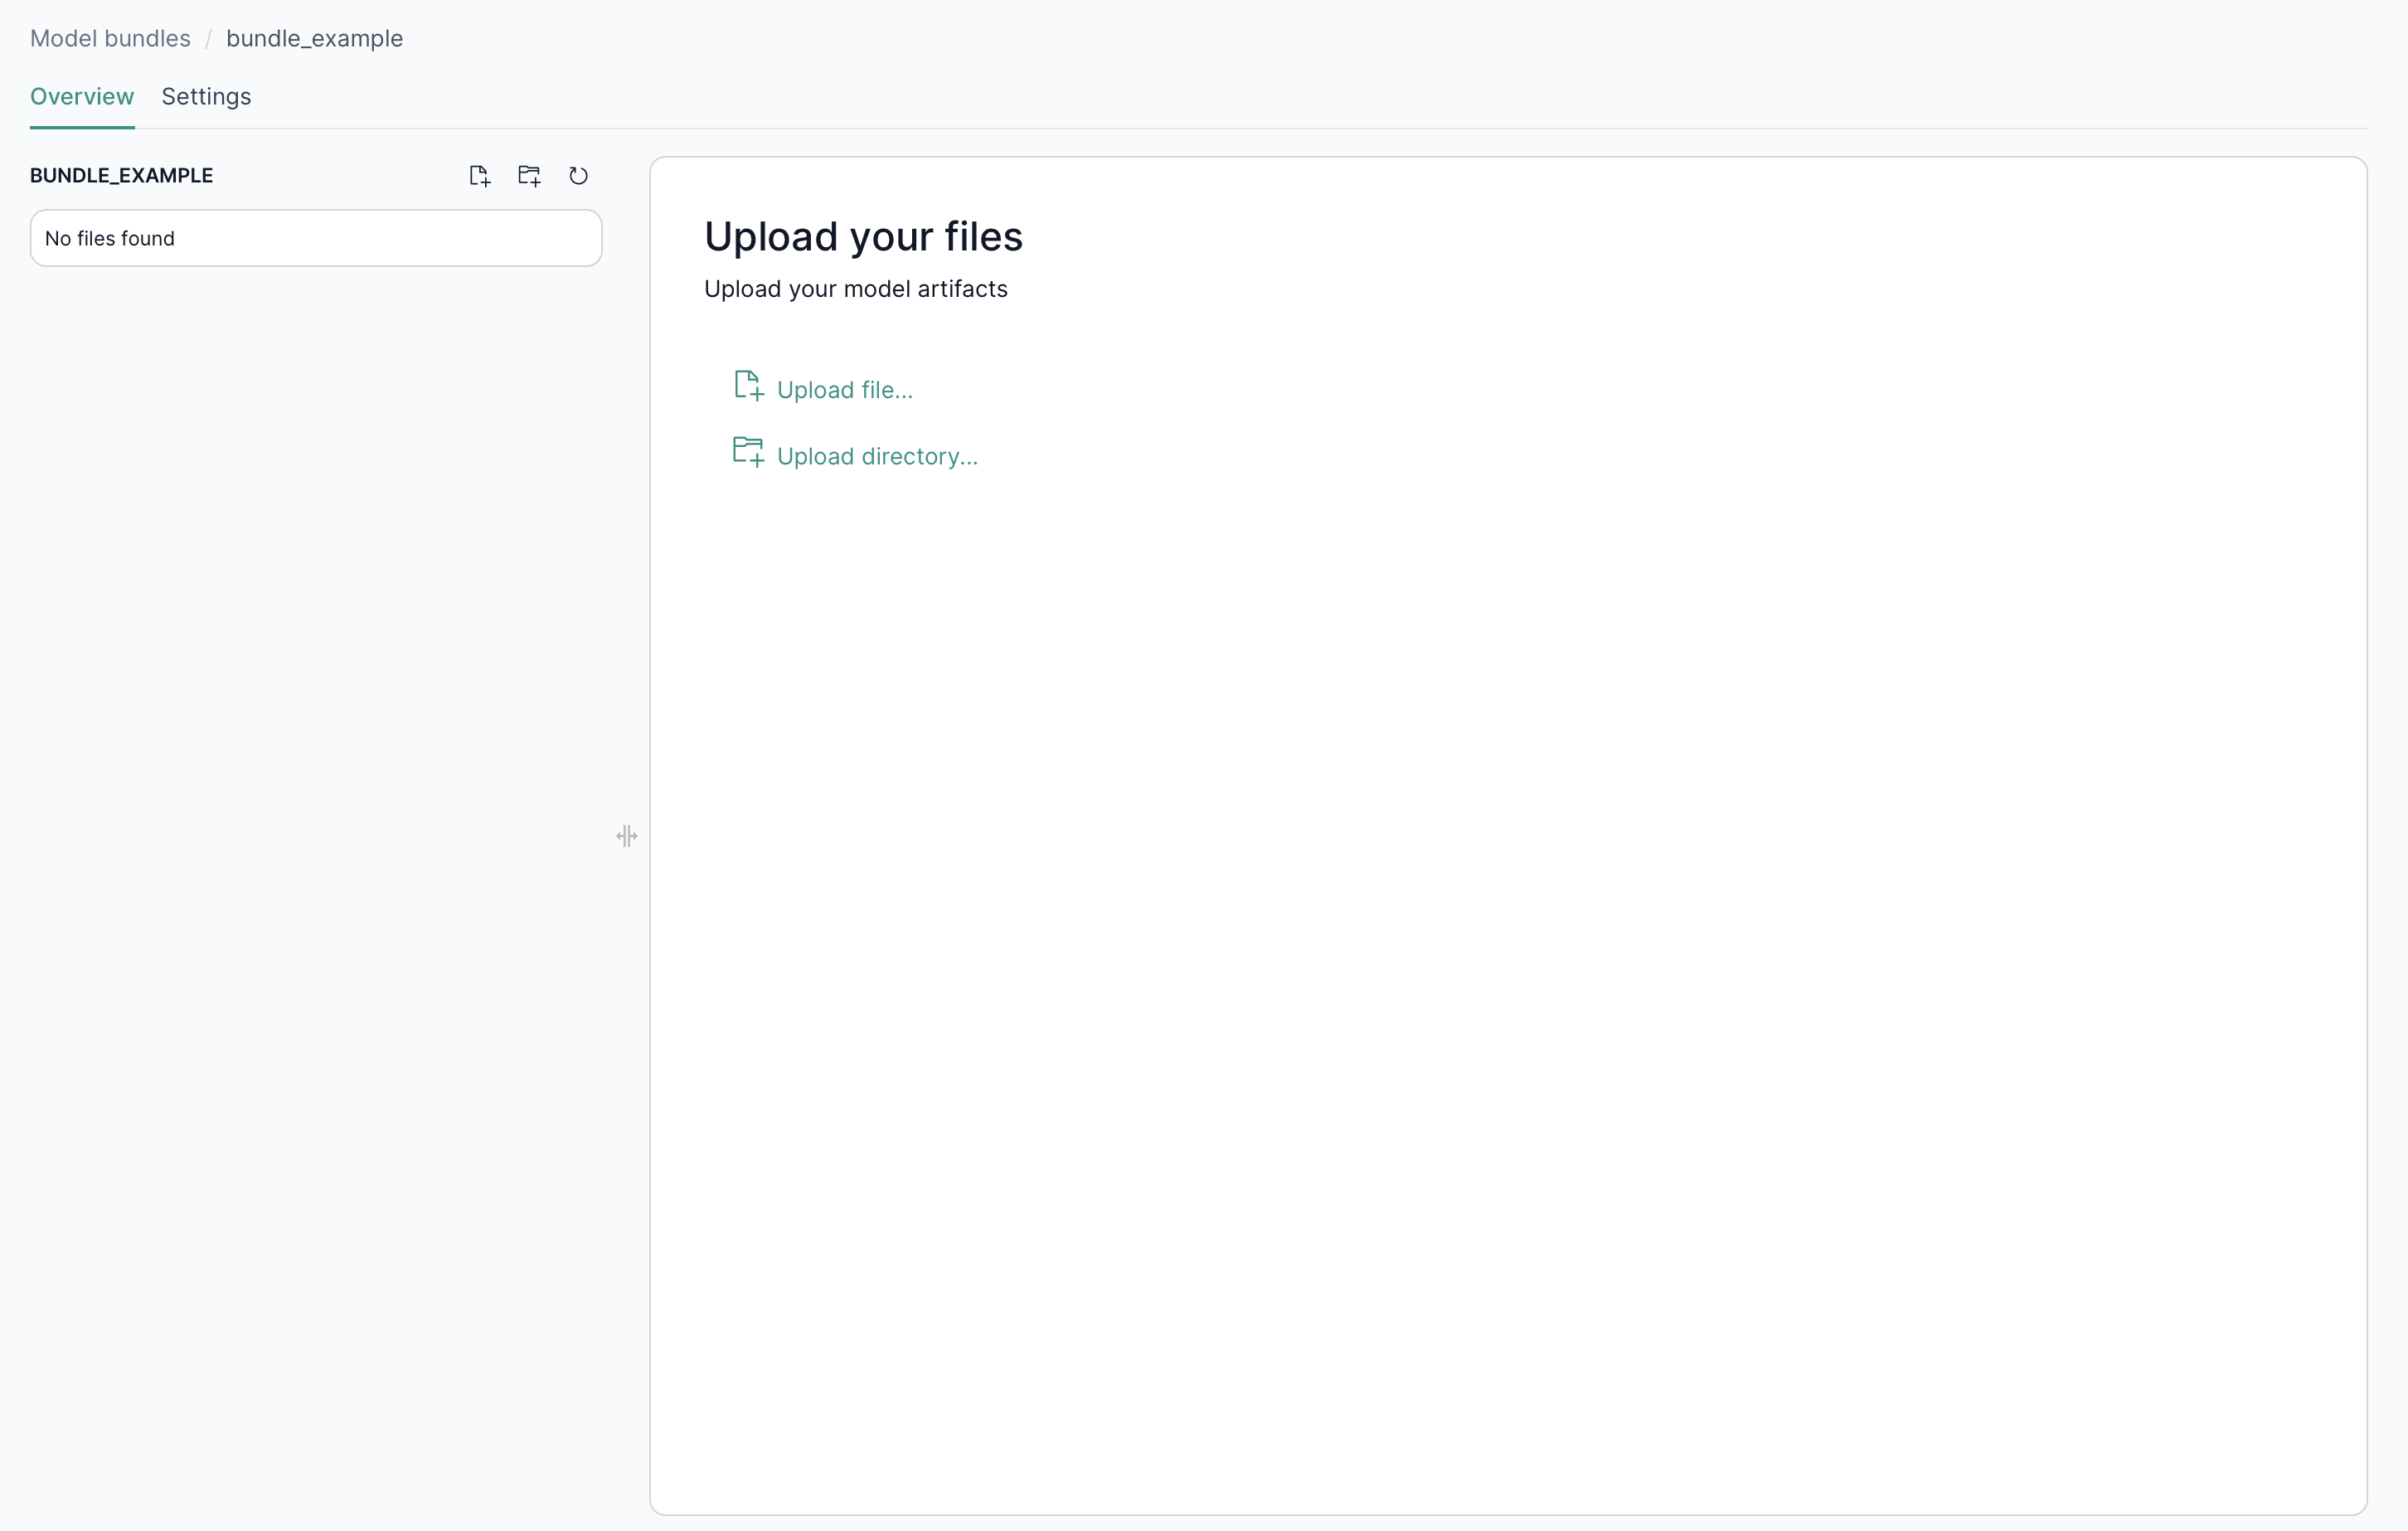
- View or modify existing files in the Model Bundle.
- Upload inference code or artifacts (pickle files, Python scripts,
requirements.txt) into the Model Bundle.
By default, a model bundle contains 4 starter files which you can build upon.
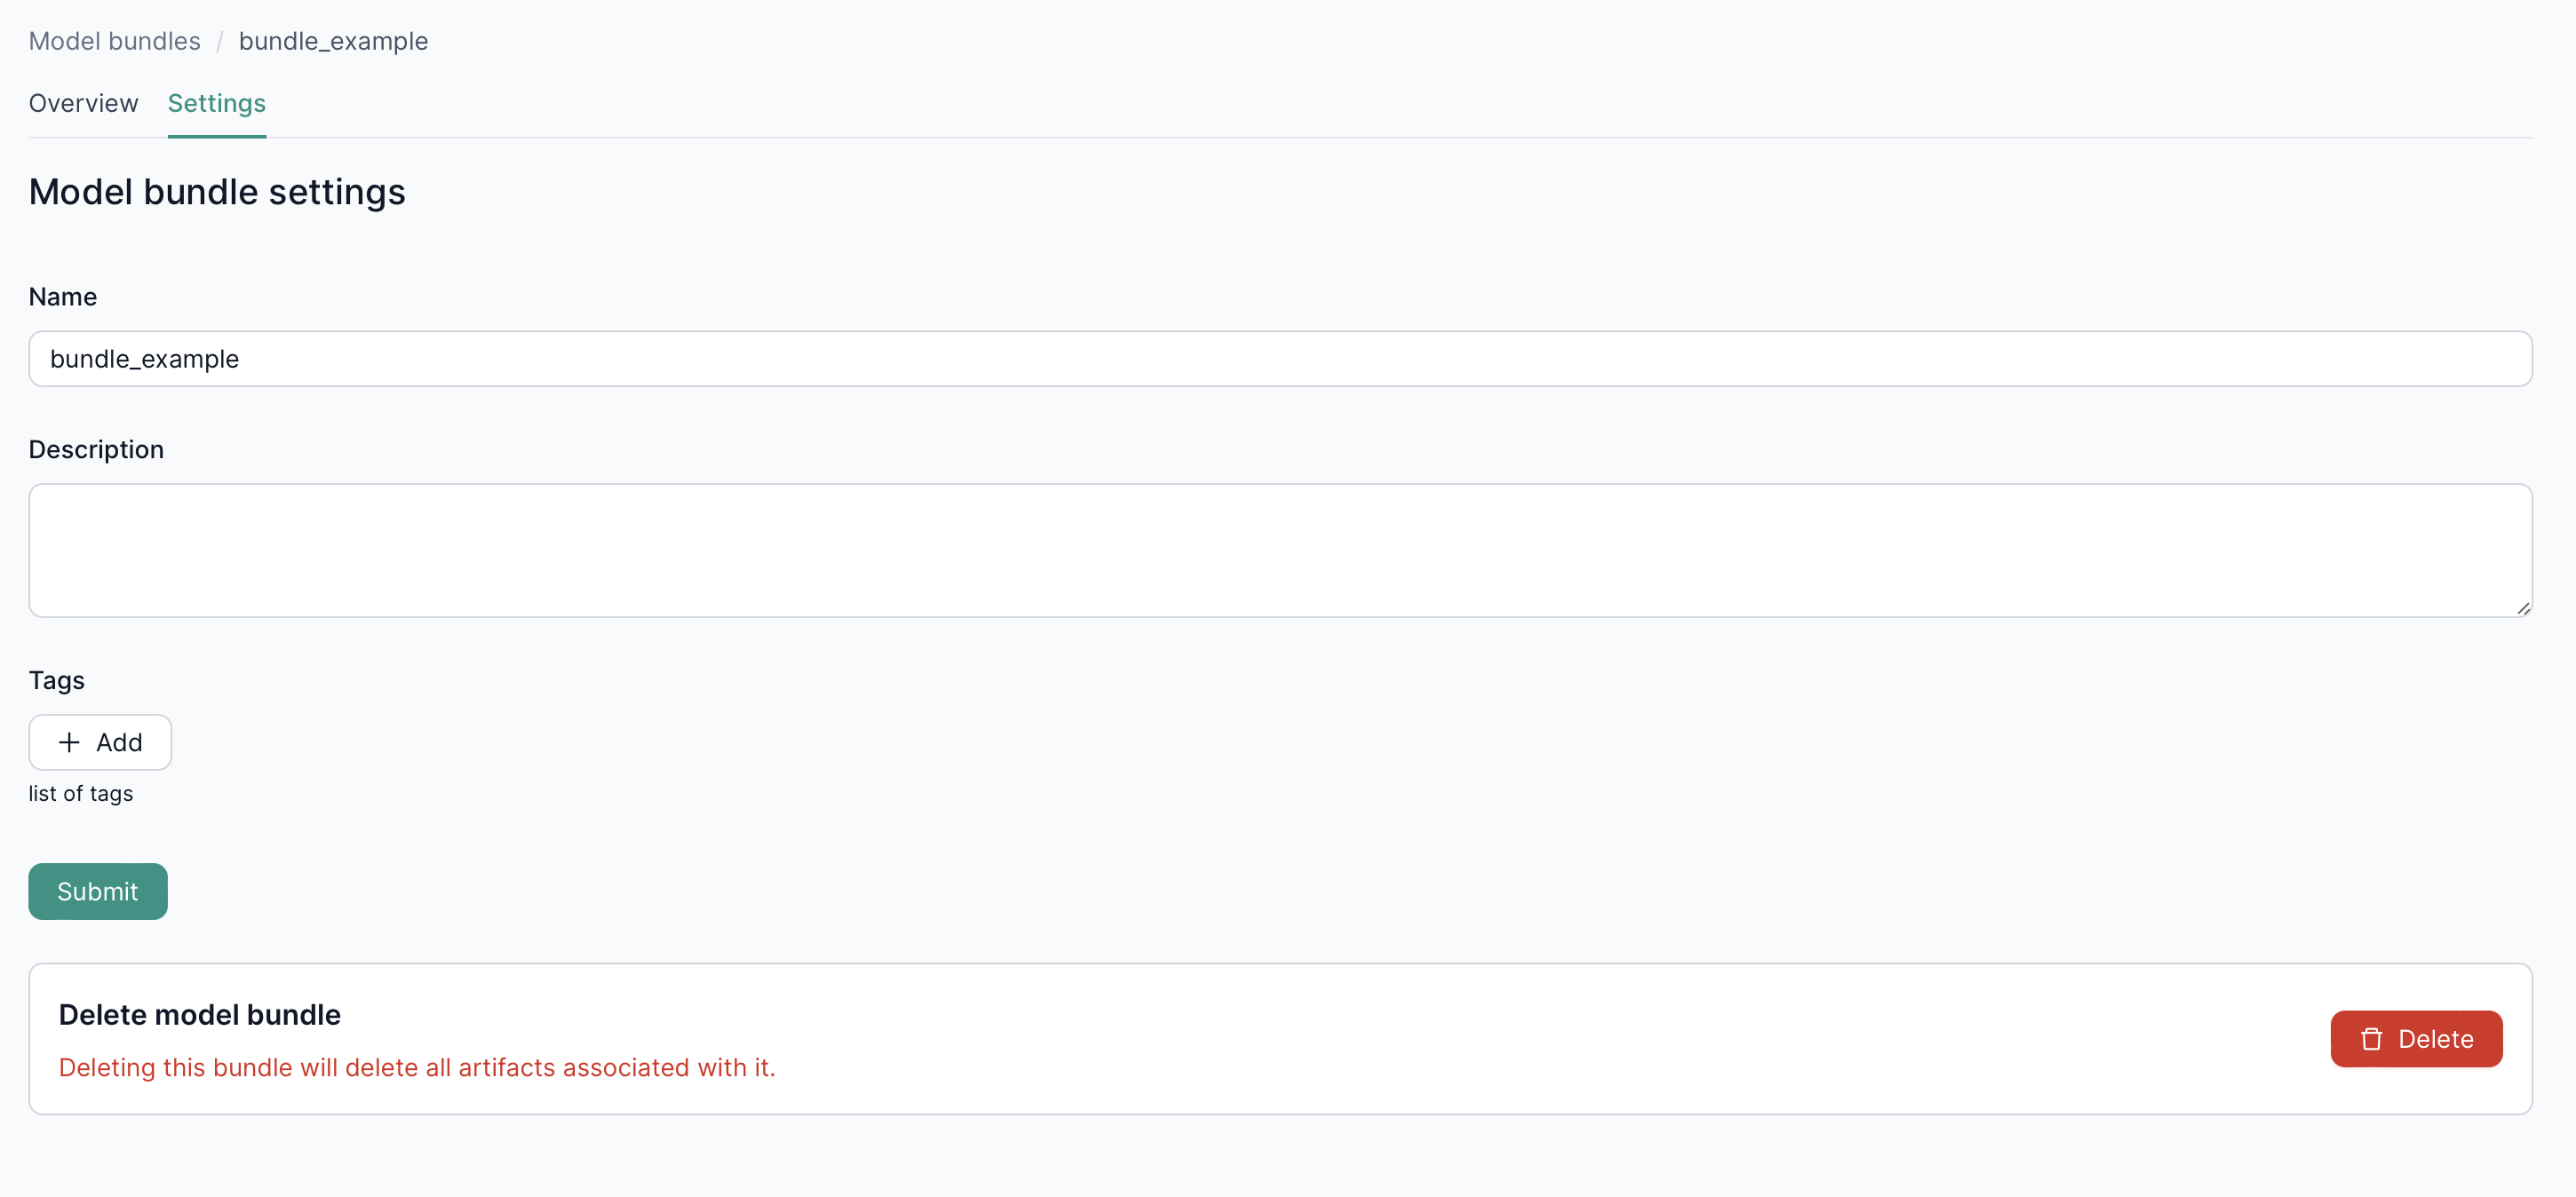
2.1. Settings
In the Settings tab, you can update or delete your model bundle as needed.
2.2. Viewing a file
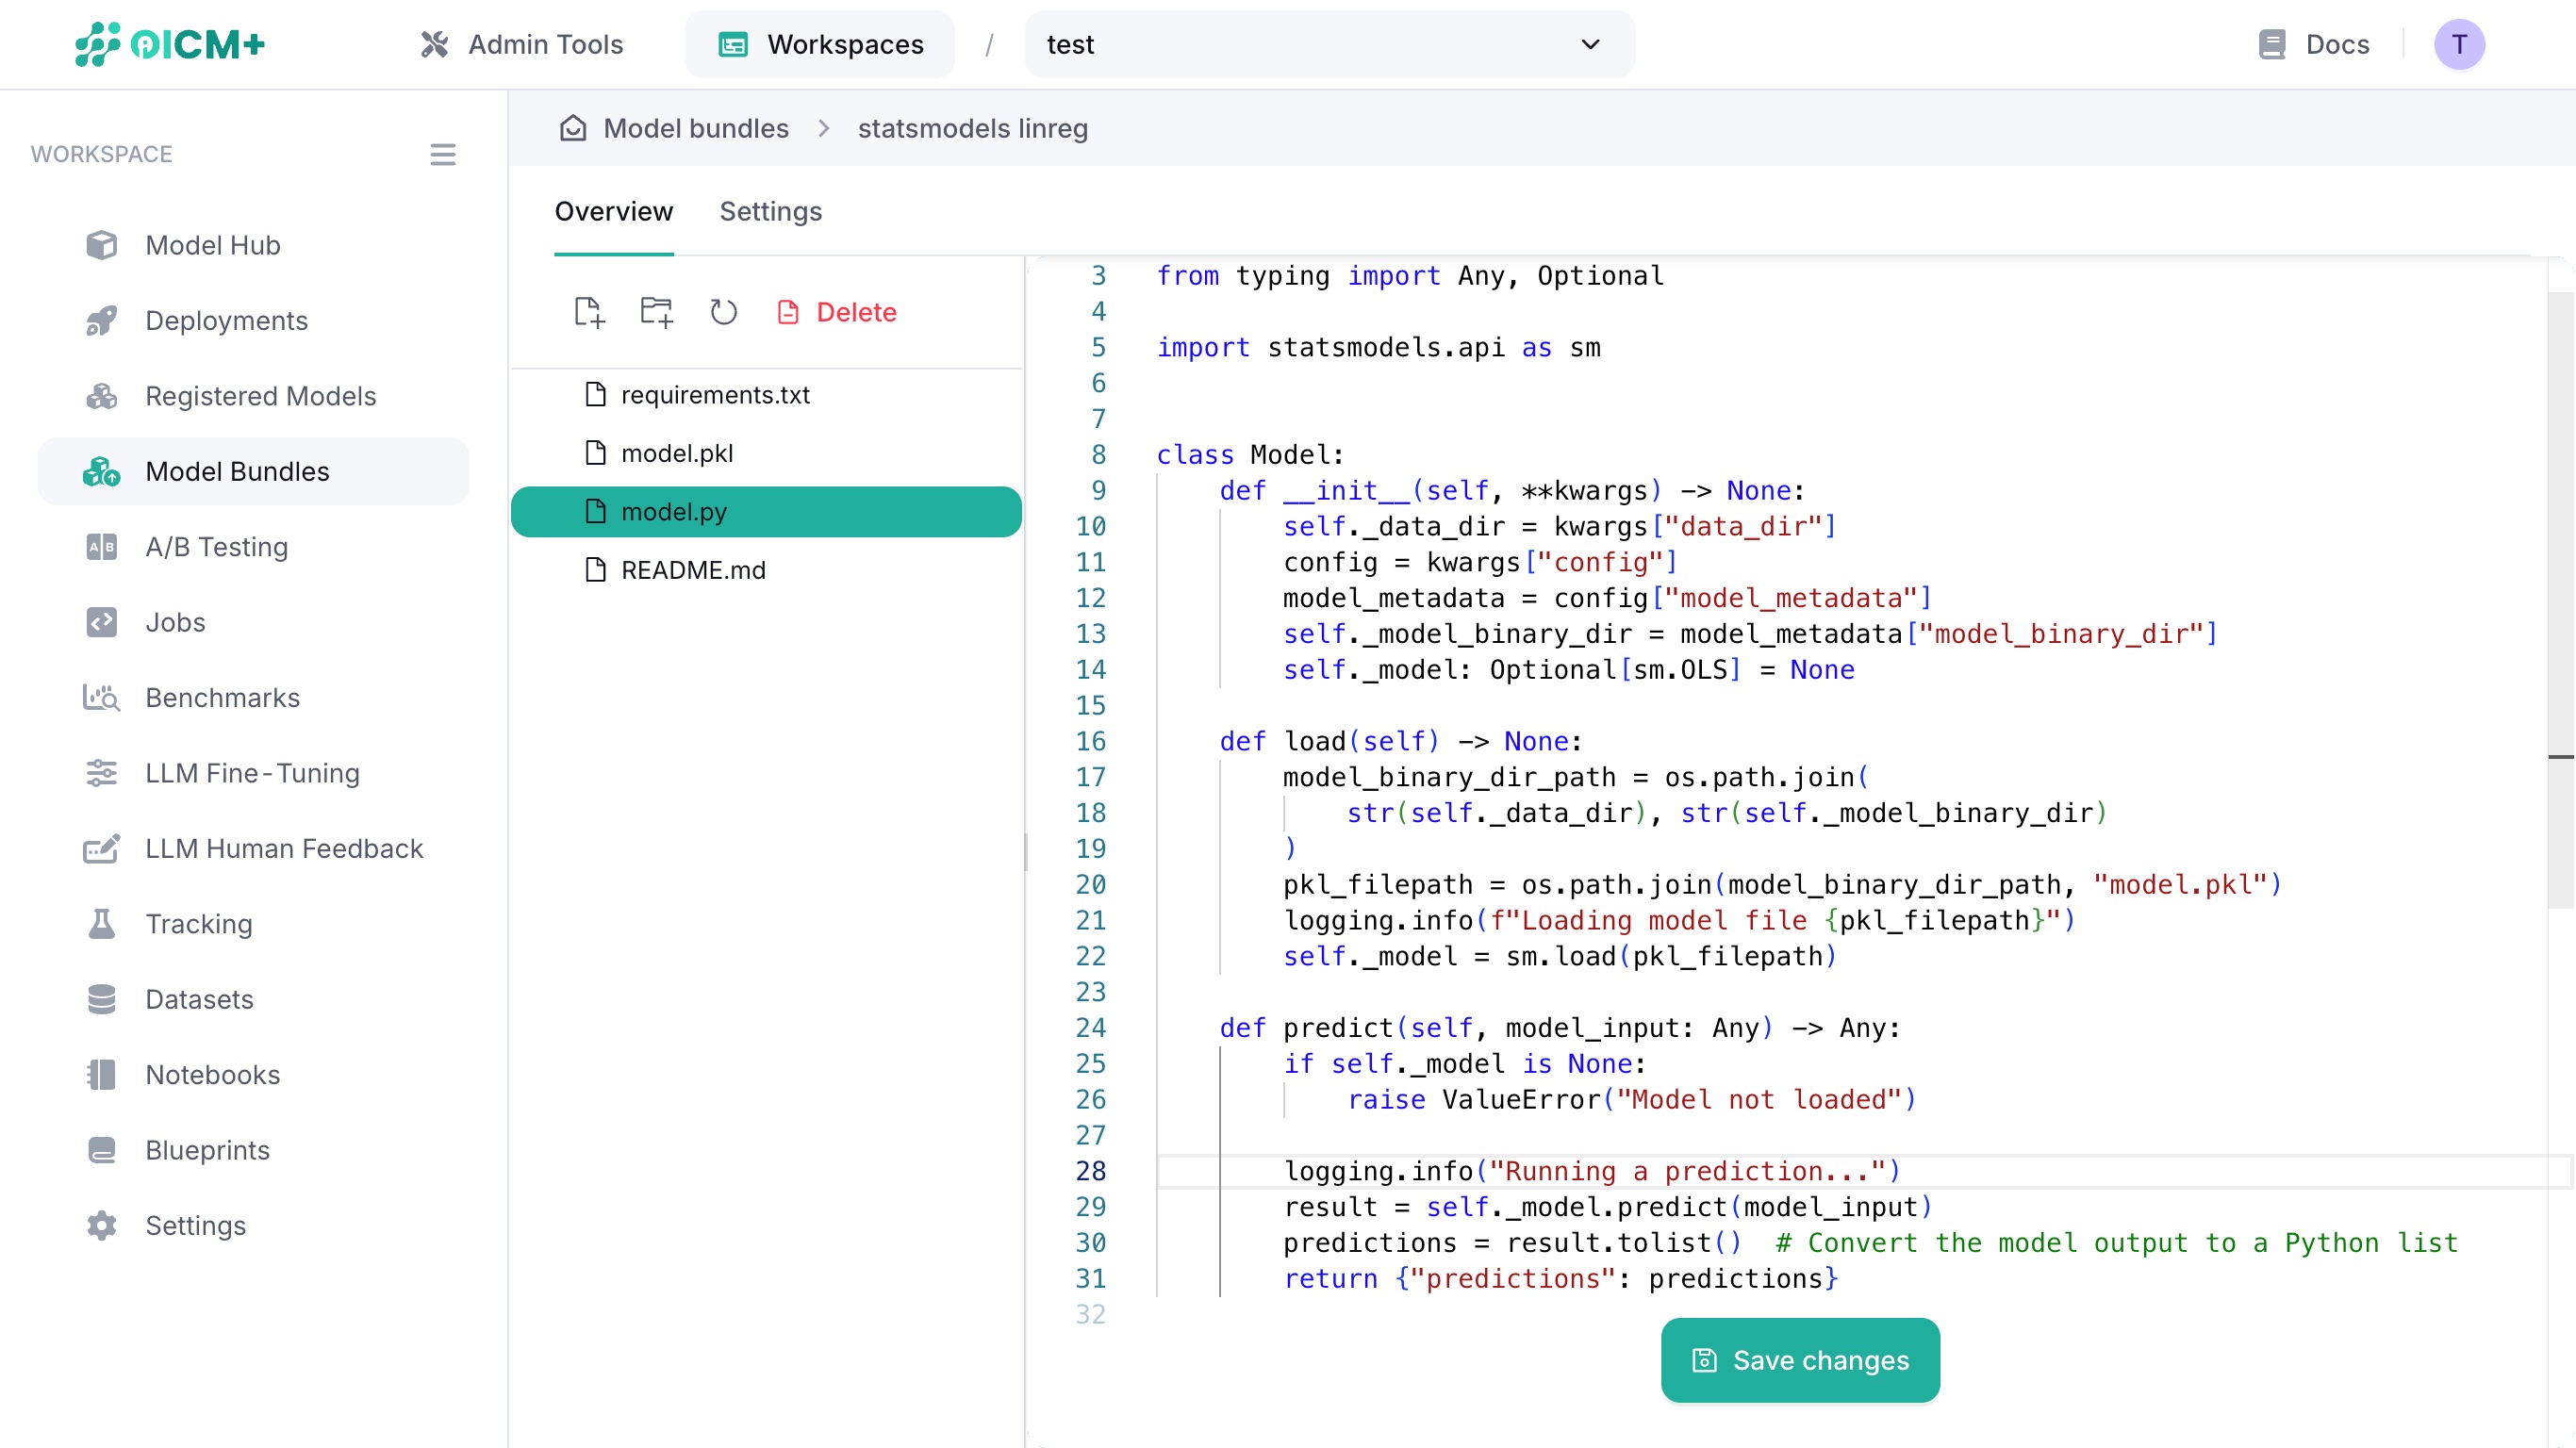
Click on a file in the file tree to display its contents in the text editor window.
2.3. Editing a file
Edit your code on the fly by clicking into the text editor window and typing into it.
Save your file edits by clicking on the Save changes button at the bottom of the main window. This button only appears when changes are detected.
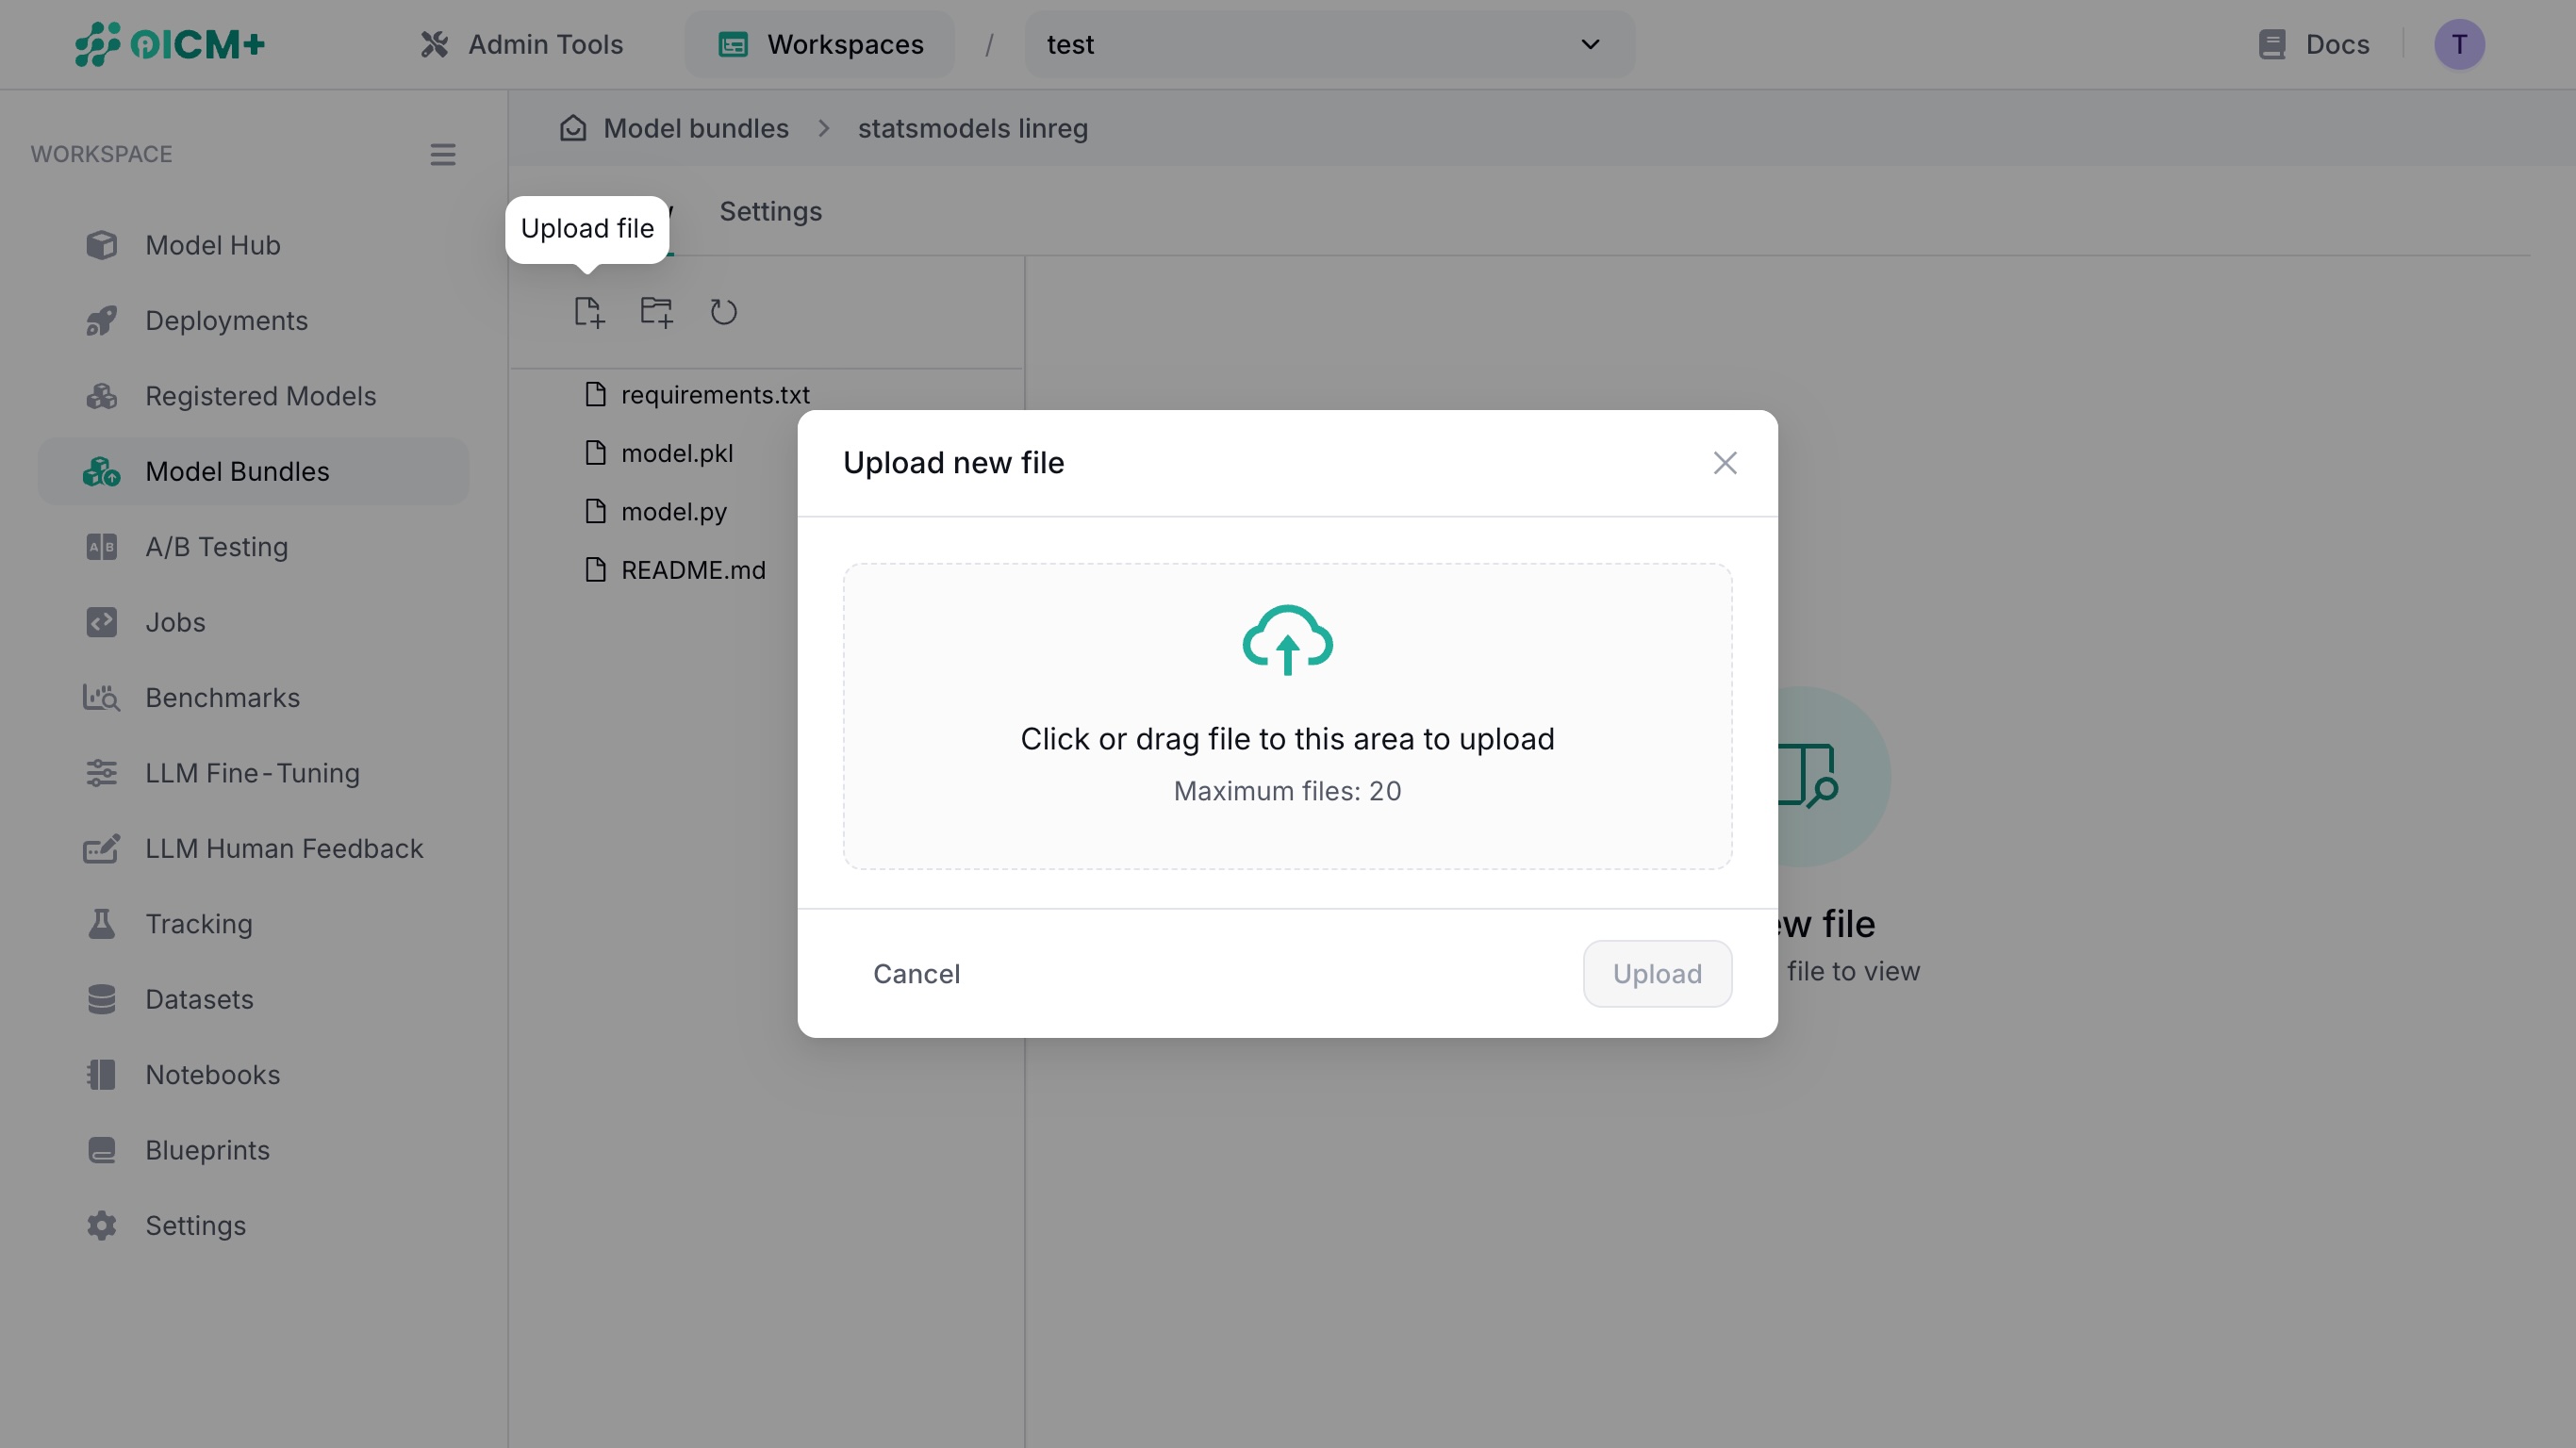
2.3. Uploading a file
In the overview, click on the upload file (leftmost) icon above the file tree to display the file upload modal window.
There are two ways to upload a file:
- Click on the file upload area to open a file selector and select a file from your file explorer.
- Drag a file from your file explorer into the file upload area
Confirm your file in the card below, then determine its final path in the Model Bundle file tree via the File relative path field.
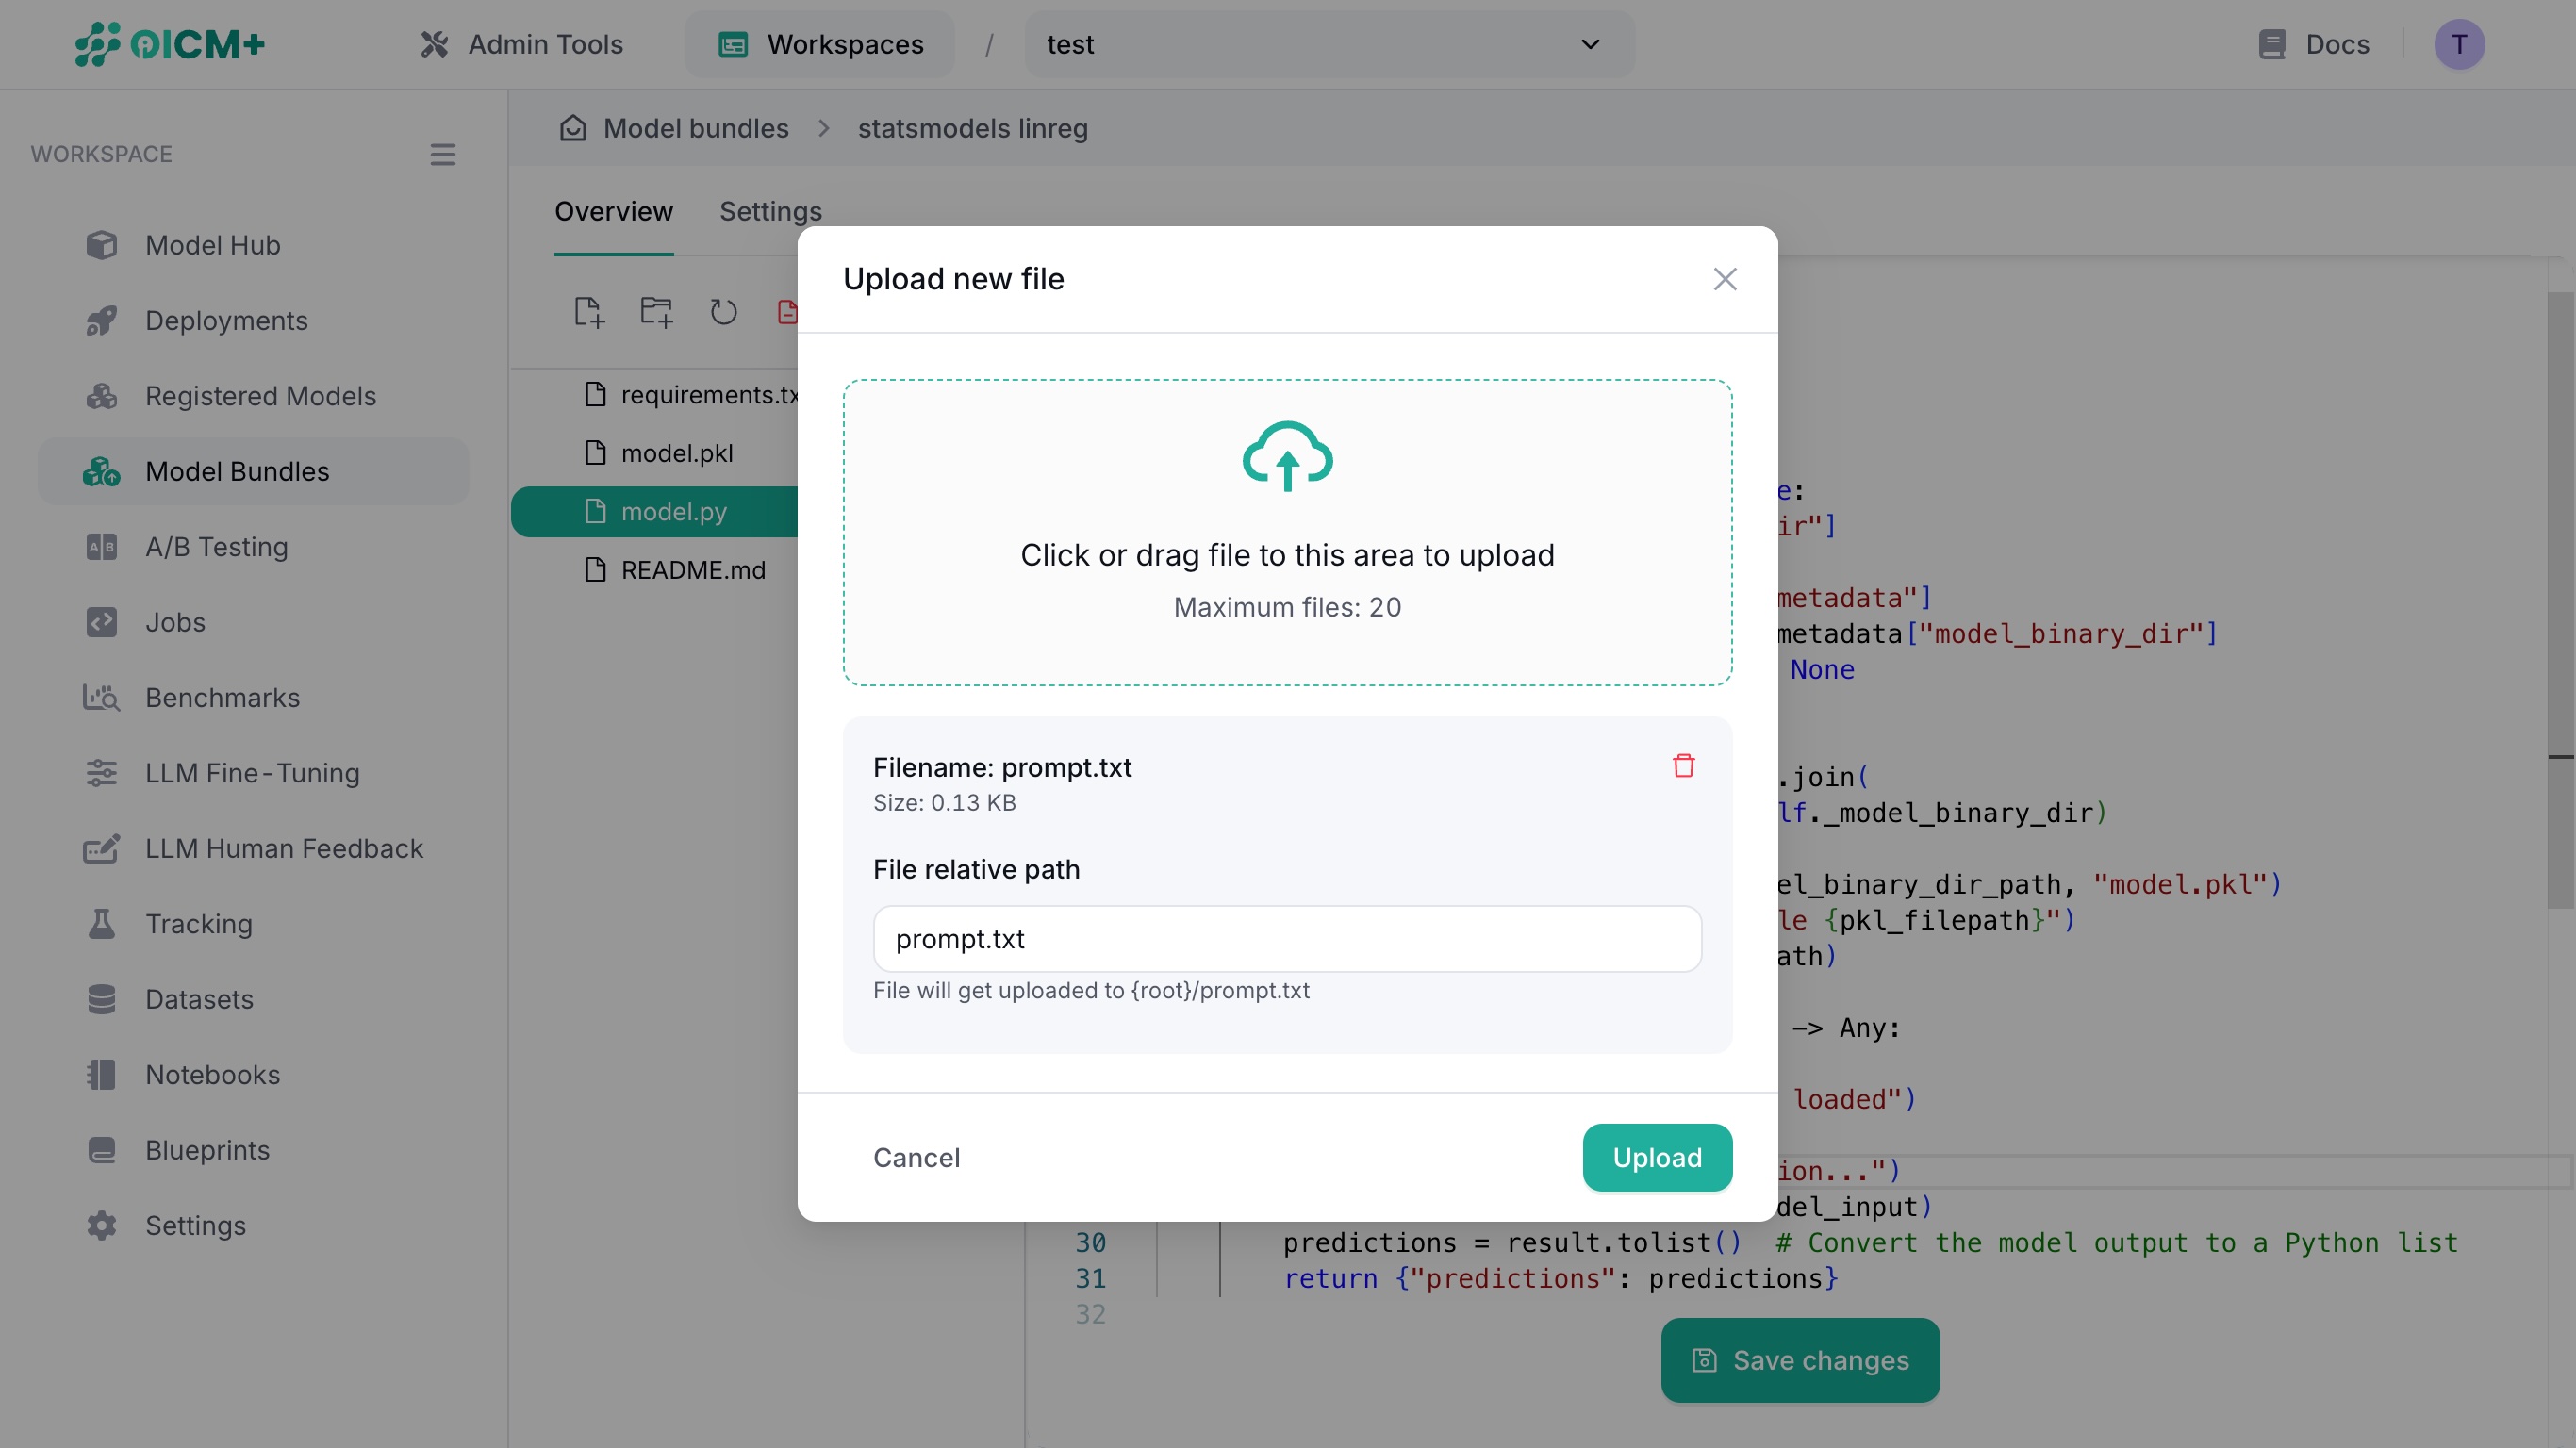
You can also upload a directory of files by clicking the upload directory (second from left) icon.
3. Model Bundle Files
A model bundle contains everything needed to:
- Configure the environment: via
requirements.txt. - Run the model: via
model.pyand a weights file (e.g..pkl,.json,.joblib, etc.).
For library-specific demos, check the GitHub model-bundle-examples repository.
OICM prefers model bundles to be organized in a flat directory structure. For example
3.1. Requirements
- Place a
requirements.txtfile in the root of the model bundle. - Include all library dependencies (e.g.,
numpy,scikit-learn) and its versions.
3.2. Model Code
Add your model application code in model.py. The file must contain a Model class with two methods: load (to load the model) and predict (to perform inference).
class Model:

    def __init__(self, **kwargs) -> None:
        ...

    def load(self) -> None:
        # Load the model
        ...

    def predict(self, model_input: Any) -> Any:
        # Apply inference logic
        ...
        return model_output
NOTE: We only currently support inference and loading via a single model.py file. If model.py loads adjacent modules or functions, it will not work.
3.2.1. Loading multiple models
While there is strictly one (1) load() function, you can load multiple models at startup.
You can assign multiple models into a variable in the load() function like so:
class Model:

    def __init__(self) -> None:
        self._image_classifier = None
        self._image_detector = None

    def load(self) -> None:
        self._image_classifier = YOLO("yolo26n-cls.pt")
        self._image_detector = YOLO("yolo26n.pt")
3.2.2. Accepting user inputs
The model only accepts user inputs via any POST routes. GET routes cannot accept any inputs.
User inputs must be formatted in one of the following ways:
- Quoted string, e.g.
"quoted string"-
"faccb3e1" -
JSON list of objects, e.g.
[1, 2, 3, 4]-
["I", "love", "tuna", 111, 222, {"key": "value"}] -
JSON object, e.g.
{"key": "value"}{"id": 123, "name": "Barry Allen", "speed": null, "isHuman": true}
Inputs must not be a raw string. Examples:
curl http://<inference_url>/predict \
  -H 'Content-type: application/json' \
  -d "abc"  # ❌ Raw string.

curl http://<inference_url>/predict \
  -H 'Content-type: application/json' \
  -d '"abc"'  # ✅ Quoted string.

curl http://<inference_url>/predict \
  -H 'Content-type: application/json' \
  -d '[1, 2, 3]'  # ✅ JSON list.

curl http://<inference_url>/predict \
  -H 'Content-type: application/json' \
  -d '{"weight": null}'  # ✅ JSON object.
3.2.3. Processing user inputs
User inputs are deserialized into Python objects in defined methods. Method outputs must be JSON serializable
Strings
The following snippet is a method that repeats an input string 3 times and returns a JSON object.
class Model:
    ...

    def process_string(self, model_input: Any) -> dict:
        """Repeat a string 3 times."""

        output = ",".join([model_input] * 3)

        return {"output": output}
The expected output when this method is called via the /repeat endpoint is as follows:
$ curl http://<inference_url>/repeat -H 'Content-type: application/json' -d '"abc"'

{"output": "abc, abc, abc"}
Lists
The following snippet is a method that receives a nested list (batch) of floats and returns prediction values as a list of floats rounded to 2 decimal places.
class Model:
    ...

    def load(self) -> None:
        self.model = RandomForestRegressor()
        # Load the weights here.

    def process_string(self, model_input: Any) -> dict:
        """Predict the price of a house."""
        input_arr = np.array(model_input)  # e.g. 100 x 7 matrix.

        predictions = self.model(input_arr)

        return [round(pred, 2) for pred in predictions]
The expected output when this method is called via the /v1/price endpoint is as follows:
$ curl http://<inference_url>/v1/price \
  -H 'Content-type: application/json' \
  -d '[
        [0.53, 19.23, 1.4442, 3.91],
        [0.12, 8.233, 4.5, 2.53],
        [0.711, 12.1, 3.33, 0.61]
      ]'

[1013694.25, 928142.17, 125868.87]
JSON objects
The following snippet is a method that receives a JSON object containing a base64-encoded image keyed by image and returns a JSON object of bounding boxes and its image render.
class Model:
    ...

    def load(self) -> None:
        self.model = YOLO("yolo26n-seg.pt")

    def detect(self, model_input: Any) -> dict:
        """Detect bounding boxes and render."""

        image_b64 = model_input.get("image", "")
        image = Image.open(BytesIO(base64.b64decode(image_b64)))
        output = self.model(image)[0]

        # Get bounding boxes.
        boxes = []
        for box in output.boxes:
            results.append(
                {
                    "bbox": box.xyxy.tolist(),
                    "confidence": box.conf.tolist(),
                    "label": result.names[int(box.cls.item())],
                }
            )

        # Convert the segmentation plot (tensor) to a WEBP image.
        boxes_image = Image.fromarray(output.plot())
        unique_name = f"/tmp/seg_image_{uuid.uuid4().hex}.webp"
        seg_image.save(unique_name)
        with open(unique_name, "rb") as image_file:
            return_image = base64.b64encode(image_file.read()).decode("utf-8")

        return {
            "boxes": boxes,
            "image": return_image
        }
The expected output when this method is called via the /v1/detect endpoint is as follows (truncated):
$ curl http://<inference_url>/v1/detect \
  -H 'Content-type: application/json' \
  -d '{"image": "<base64-encoded-image>"}'

{
  "boxes": [
    {
      "bbox": [[34.12, 58.91, 198.44, 310.22]],
      "confidence": [0.97],
      "label": "person"
    },
    {
      "bbox": [[220.55, 75.33, 410.88, 290.14]],
      "confidence": [0.89],
      "label": "car"
    }
  ],
  "image": "UklGRlIAAABXRUJQVlA4WAoAAAAQAAA..."
}
3.3. Model Weights
Store model weights (e.g., .pkl, .h5, .pt, etc.) in the root of the file tree. This includes different model weight files.
3.4. Custom endpoints
You can define custom endpoints by uploading an endpoints.yaml file. The following example shows how to expose the Model.predict_stream() method to the /custom-predict endpoint via the POST verb.
This assumes that you have defined a method named predict_stream() in your model.py.
If endpoints.yaml is absent or empty, it is ignored during runtime.
3.4.1. Nested endpoint paths
Nested endpoint paths are allowed. You may also define nested endpoint paths with the same prefixes:
endpoints:
  - endpoint: /models # Shallow unique endpoint.
    http_method: GET
    function_name: get_models
  - endpoint: /v1/custom/endpoint-name # Three levels deep, /v1 prefix.
    http_method: POST
    function_name: predict_stream
    stream: true
  - endpoint: /v1/classify # Two levels deep, /v1 prefix.
    http_method: POST
    function_name: classify_image
3.4.2. Restrictions
endpoint:- You must use alphanumeric characters,
-, and_only. - You cannot define two different function names for the same endpoint.
- You cannot override the following endpoints:
/health-check/predict
http_method:- You can only define a
GETorPOSTHTTP method. function_name:- You cannot expose dunder methods.
- You cannot expose private methods (i.e. methods that begin with
_). - You cannot expose the
loadmethod, this is restricted for internal use. - A
GETendpoint must be a method that have no arguments. - A
POSTendpoints must be a method that have a single argument. stream:trueorfalse.falseby default.
4. Example: Scikit-learn Bundle
Below is a minimal layout for deploying a scikit-learn model as a model bundle:
4.1. requirements.txt
Lists required libraries:
4.2. model.py
Loads model.pkl and performs inference:
import logging
import os
from typing import Any, Optional

import joblib
import numpy as np
from sklearn.ensemble import RandomForestRegressor


class Model:
    def __init__(self, **kwargs) -> None:
        self._data_dir = kwargs["data_dir"]
        config = kwargs["config"]
        model_metadata = config["model_metadata"]
        self._model_binary_dir = model_metadata["model_binary_dir"]
        self._model: Optional[RandomForestRegressor] = None

    def load(self) -> None:
        model_binary_dir_path = os.path.join(
            str(self._data_dir), str(self._model_binary_dir)
        )
        joblib_filepath = os.path.join(model_binary_dir_path, "model.joblib")
        self._model = joblib.load(joblib_filepath)

    def predict(self, model_input: Any) -> Any:
        x = np.asarray(model_input)  # Convert to NumPy array
        result = self._model.predict(x)
        predictions = result.tolist()  # Convert to Python list
        return {"predictions": predictions}
4.3. model.joblib
A binary file containing the parameters of a trained RandomForestRegressor.
Next Steps
- Registered Models & Versions – Learn how to register and version your models.
- Model Version Configuration – Customize resources and environment settings for your bundles.
- Deployment Process – Explore how to deploy and monitor your bundles on the OICM platform.