Cluster Management
Overview
Cluster Management enables platform administrators to import, configure, and manage Kubernetes (K8s) clusters within the platform allowing tenants to operate on either Shared Clusters or Dedicated Clusters. Platform admins can see to which tenant a cluster or nodes are allocated to, monitor resource availability, and oversee all the cluster's health. To check how to assign clusters or nodes to tenants please check Tenant Management.
How does Cluster Management work?
With the Cluster Management feature, you can:
- Import a new Kubernetes cluster into OICM using a Kubeconfig file.
- Define the cluster as either a Shared Cluster (allocatable to multiple tenants) or a Dedicated Cluster (assigned to a single tenant only).
- Monitor the cluster health, resources, and tenant assignments in real time.
- View detailed cluster information, including node count, GPU types, and resource utilization.
Terminology
- Shared Cluster: A Kubernetes cluster where nodes can be allocated to different tenants, maintaining a moderate degree of isolation while allowing tenants to share the same cluster. Note, nodes are not shared between tenants.
- Dedicated Cluster: A Kubernetes cluster assigned entirely to a single tenant, providing maximum performance and isolation.
- Platform Admin: A user with administrative privileges to manage clusters, tenant and cluster assignments in the Platform Admin Tools section.
Getting Started with Cluster Management
Below is the step-by-step process to import, configure, and manage a Kubernetes cluster in OICM.
Step 1: Navigate to the Cluster Management Section
- Log in to OICM and navigate to the Platform Admin Tools in the sidebar.
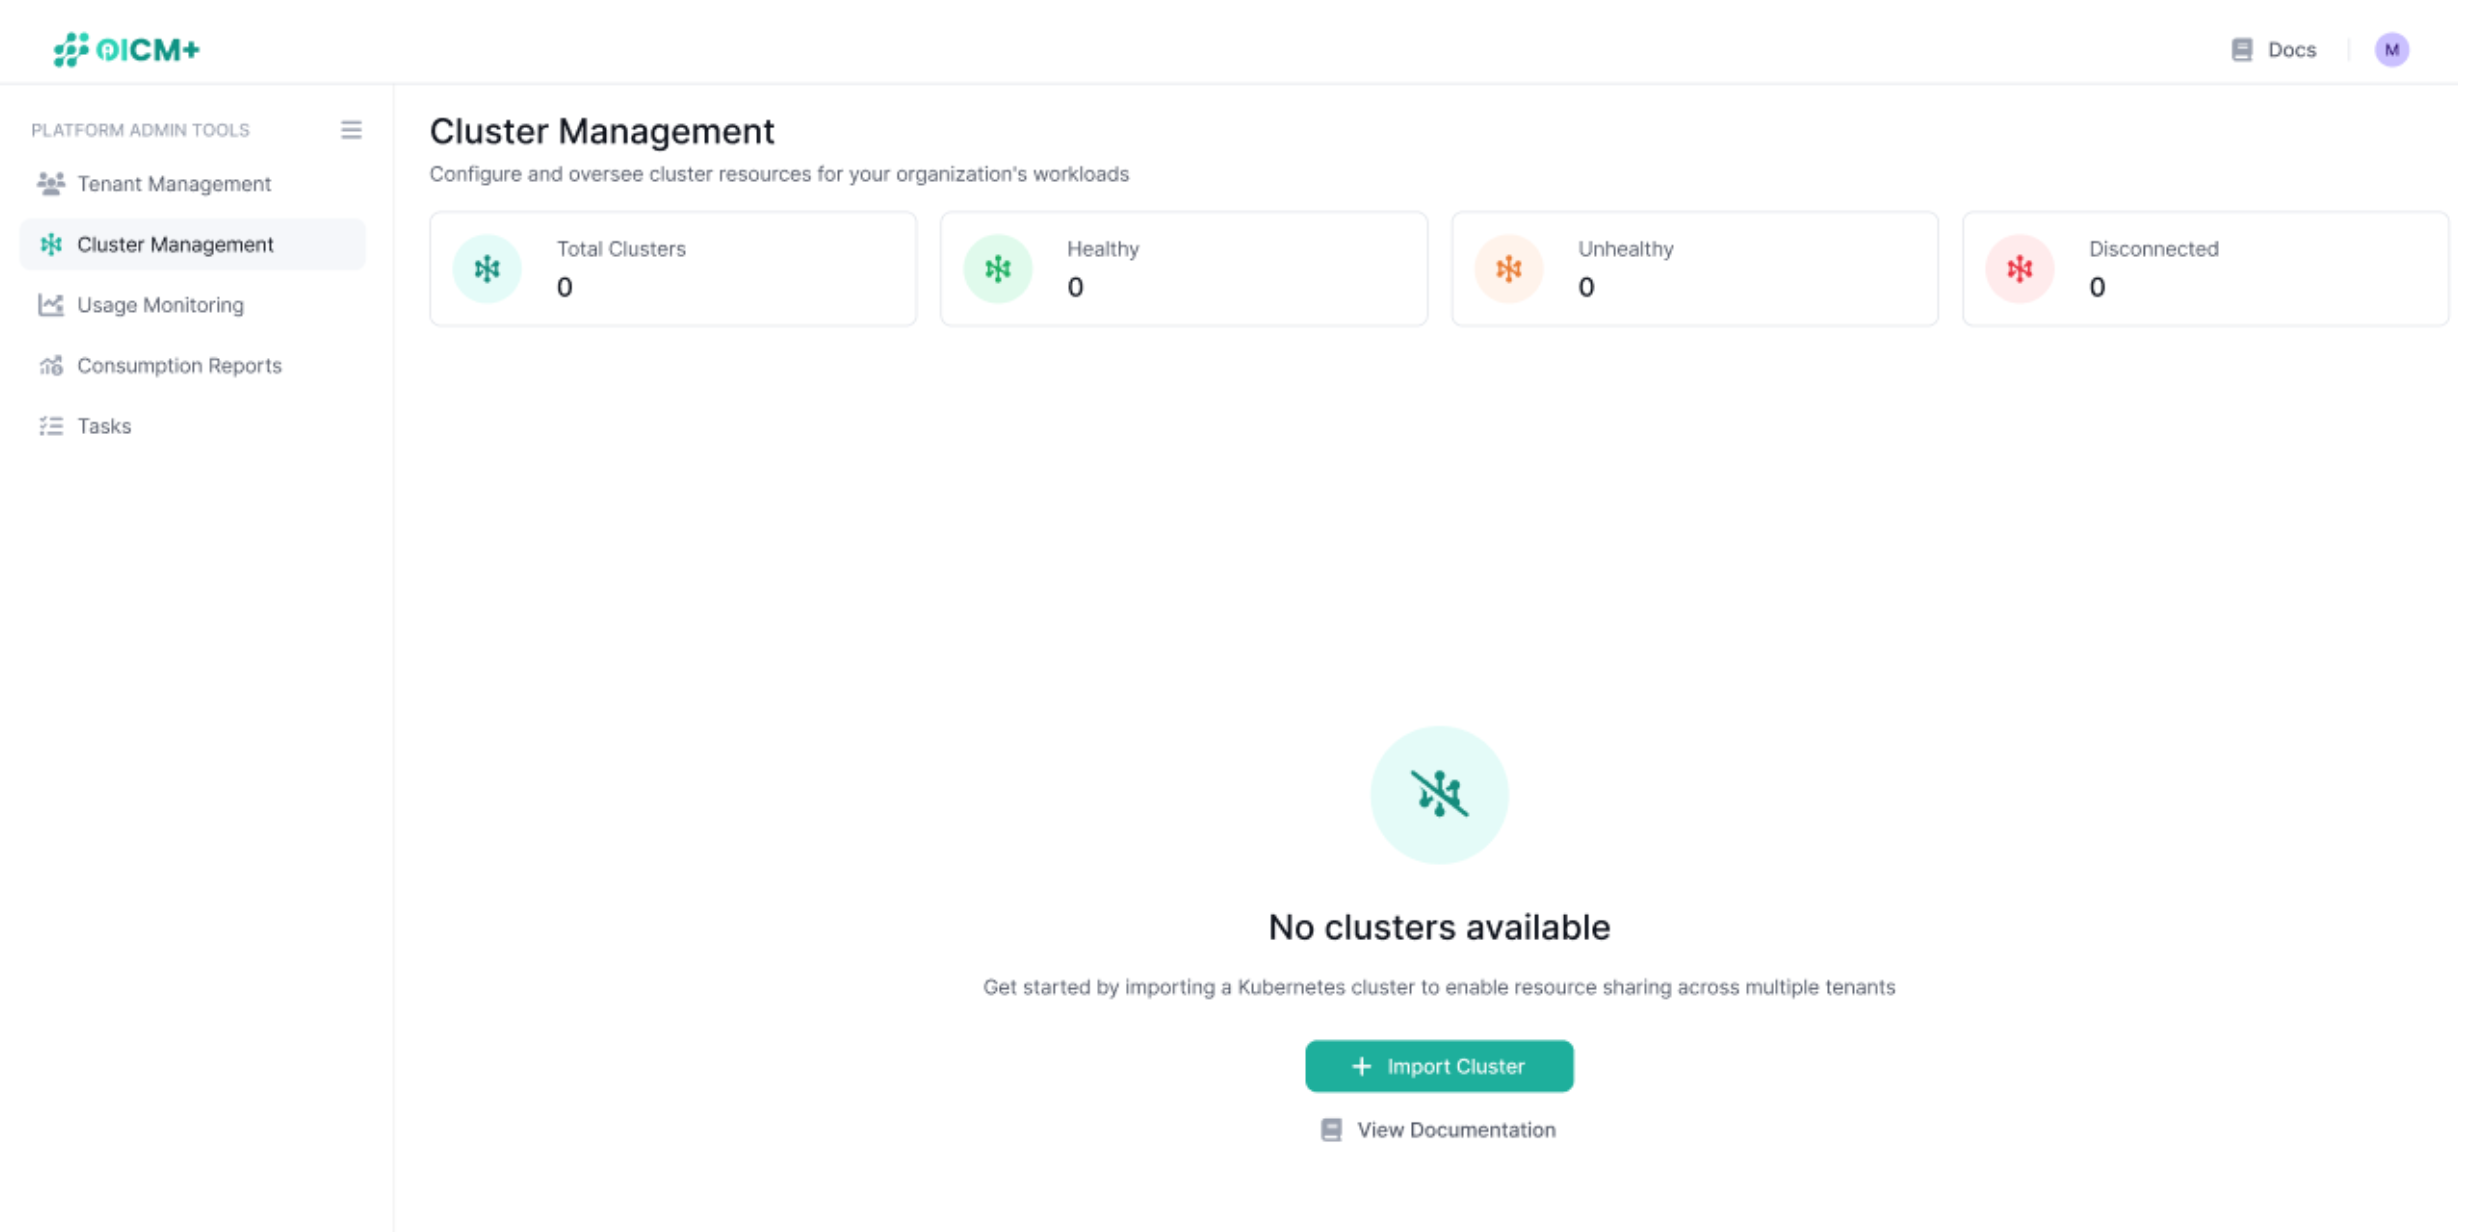
- Select Cluster Management from the menu to access the Cluster Management dashboard.
- View a summary of existing clusters, including:
- Total Clusters
- Healthy Clusters
- Unhealthy Clusters
- Disconnected Clusters
- If no clusters are available, you’ll see a prompt to import a new cluster.
Step 2: Import a New Cluster
- From the Cluster Management dashboard, click the Import Cluster button to start the process.
- You’ll be directed to the Import New Cluster page, which guides you through the import process.
- Provision a Cluster: Provision a Kubernetes cluster and/or generate an admin Kubeconfig file with the necessary permissions for OICM to orchestrate workloads. Please refer to the following workload cluster provisioning docs.
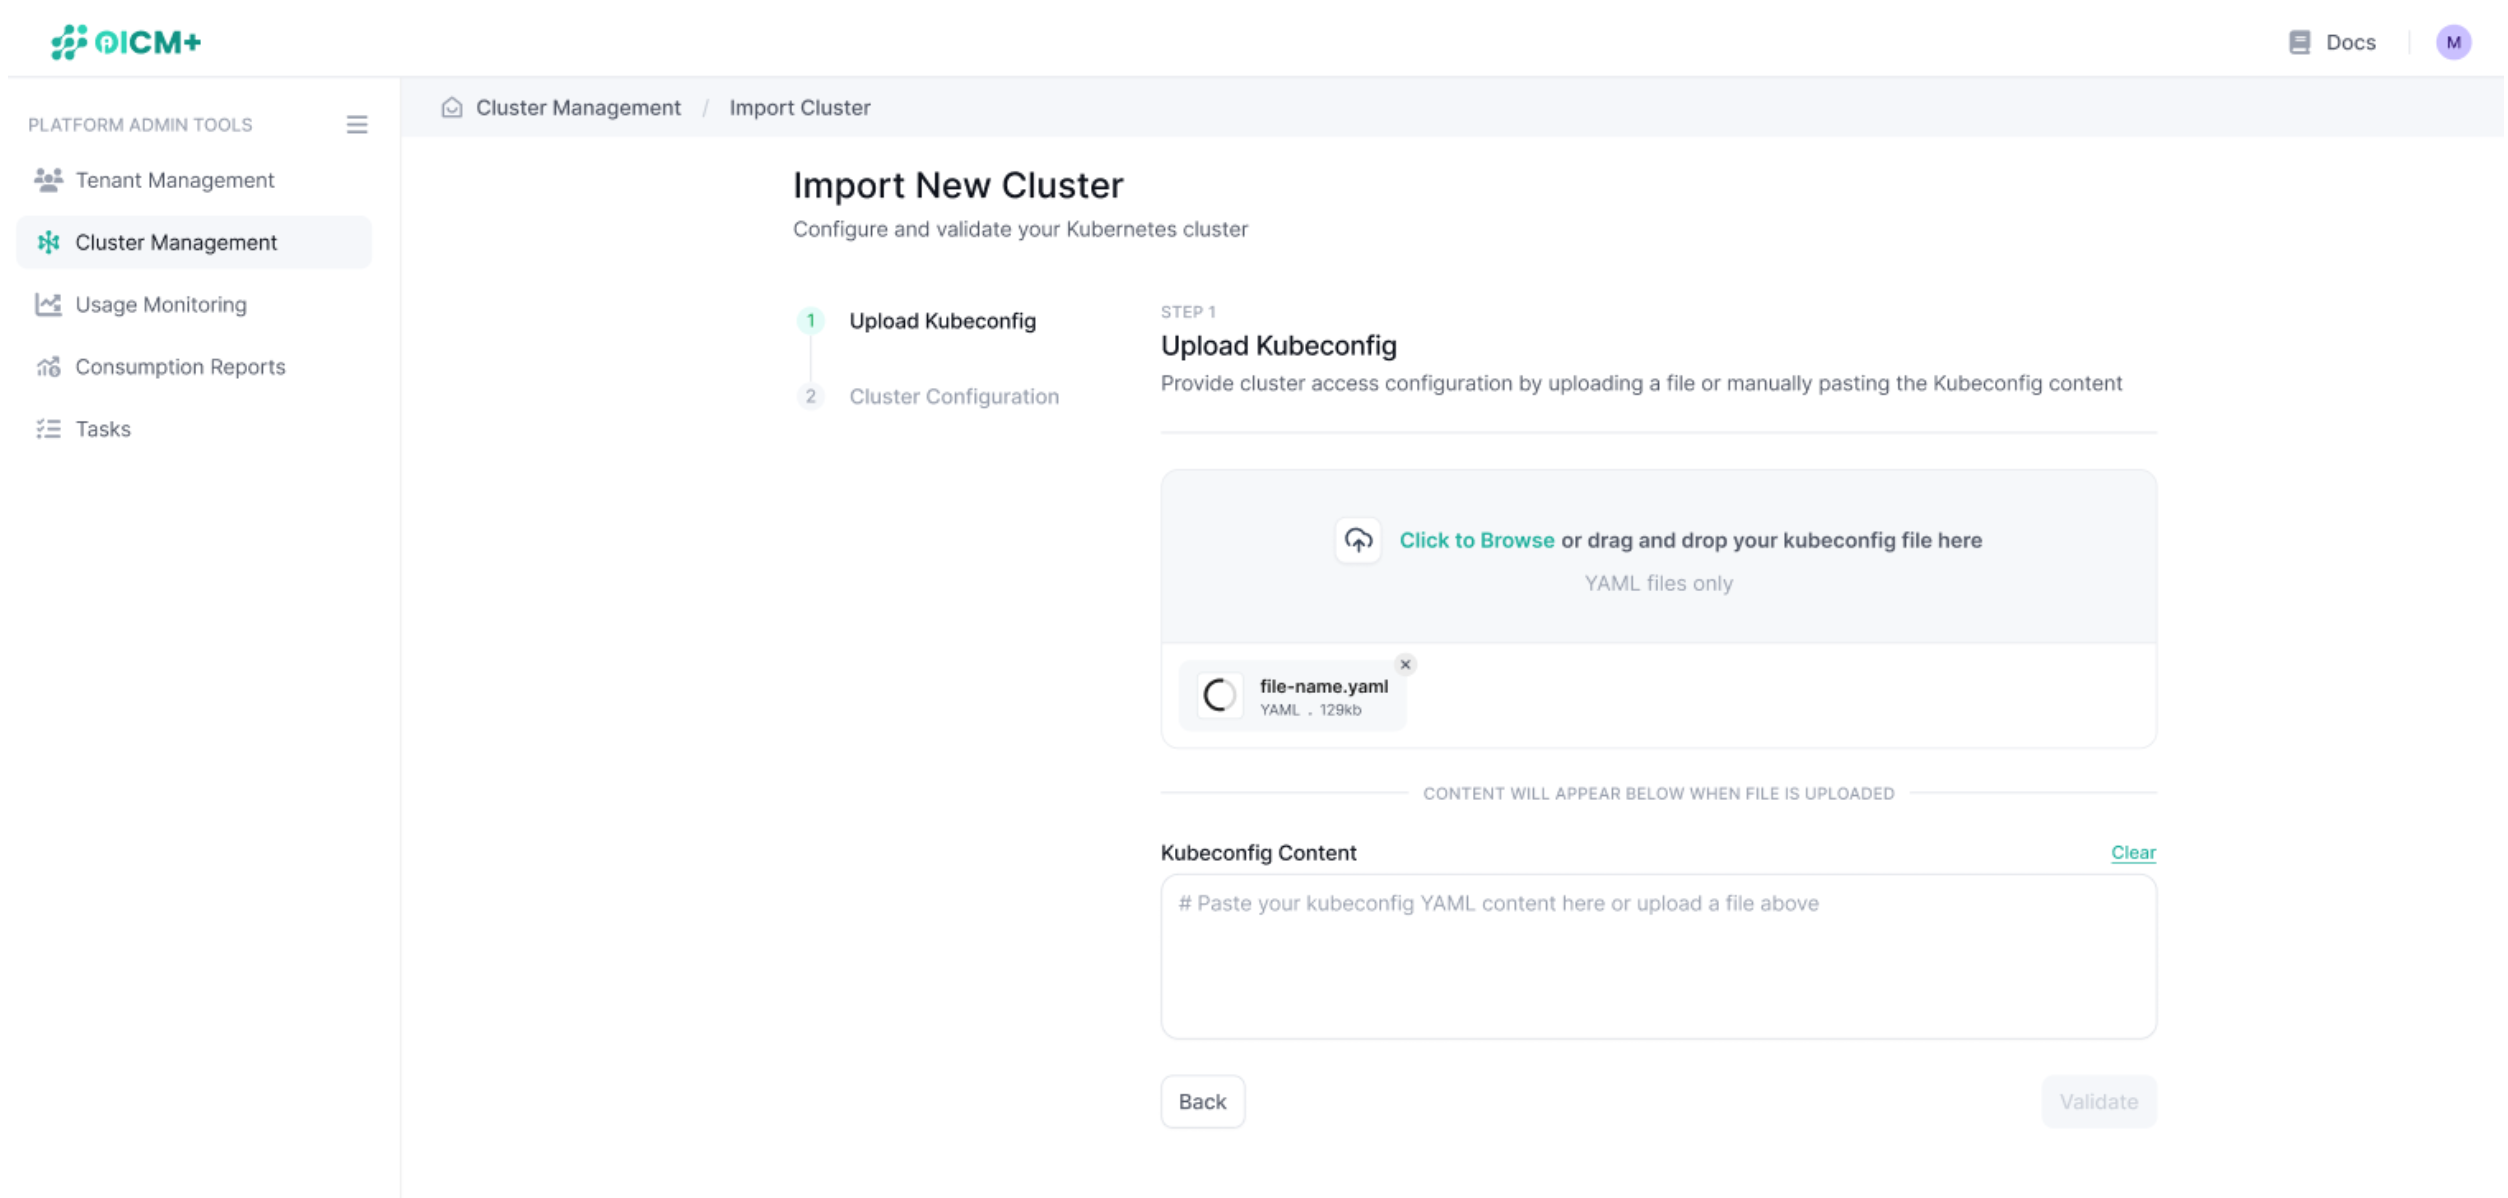
- Upload the Kubeconfig:
- Click the Browse button to upload the Kubeconfig file (YAML files only), or drag and drop the file into the designated area.
- Alternatively, paste the Kubeconfig YAML content directly into the Kubeconfig Content text box.
- Once uploaded, the Kubeconfig content will be displayed in the text box for review.
- Click Validate to verify the Kubeconfig file. If valid, you’ll see a confirmation message (e.g., "Kubeconfig validated successfully").
- Click Next to proceed to the configuration step.
Step 3: Configure the Cluster
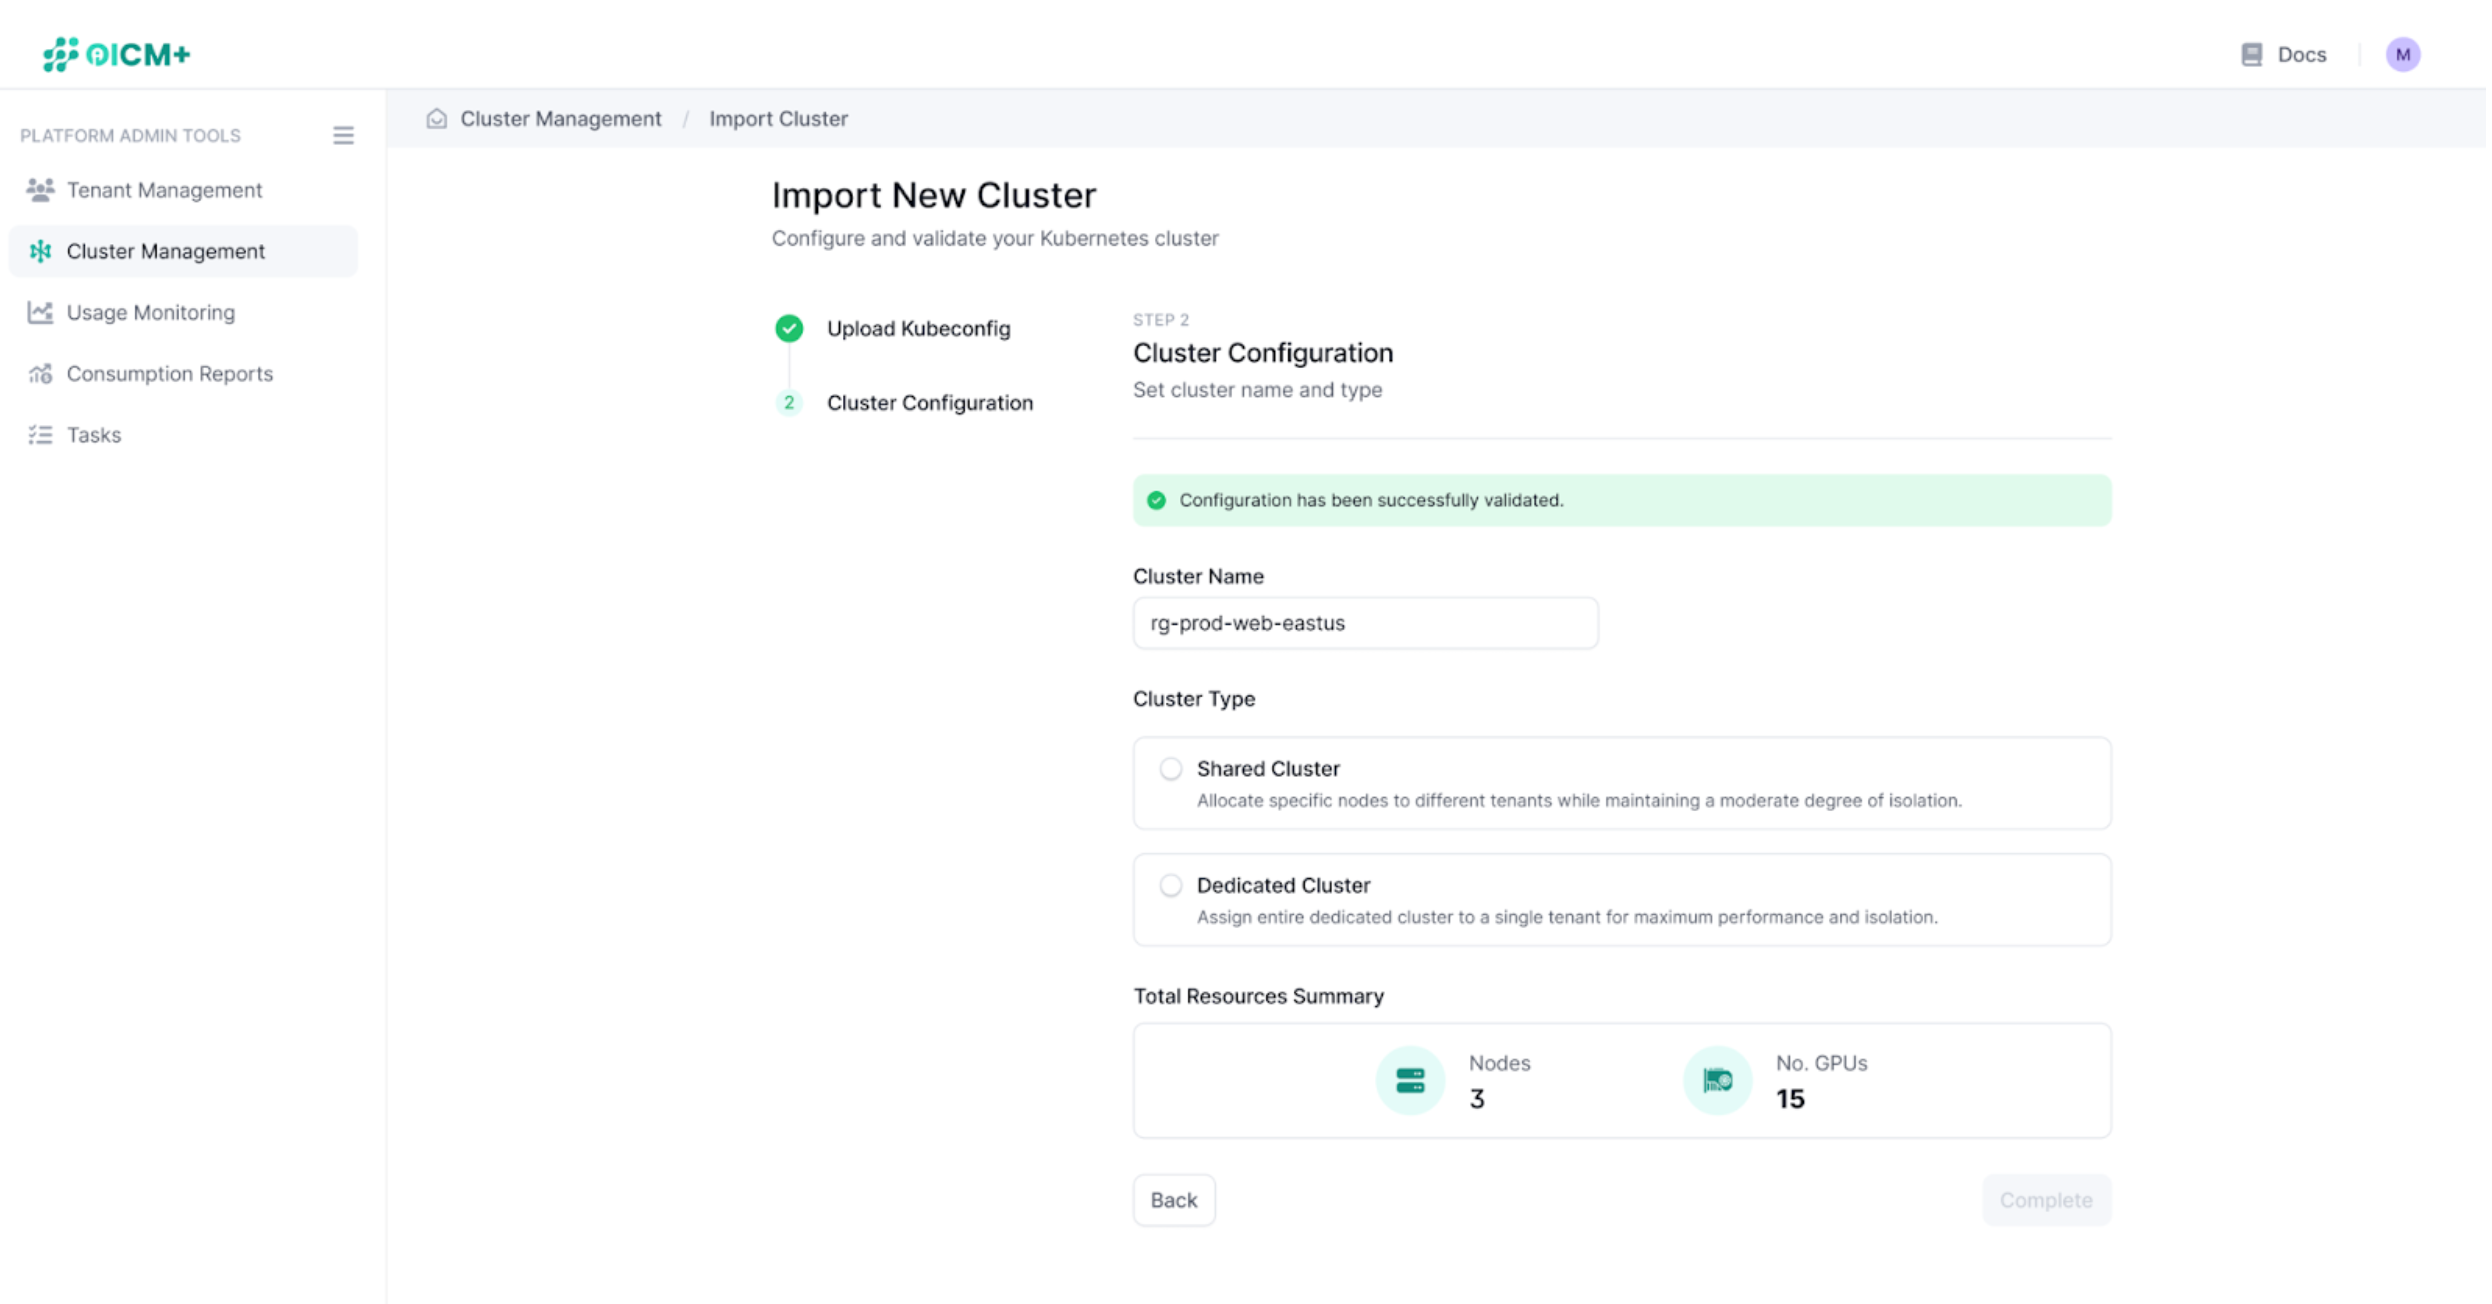
- Set Cluster Details:
- Cluster Name: Is prefilled with the name found in the Kubeconfig, but feel free to change it and give it any other unique name.
- Cluster Type: Choose the cluster type:
- Shared Cluster: Allocates nodes to different tenants while maintaining a moderate degree of isolation.
- Dedicated Cluster: Assigns the entire cluster to a single tenant for maximum isolation and performance
- Click Complete to finalize the import process.
Step 4: View and Manage the Cluster
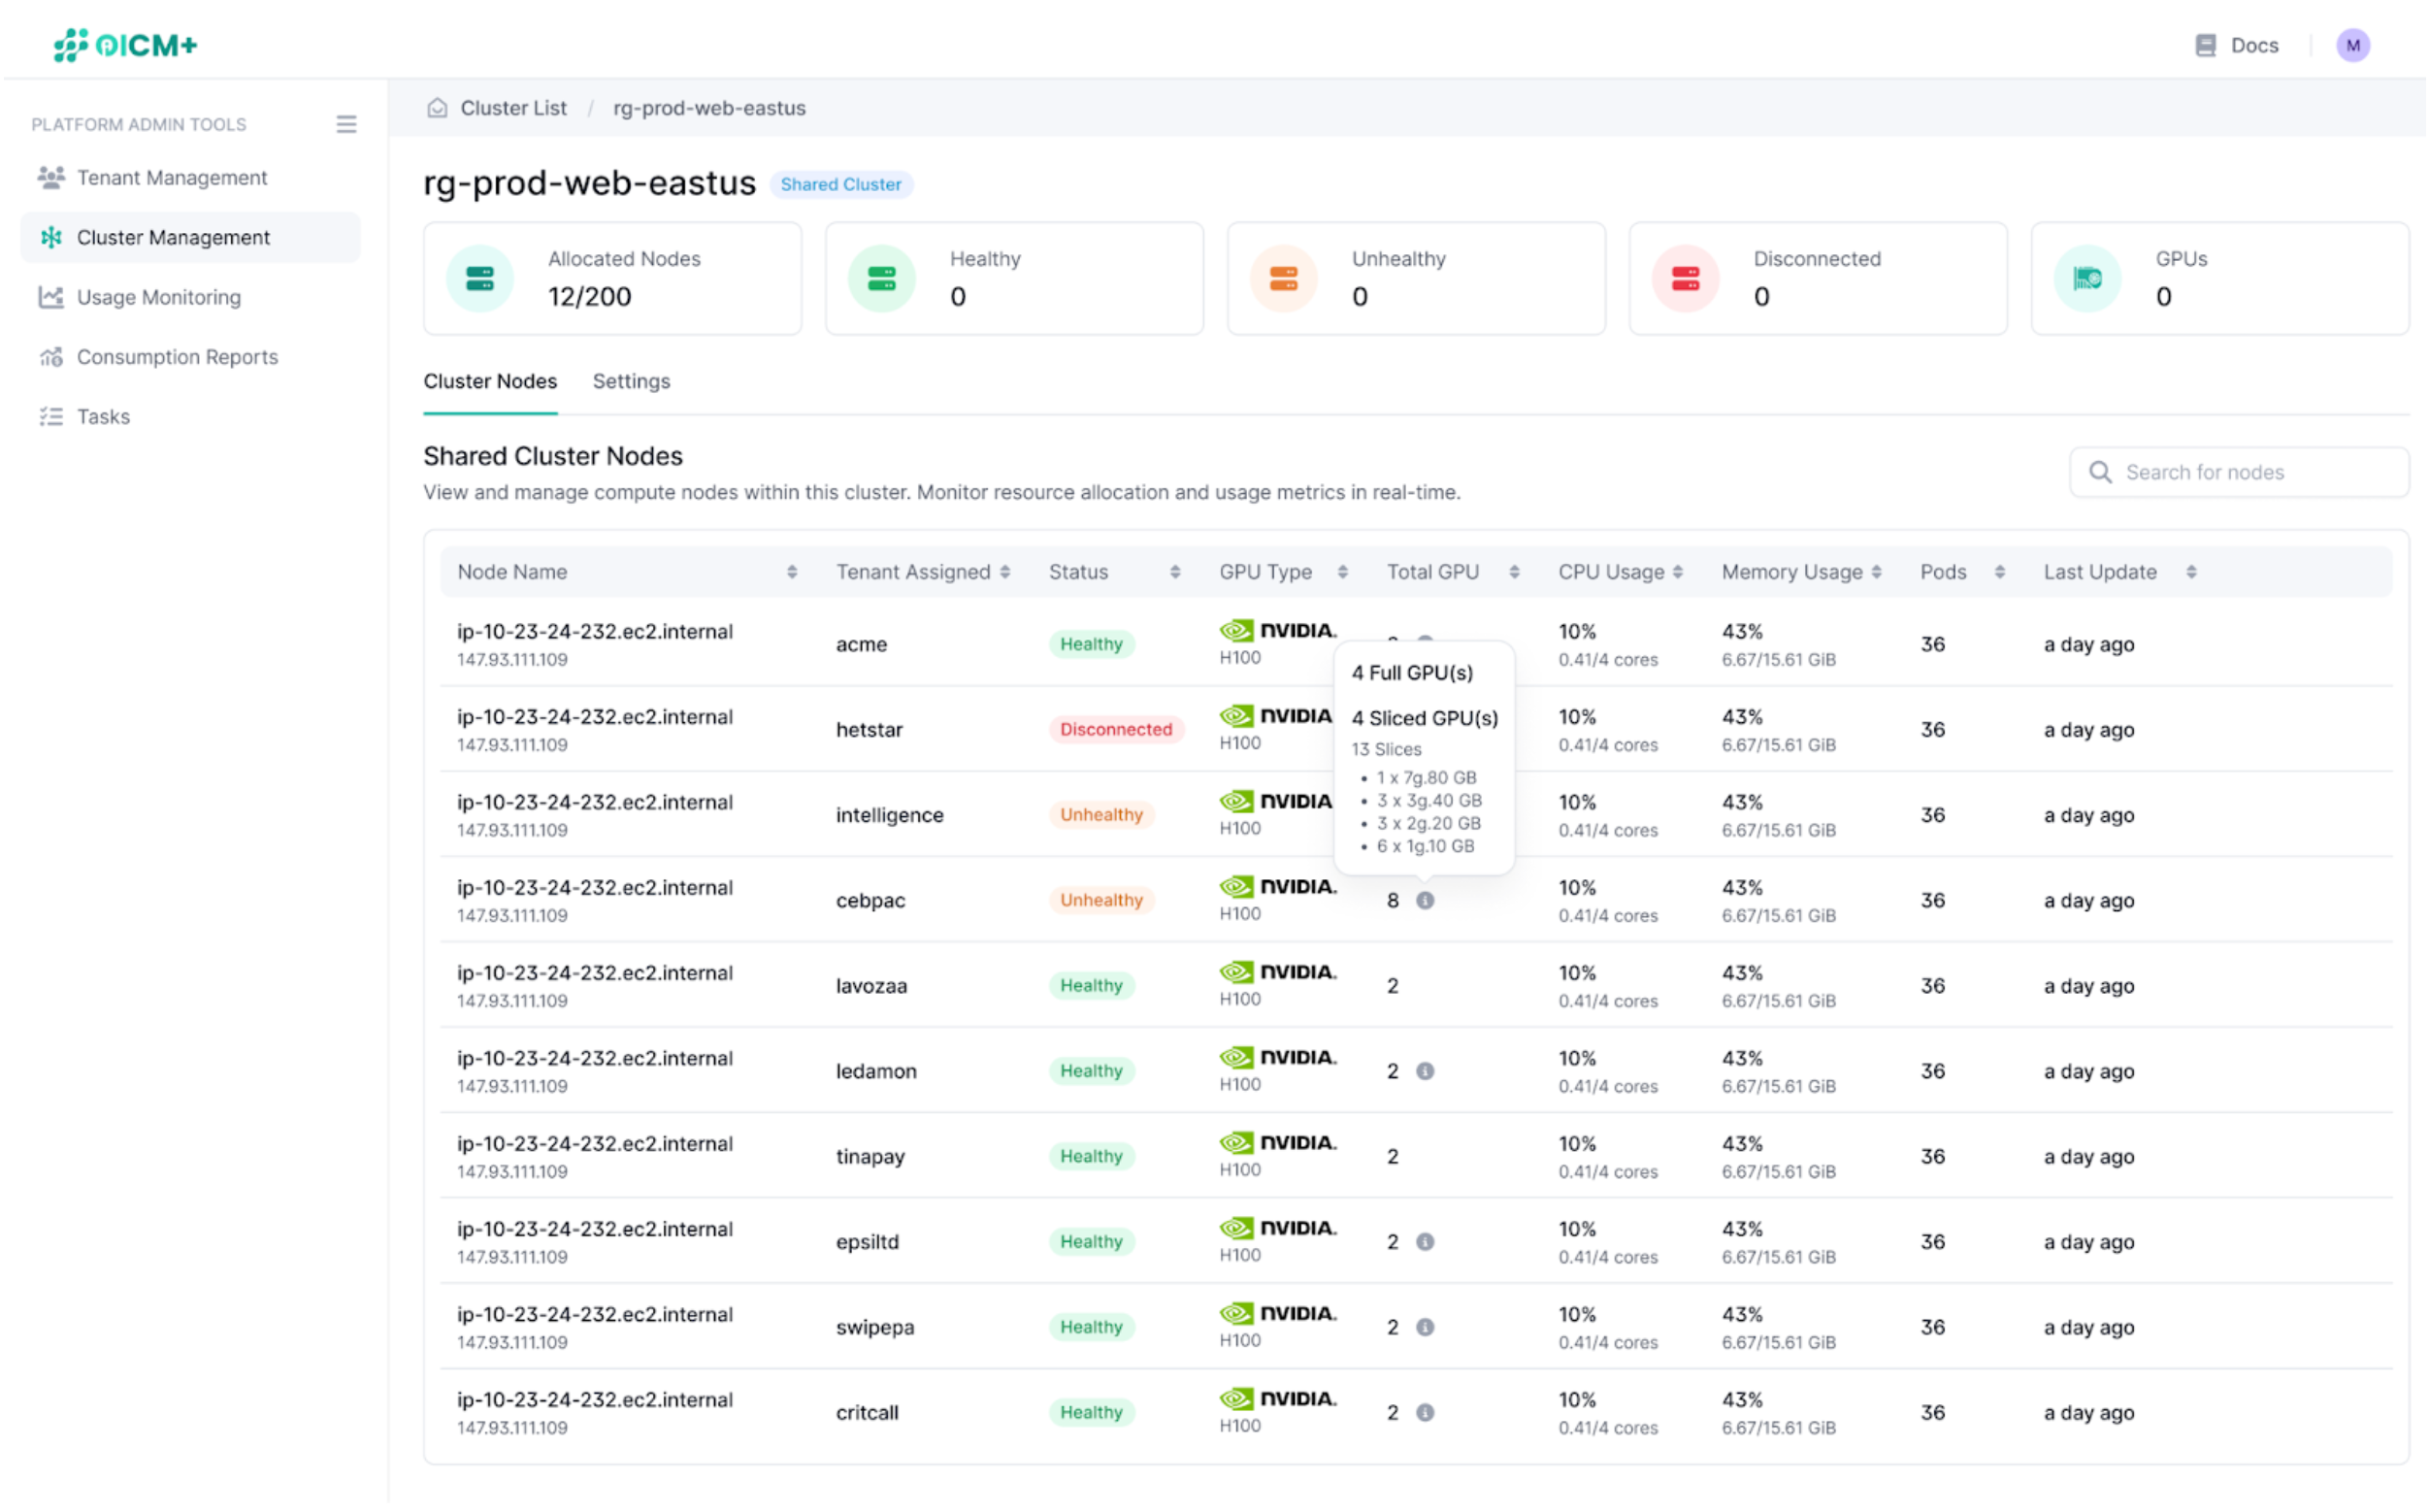
After importing, you’ll be redirected to the Cluster Management Dashboard, where the new cluster is now listed.
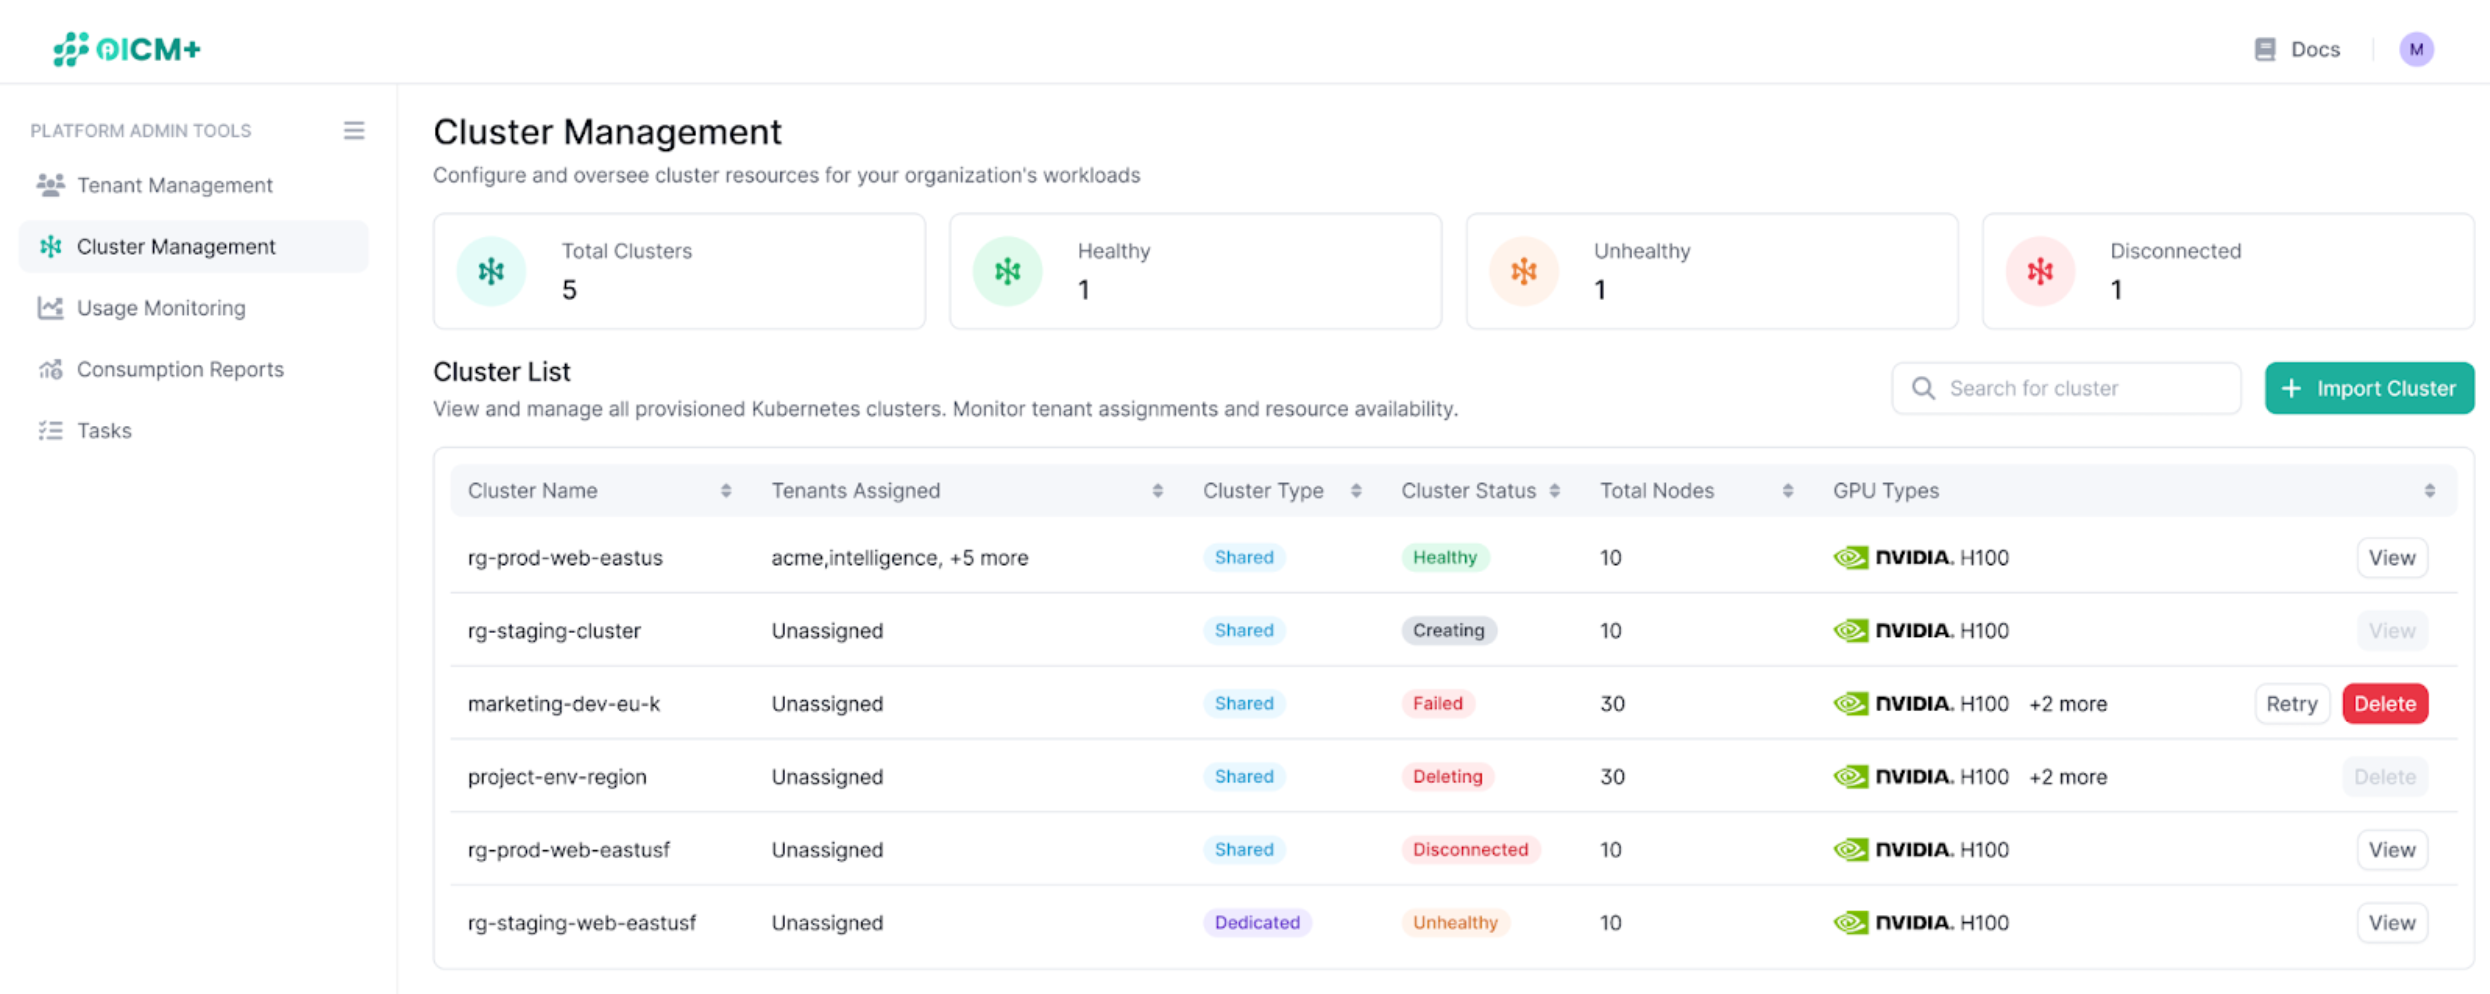
You can now go ahead and check the status and metrics about the nodes of the cluster you just added. This view is very handy to understand if a node is in use or to see if you have any unhealthy nodes.
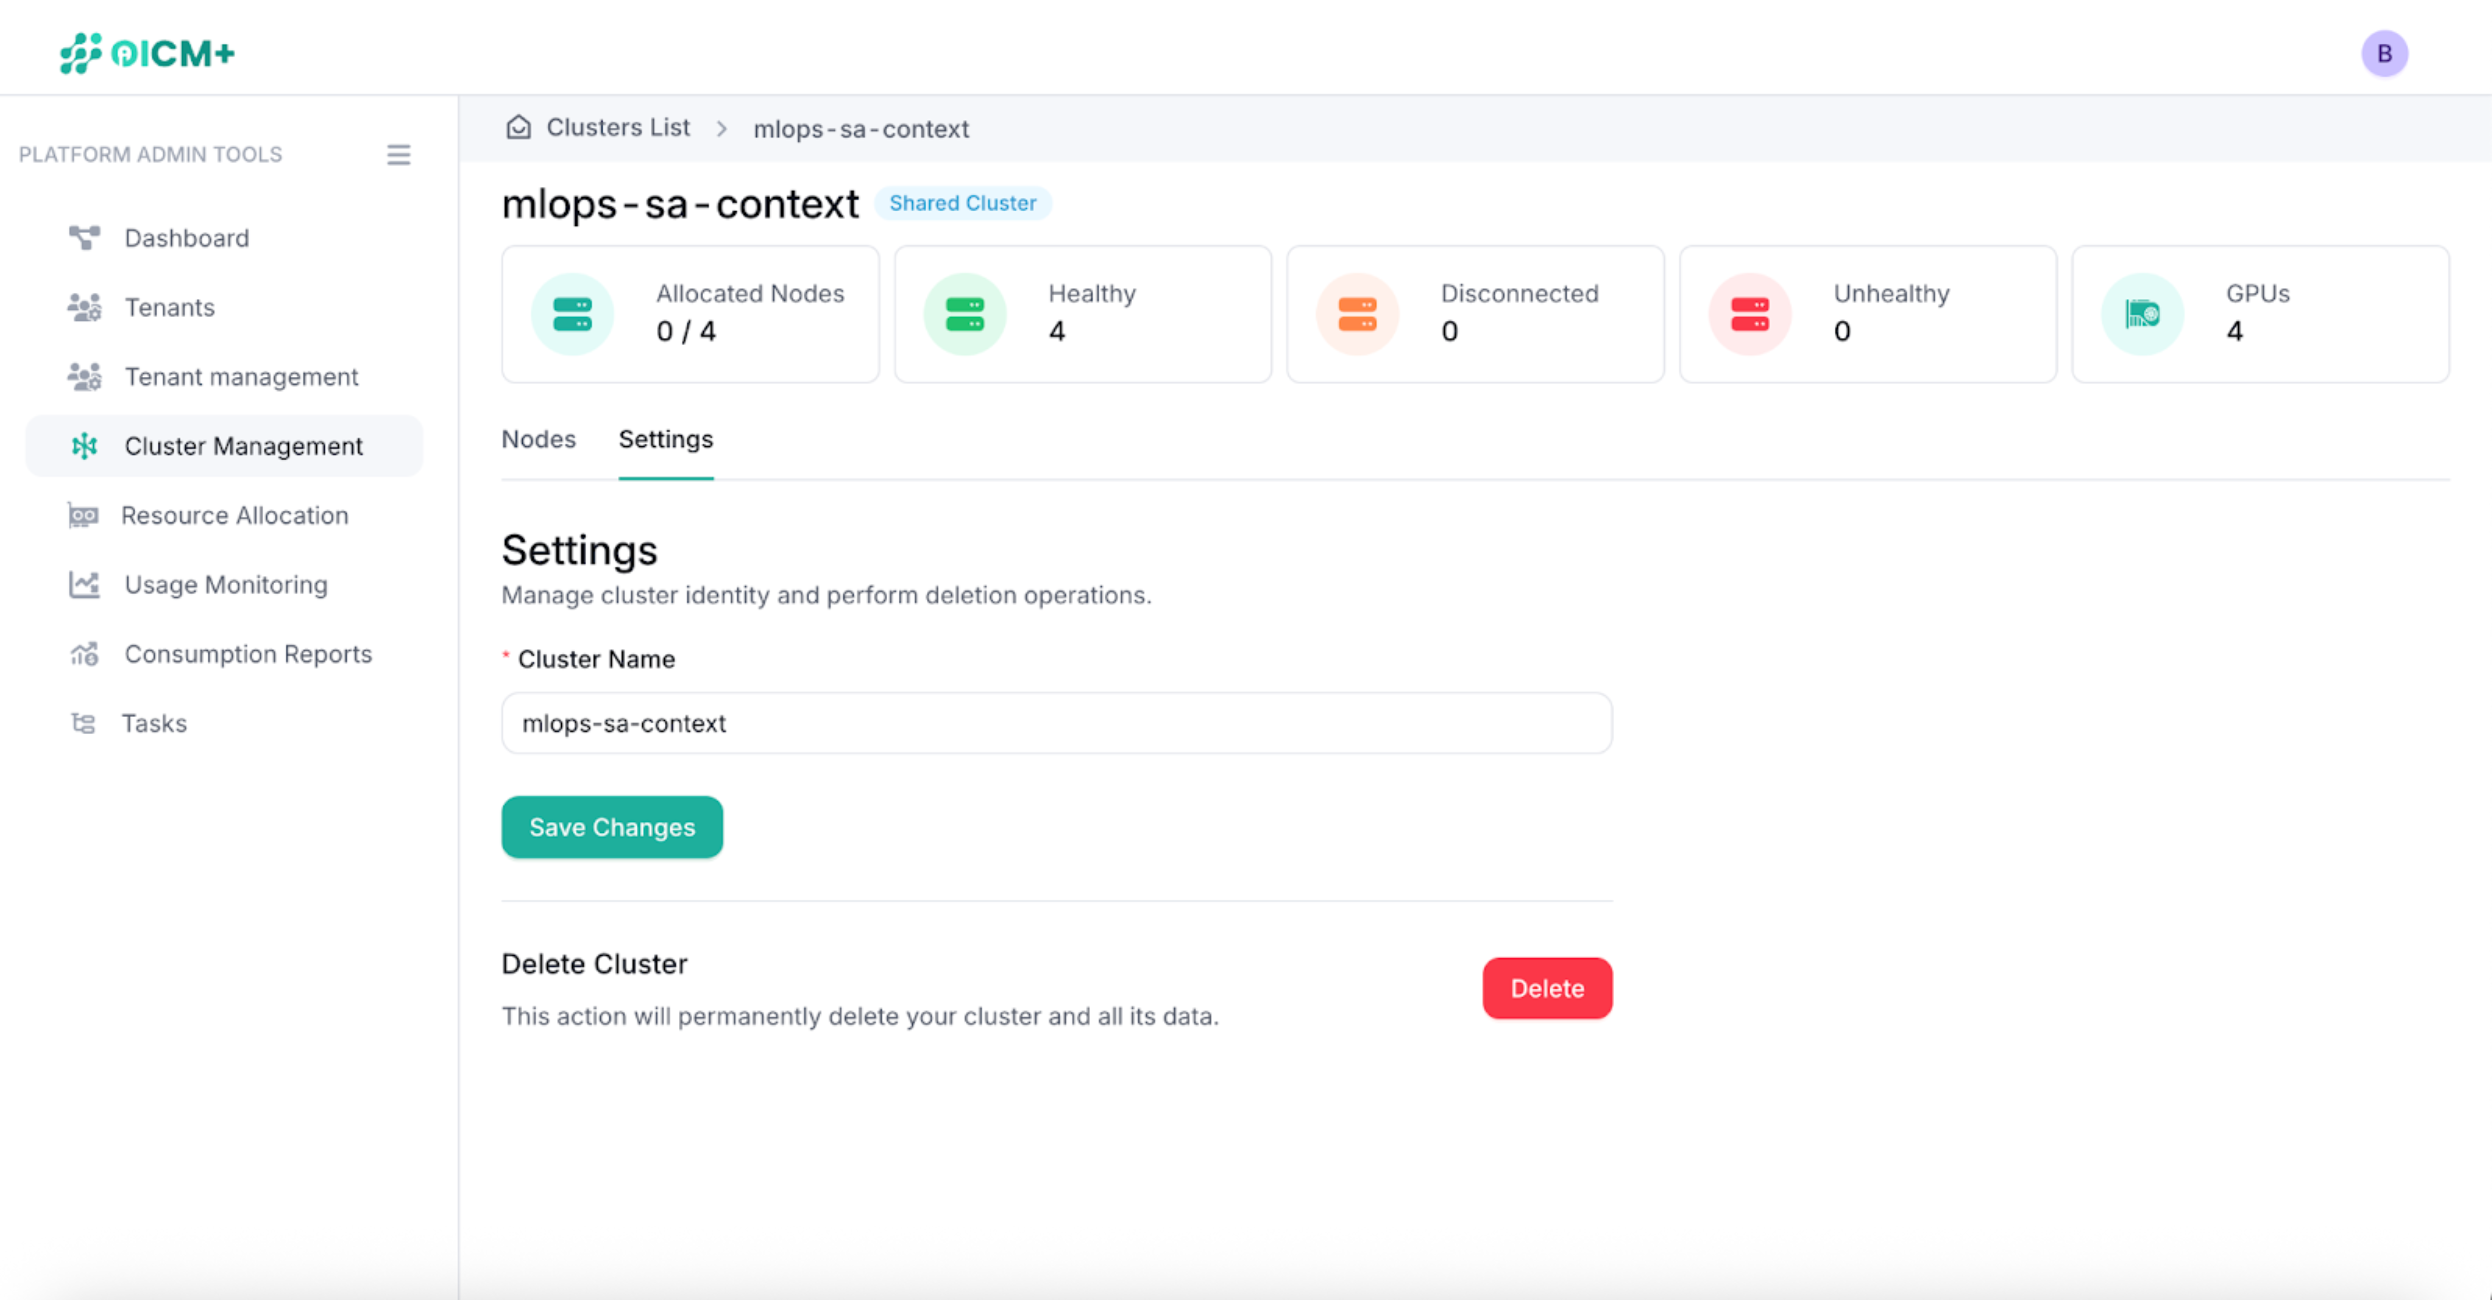
In cluster settings you are able to change the name of the cluster and delete it from the platform.
Now that you added a cluster to OICM you go to the tenant management section to find the tenant or tenants that you want to assign resources to.
Next Steps
- Tenant Admin Tools Overview – Explore tenant-level administrative capabilities.
- Tenant Management – Find the tenant or tenants that you want to assign resources to.