User Interface
Deployments UI
Accessing Model Deployments
- Navigate to the Deployments section from the main platform menu.
- The dashboard displays your existing deployments with their status.
- Use the search functionality to find specific deployments.
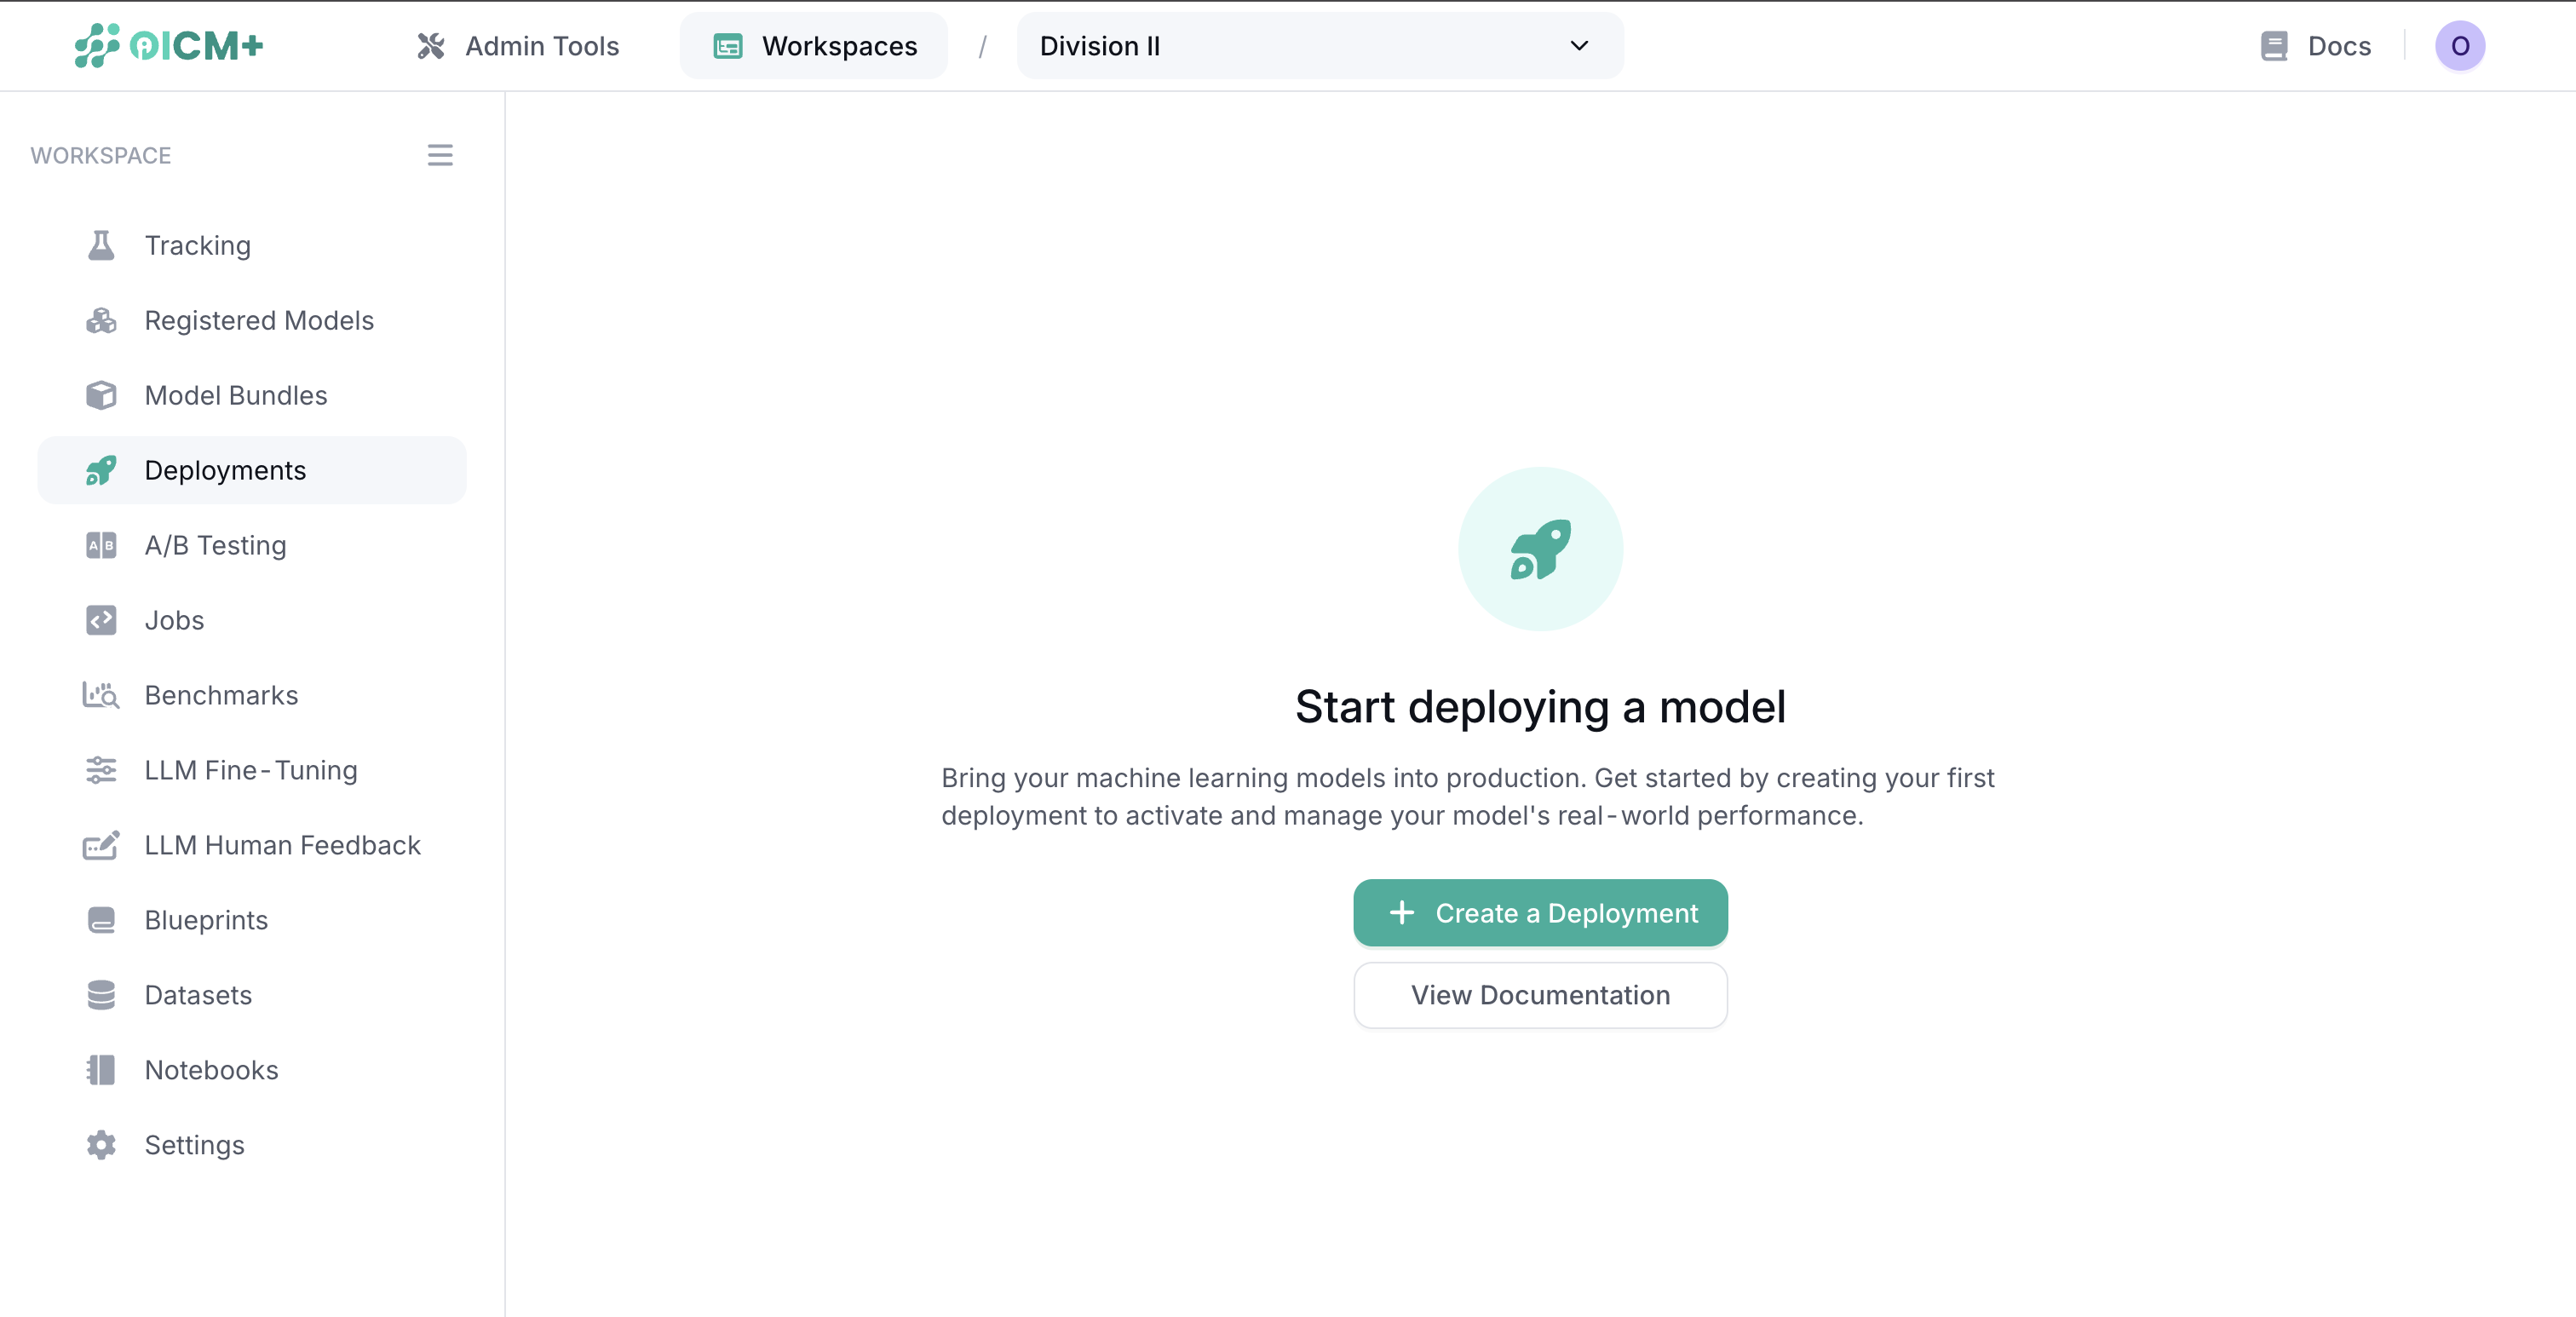
Creating a New Deployment
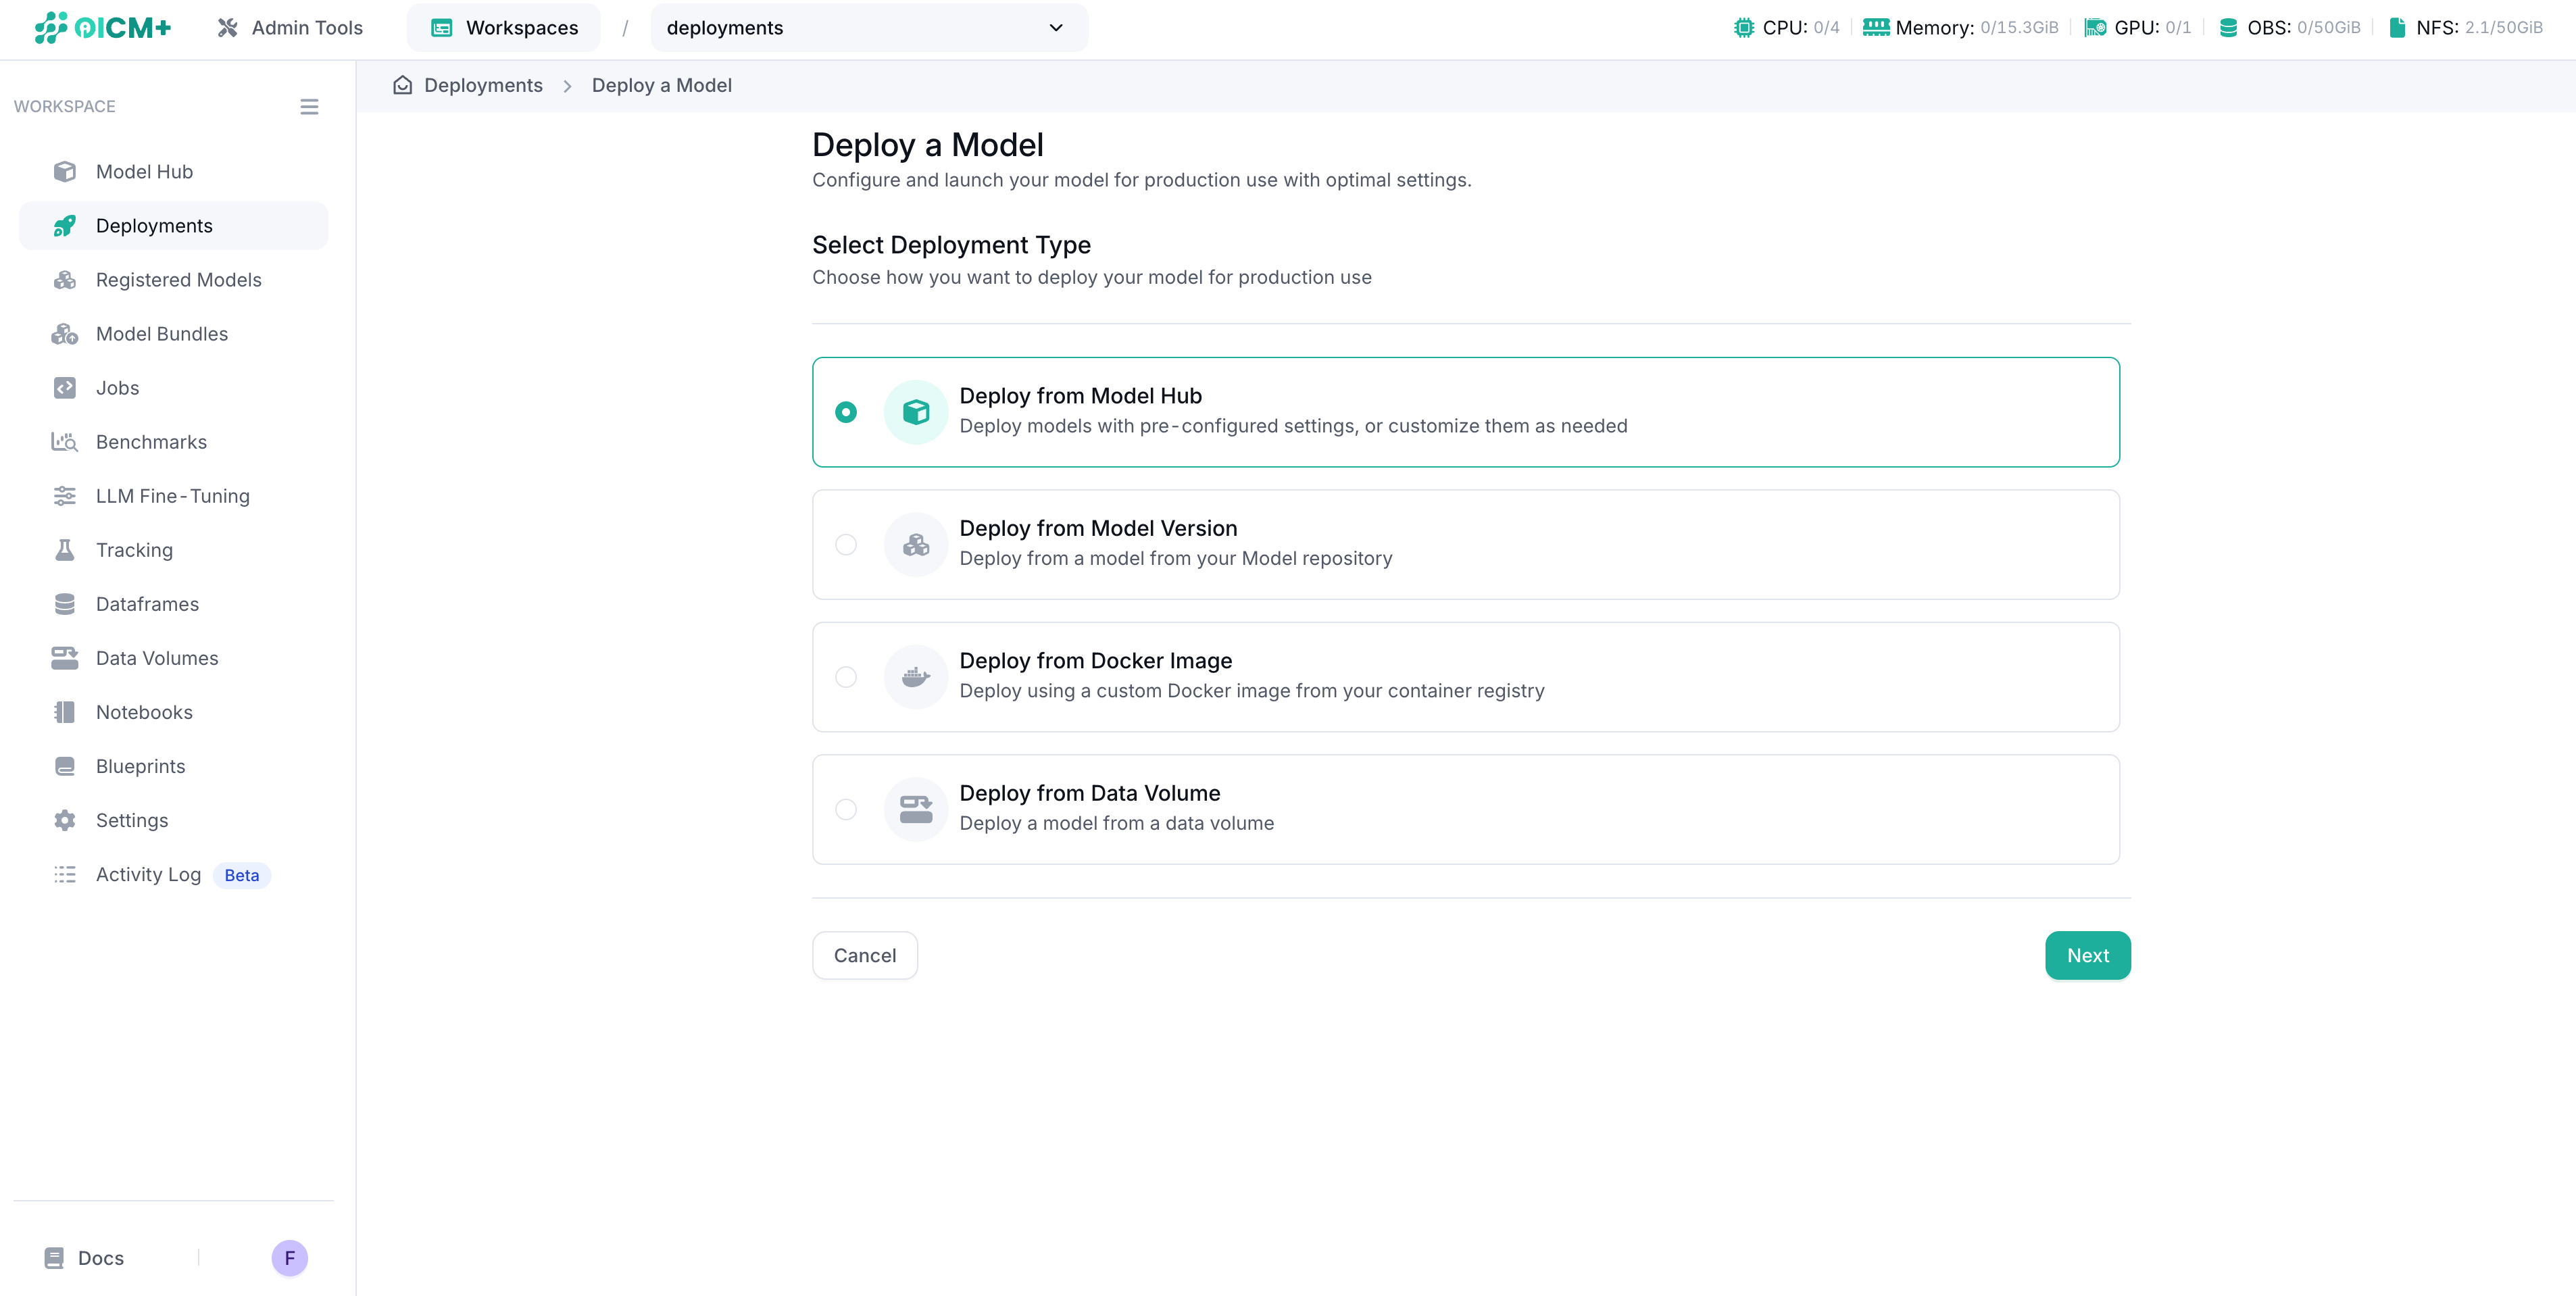
Selecting Deployment Type
Click the "Create New Deployment" button and choose your deployment source:
- Deploy from Model Hub: Deploy a pre-configured model from the OICM catalog.
- Deploy from Model Registry: Deploy a custom model you have registered.
- Deploy from External Source: Deploy directly from external repositories like Hugging Face.
- Deploy from Existing Volume: Deploy a model stored in an OICM data volume.
- Deploy from Docker Image: Deploy using your own custom container image.
Deploying a Registered Model
When deploying from the Model Registry, follow this configuration wizard:
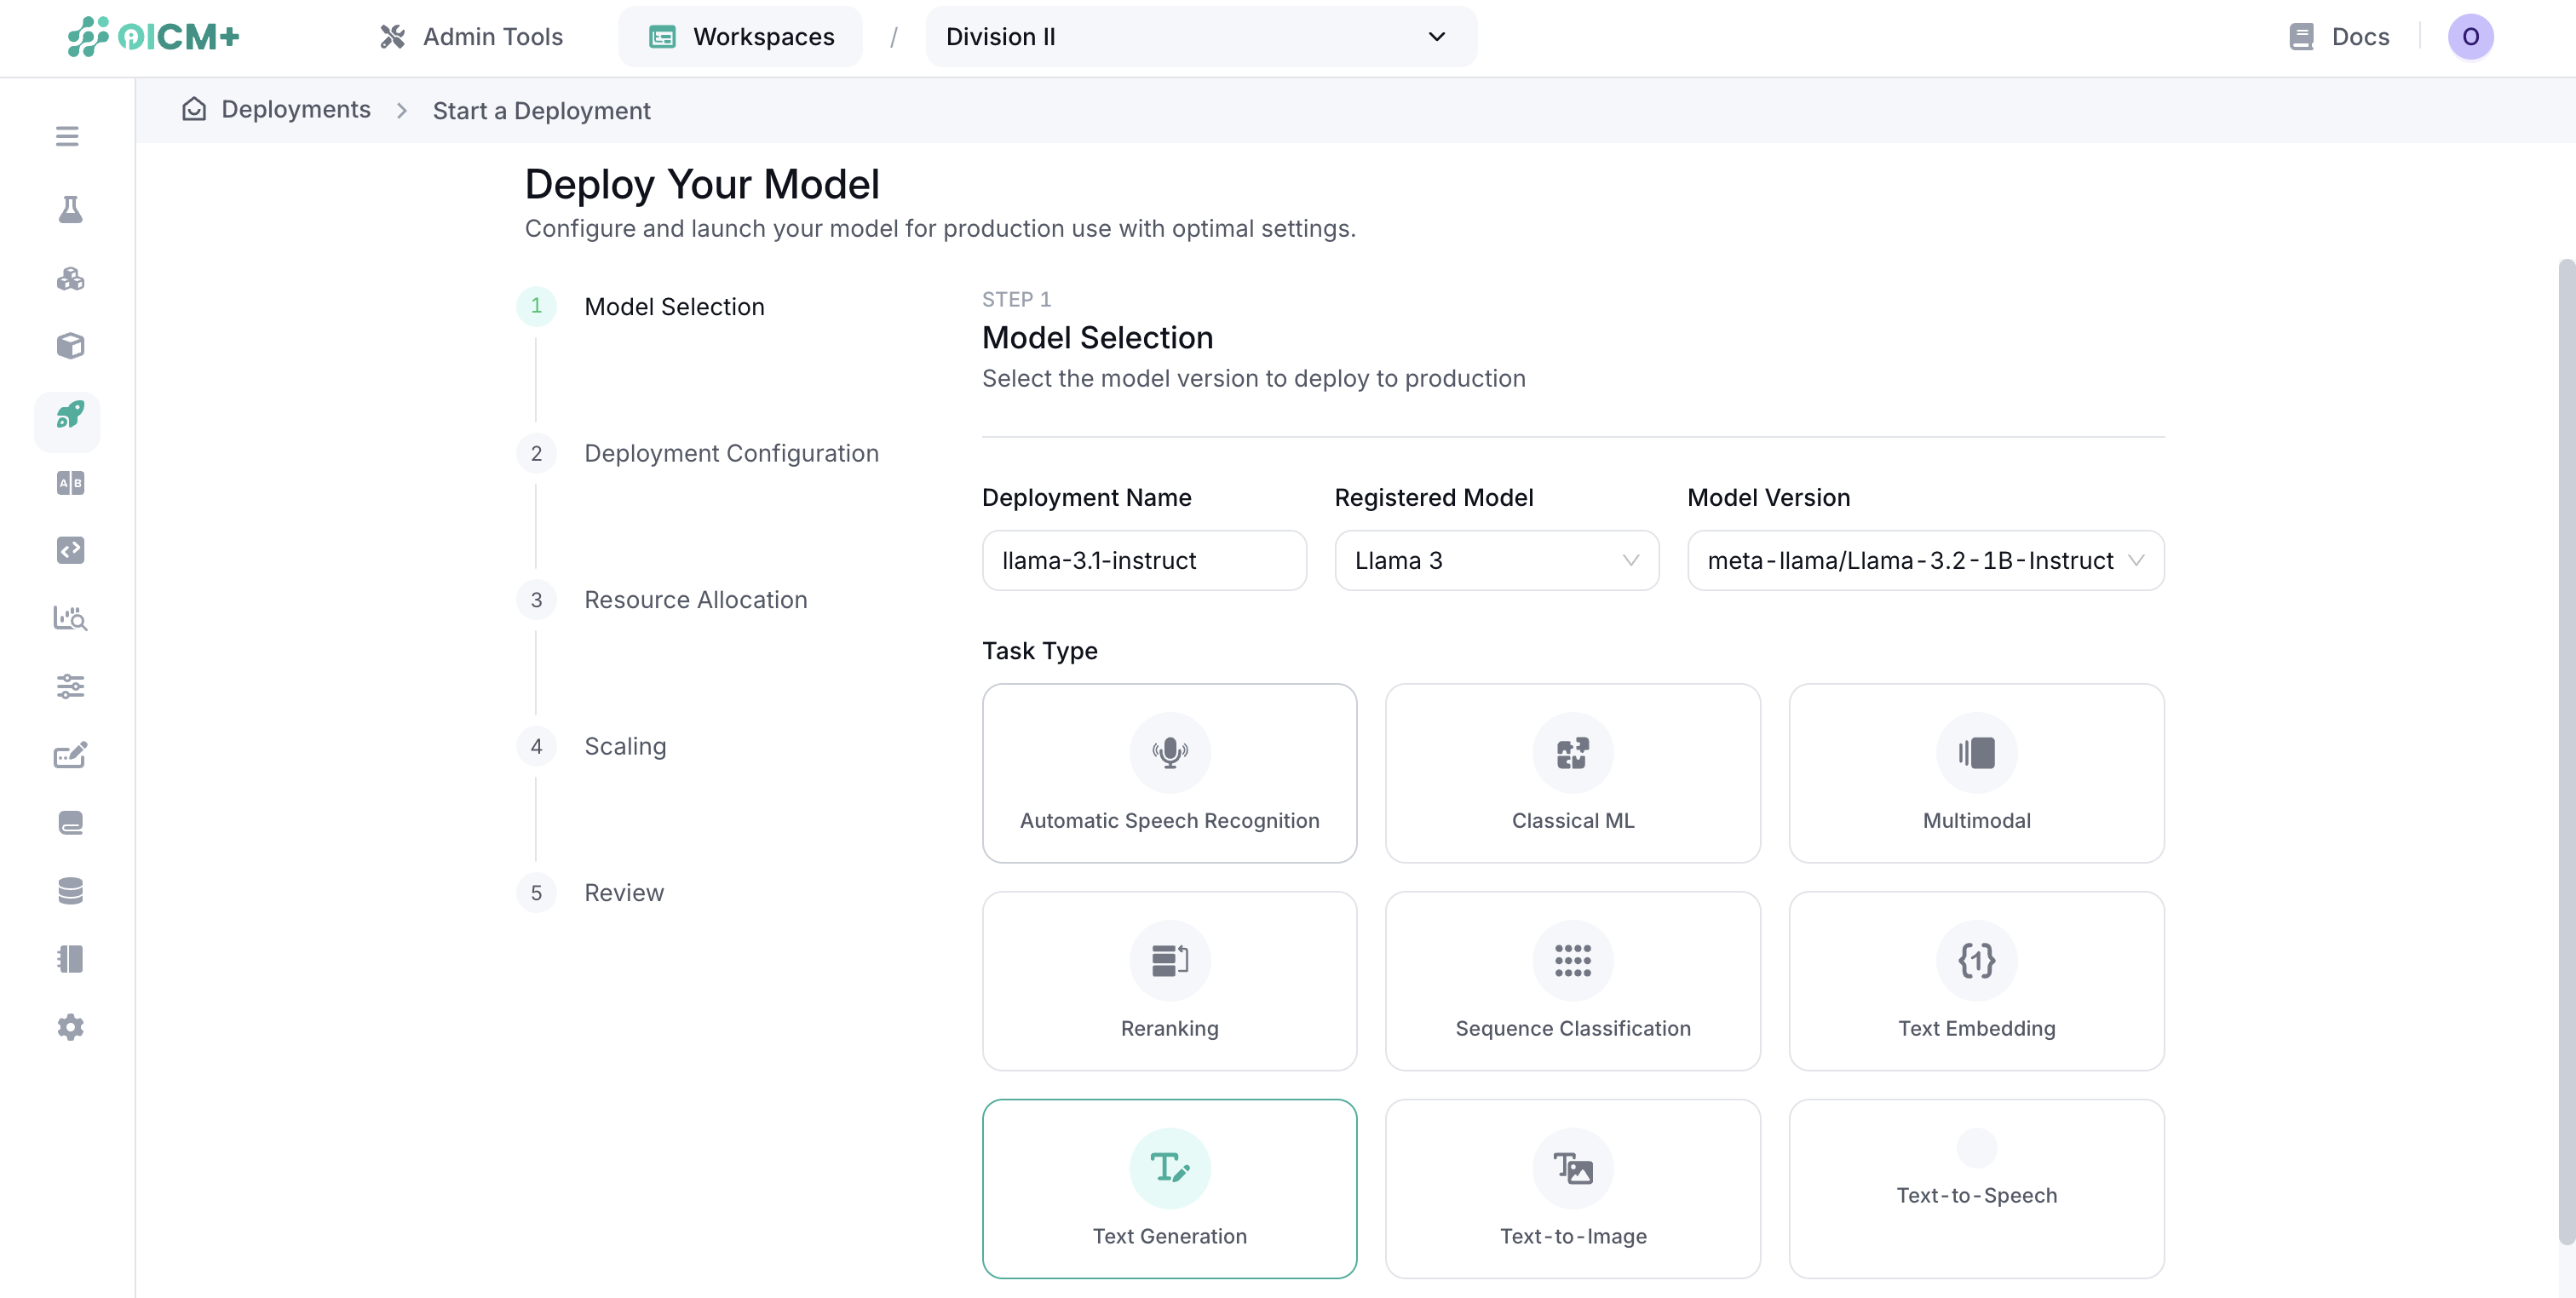
Step 1: Model Selection
- Enter a unique deployment name.
- Select a registered model from the dropdown.
- Choose the appropriate task type for your model (e.g., Text Generation, Text-to-Image, Classical ML).
- LoRA Adapters: If deploying a LoRA adapter, you must select its required Parent Model and provide the adapter Key. You can switch between adapters during inference once deployed.
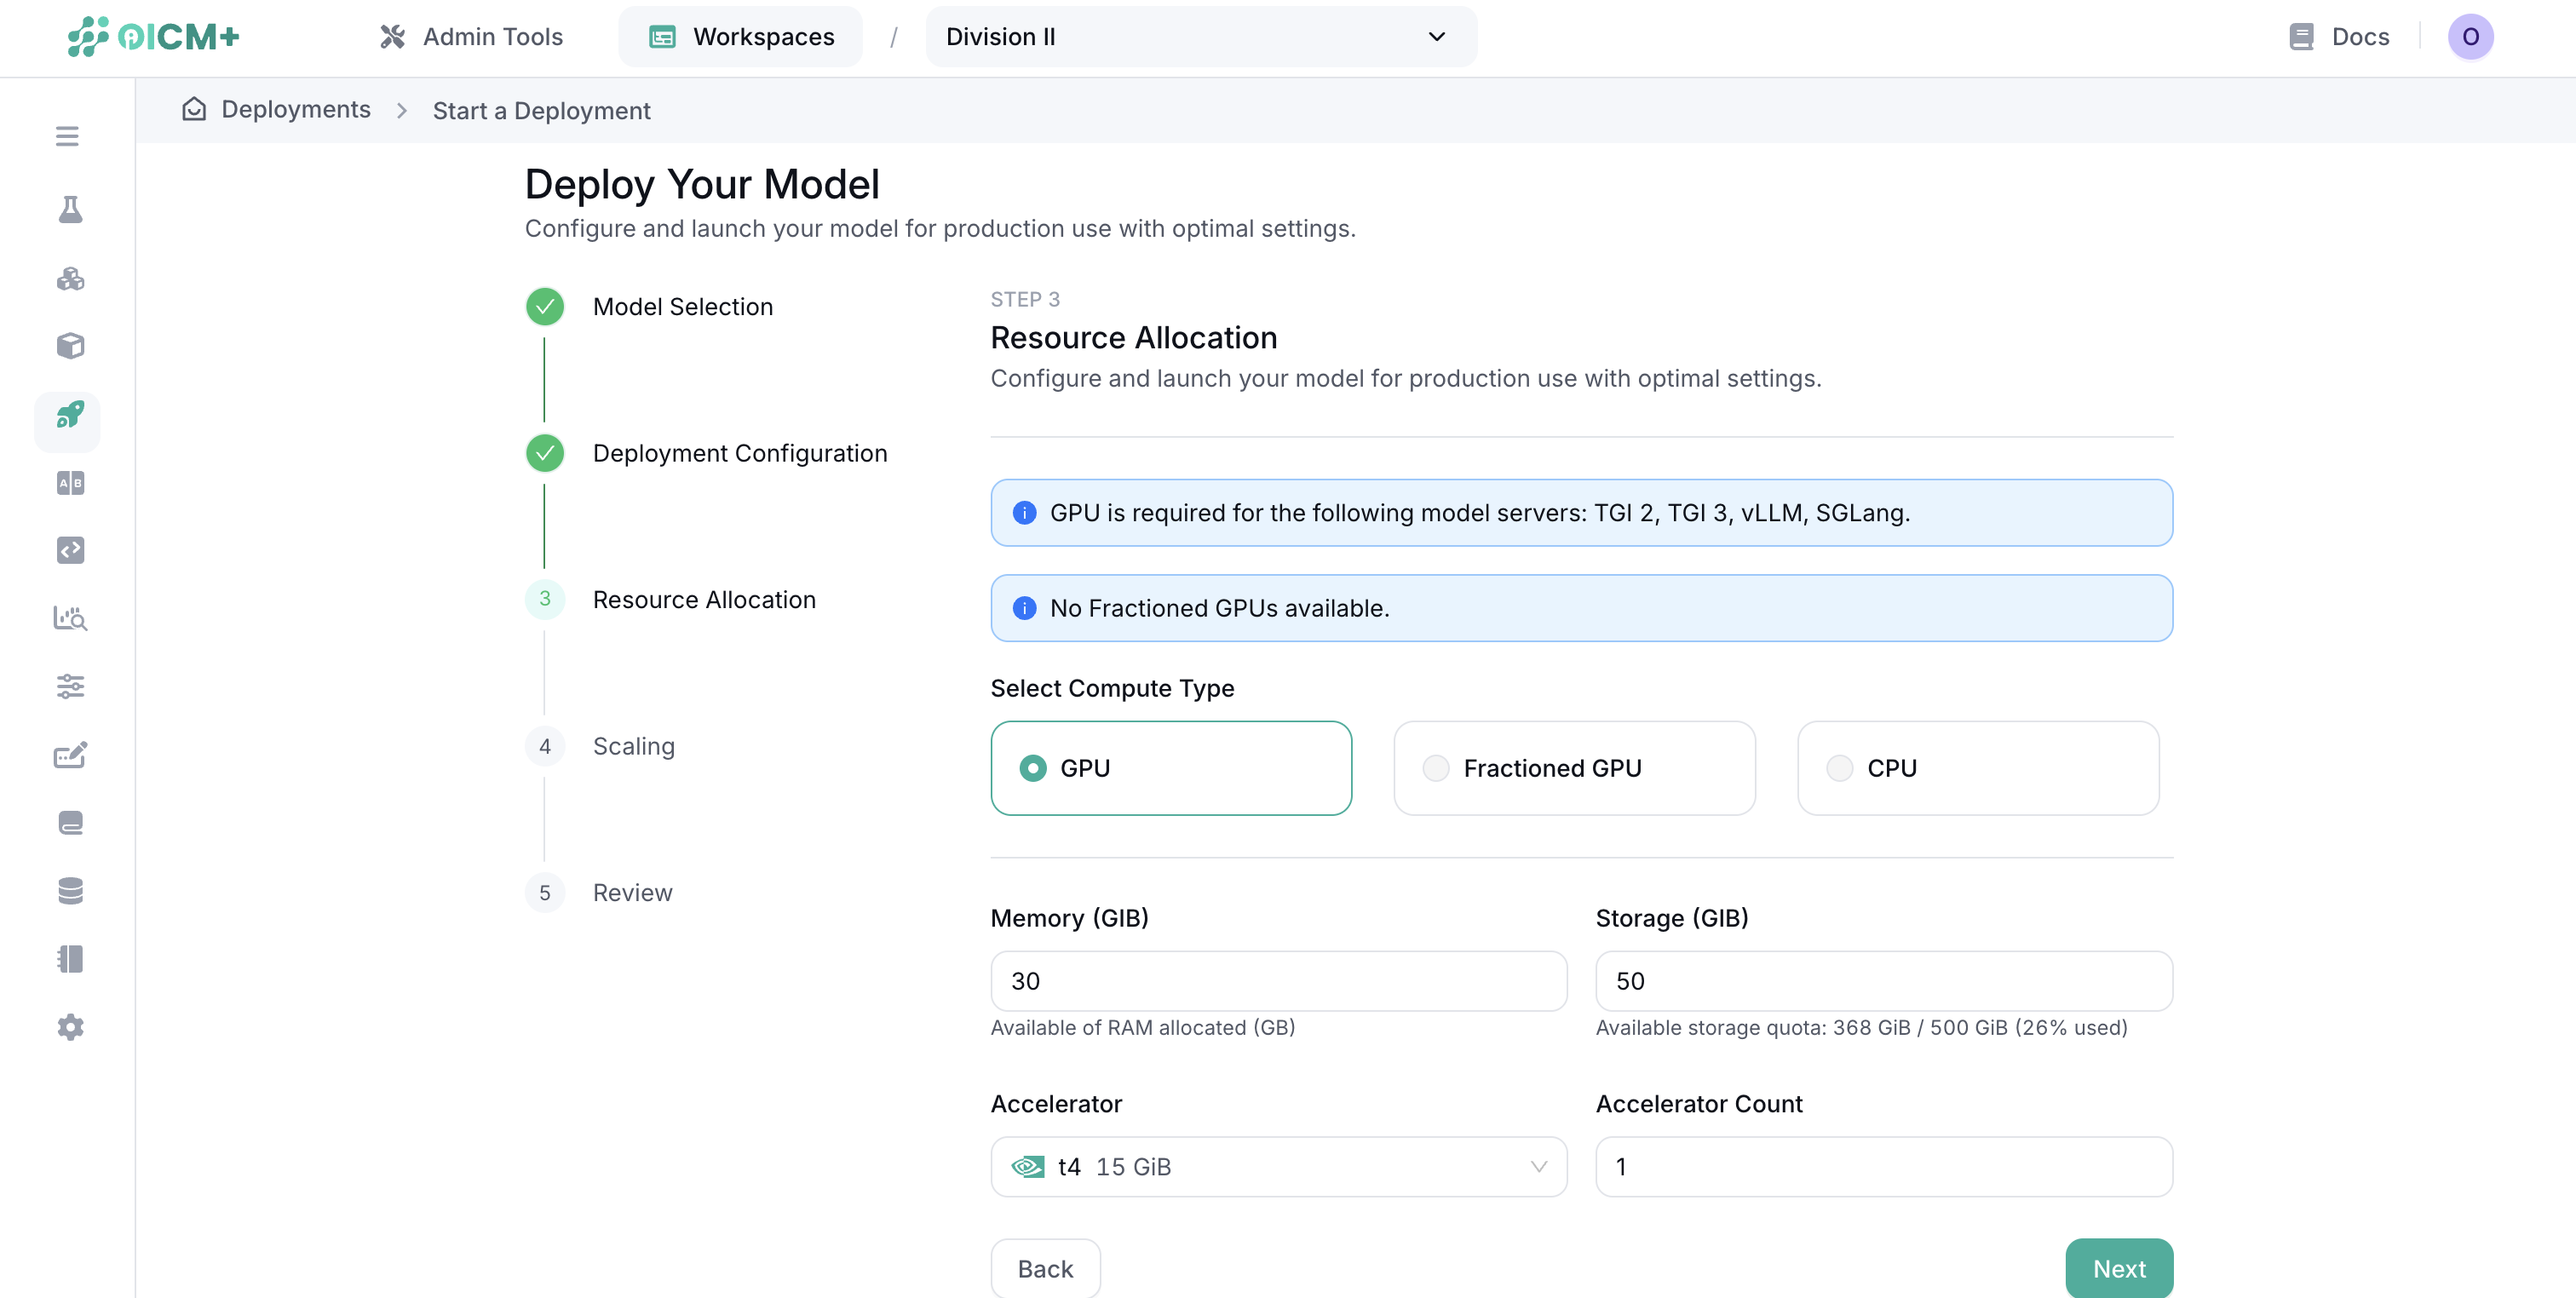
Step 2: Resource Allocation
Configure the computing resources and scaling behavior for each instance:
- Compute Type: GPU (Full), Fractioned GPU, or CPU.
- Memory (RAM) & Storage: Allocated RAM and disk space.
- Accelerator & Count: GPU model and number of GPUs per instance.
Important: Resources specified are for a single instance. Total consumption multiplies by the number of active replicas.
GPU Fractioning
Modern NVIDIA GPUs support MIG (Multi-Instance GPU). This allows a single card to be split into independent slices to run lightweight models economically. Available slices vary by GPU type.
Scaling Configuration
- Enable Autoscaling: Toggle automatic replica scaling based on load.
- Manual Scaling: Disable autoscaling to set a fixed number of replicas.
- Autoscaling Parameters: Set the Target Metric (e.g.,
ml_model_concurrent_requests), Scale/Activation Thresholds, and Min/Max Replicas to allow the platform to dynamically adjust resources.
Step 3: Deployment Configuration
Select your model serving framework:
- Choose from supported servers like vLLM, TGI 3, SGLang, or use a Custom Model Server.
- Use Quick Settings for standard configurations or Developer Mode for advanced server arguments.
Step 4: Review and Deploy
Review your configuration summary:
- Save: Store the configuration as a template without starting it.
- Save & Deploy: Create and immediately launch the deployment.
Managing Deployments
Once created, you can manage your active workloads through the Deployments dashboard:
- Monitor statuses, performance metrics, and logs.
- Start, stop, undeploy, or delete deployments.
- Update configurations for stopped deployments.
Best Practices
- Resource Optimization: Start with modest resources and scale based on actual performance.
- Autoscaling: Configure appropriate thresholds to balance performance and cost.
- Monitoring: Regularly review deployment metrics to identify optimization opportunities.