Tenant Management
Overview
Tenant Management enables platform administrators to create, manage, and allocate compute resources to tenants within OICM. You can allocate either a Dedicated Cluster or nodes from a Shared Cluster (added via the Cluster Management section) to ensure tenants have the resources they need for their workloads and also their Object and File storage.
How does Tenant Management work?
With the Tenant Management feature, you can:
- Create new tenants and set up their tenant administrators.
- Allocate compute resources, such as dedicated clusters or nodes from shared clusters to tenants.
- Configure object and file storage quotas for tenants.
- Monitor tenant resource usage, including nodes, storage, and cluster status.
- Deallocate resources from tenants as needed.
Terminology
- Tenant: An organization or team within the OICM platform that uses allocated compute and storage resources to run workloads.
- Dedicated Cluster: A Kubernetes cluster assigned entirely to a single tenant, providing maximum performance and isolation.
- Shared Cluster: A Kubernetes cluster where nodes can be allocated to different tenants, maintaining a moderate degree of isolation. Note, nodes are not shared between tenants.
- Platform Admin: A user with administrative privileges to manage tenants, clusters, and resource assignments in the Platform Admin Tools section.
Getting Started with Tenant Management
Below is the step-by-step process to create a tenant and do resource allocation, in OICM.
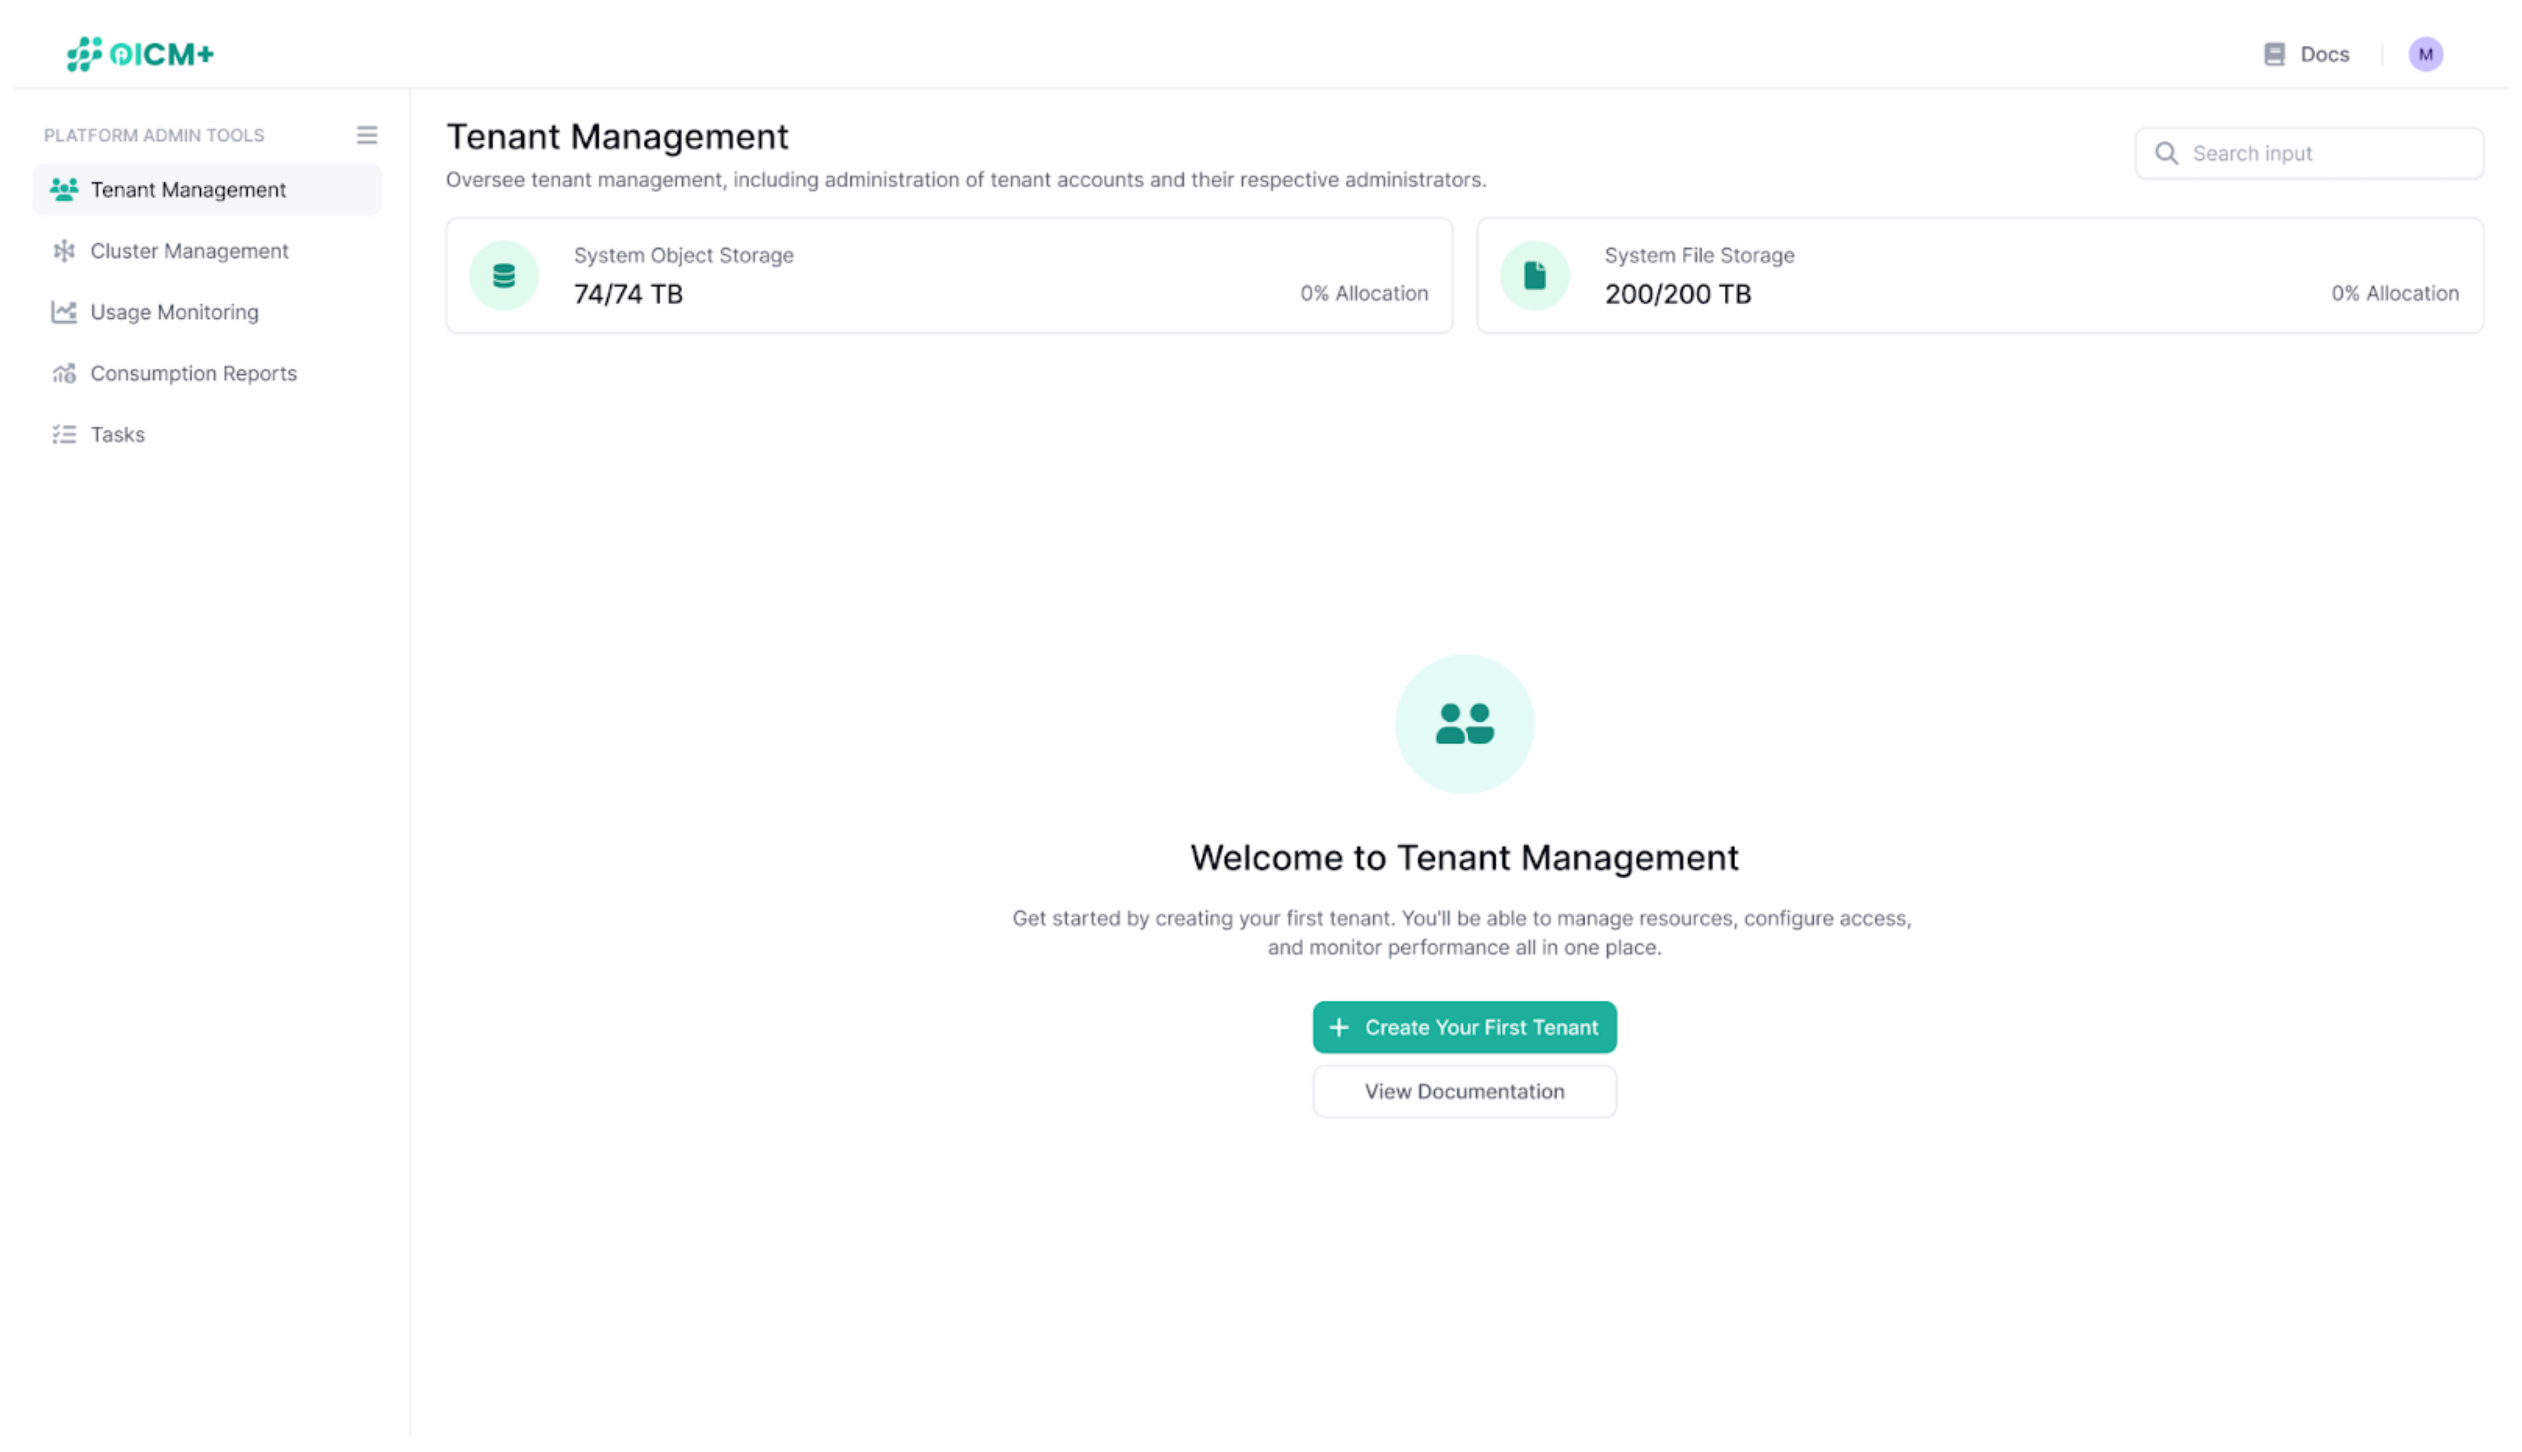
Step 1: Navigate to the Tenant Management Section
- Login to OICM using a platform admin account and to the Platform Admin Tools section.
- Select Tenant Management from the menu to access the Tenant Management dashboard.
- In there you can view a summary of your available Object and File Storage.
- Click Create Your First Tenant to get started.
Step 2: Create a New Tenant
-
Once you click Create Tenant to start the process, you’ll be directed to the Create a Tenant page. You only need to specify a name to create a tenant. All other steps are optional, however, you will need to set them up at some point to make the tenant account ready to use all of OICM’s features. Here’s the list of steps:
- Step 1: Tenant Details
- Step 2: Compute Resources (Optional)
- Step 3: Node Selection (Optional)
- Step 4: Storage Configuration (Optional)
- Step 5: Add Tenant Admin (Optional)
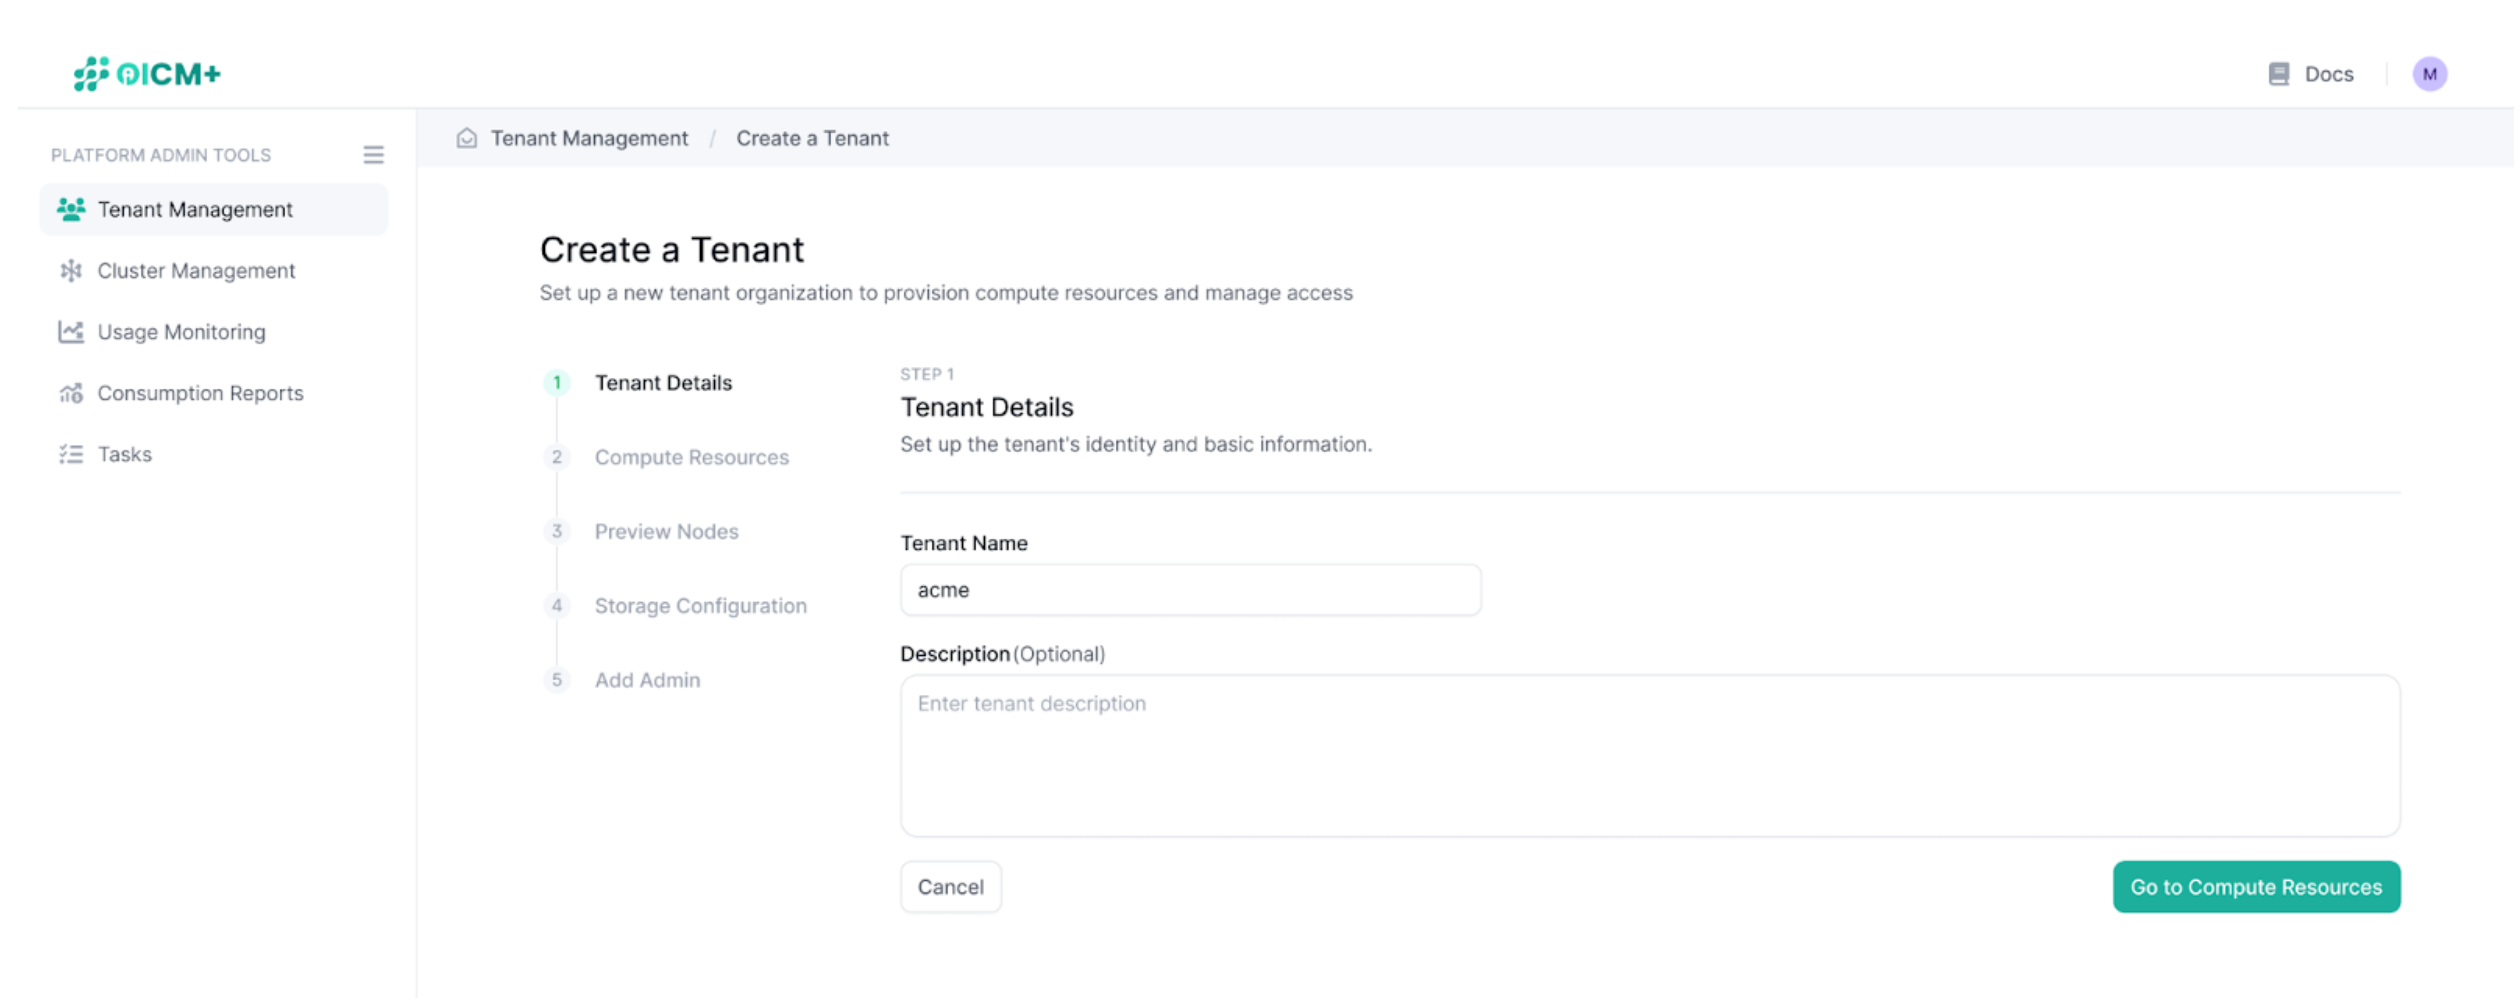
Step 2.1: Set Tenant Details
- On the Tenant Details page, enter the required information:
- Tenant Name: Enter a unique name for the tenant (e.g., company or department name)
- Description (optional): Add a brief description of the tenant’s purpose.
- Click Next to proceed to the compute resources step.
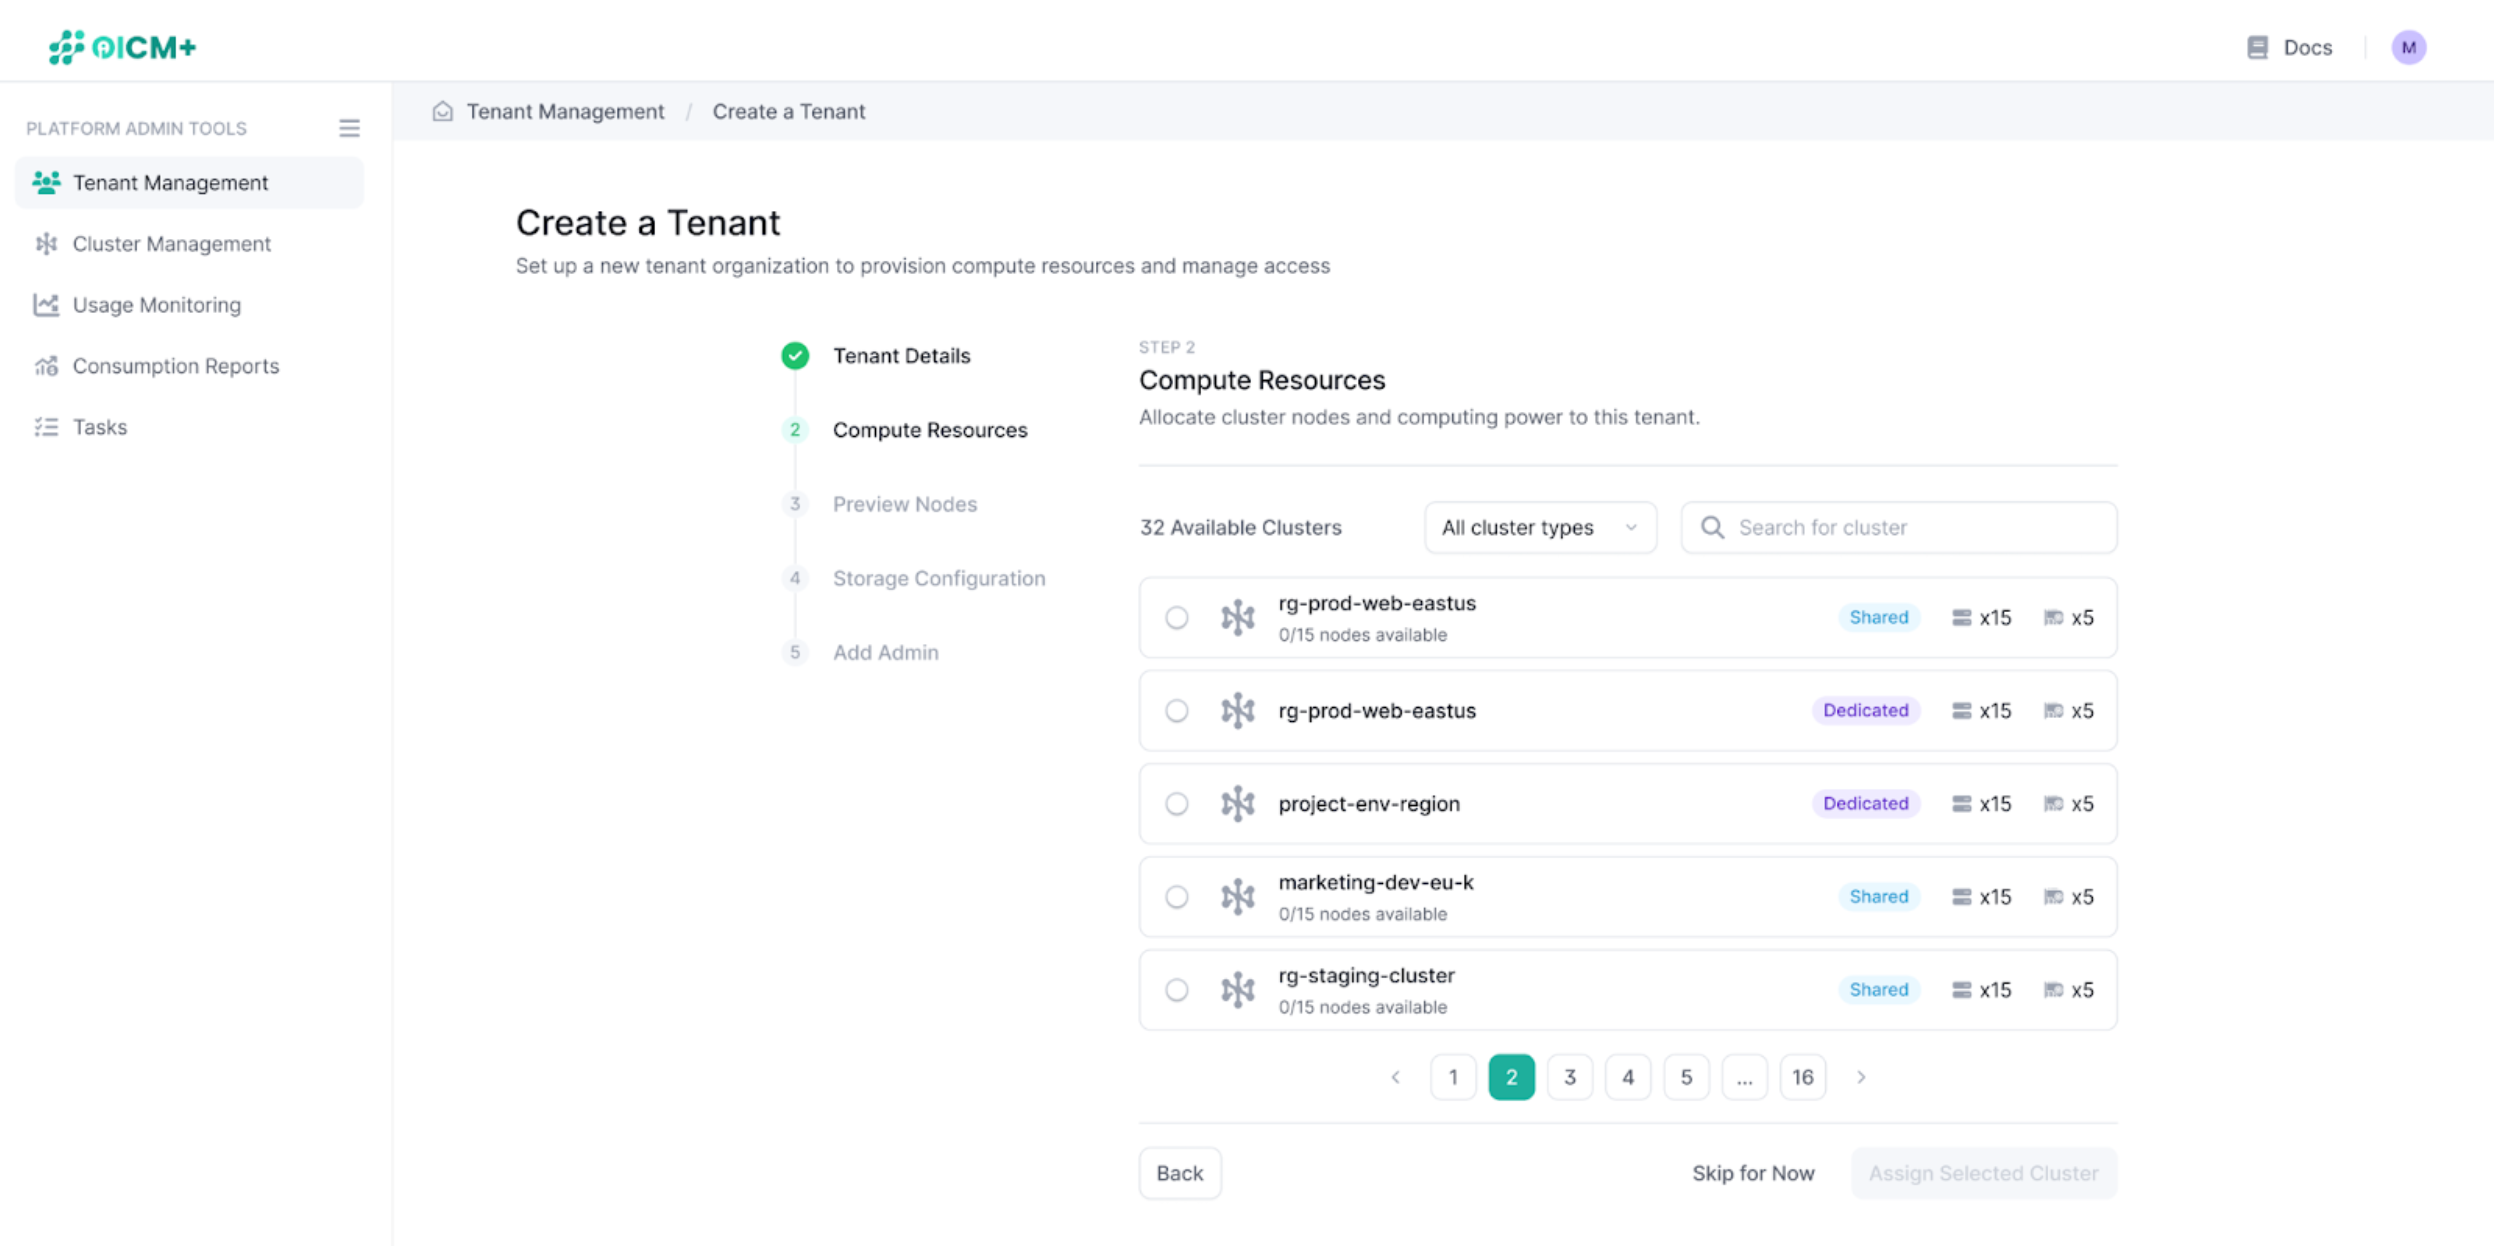
Step 2.2: Allocate Compute Resources (optional)
- On the Compute Resources page, assign a cluster to the tenant:
- View the list of available clusters (e.g., 32 available clusters) added via the Cluster Management section.
- Select a cluster to assign, you can pick a Shared Cluster, meaning that the tenant will share that cluster with other tenants. Or a Dedicated Cluster fully allocated to the tenant only
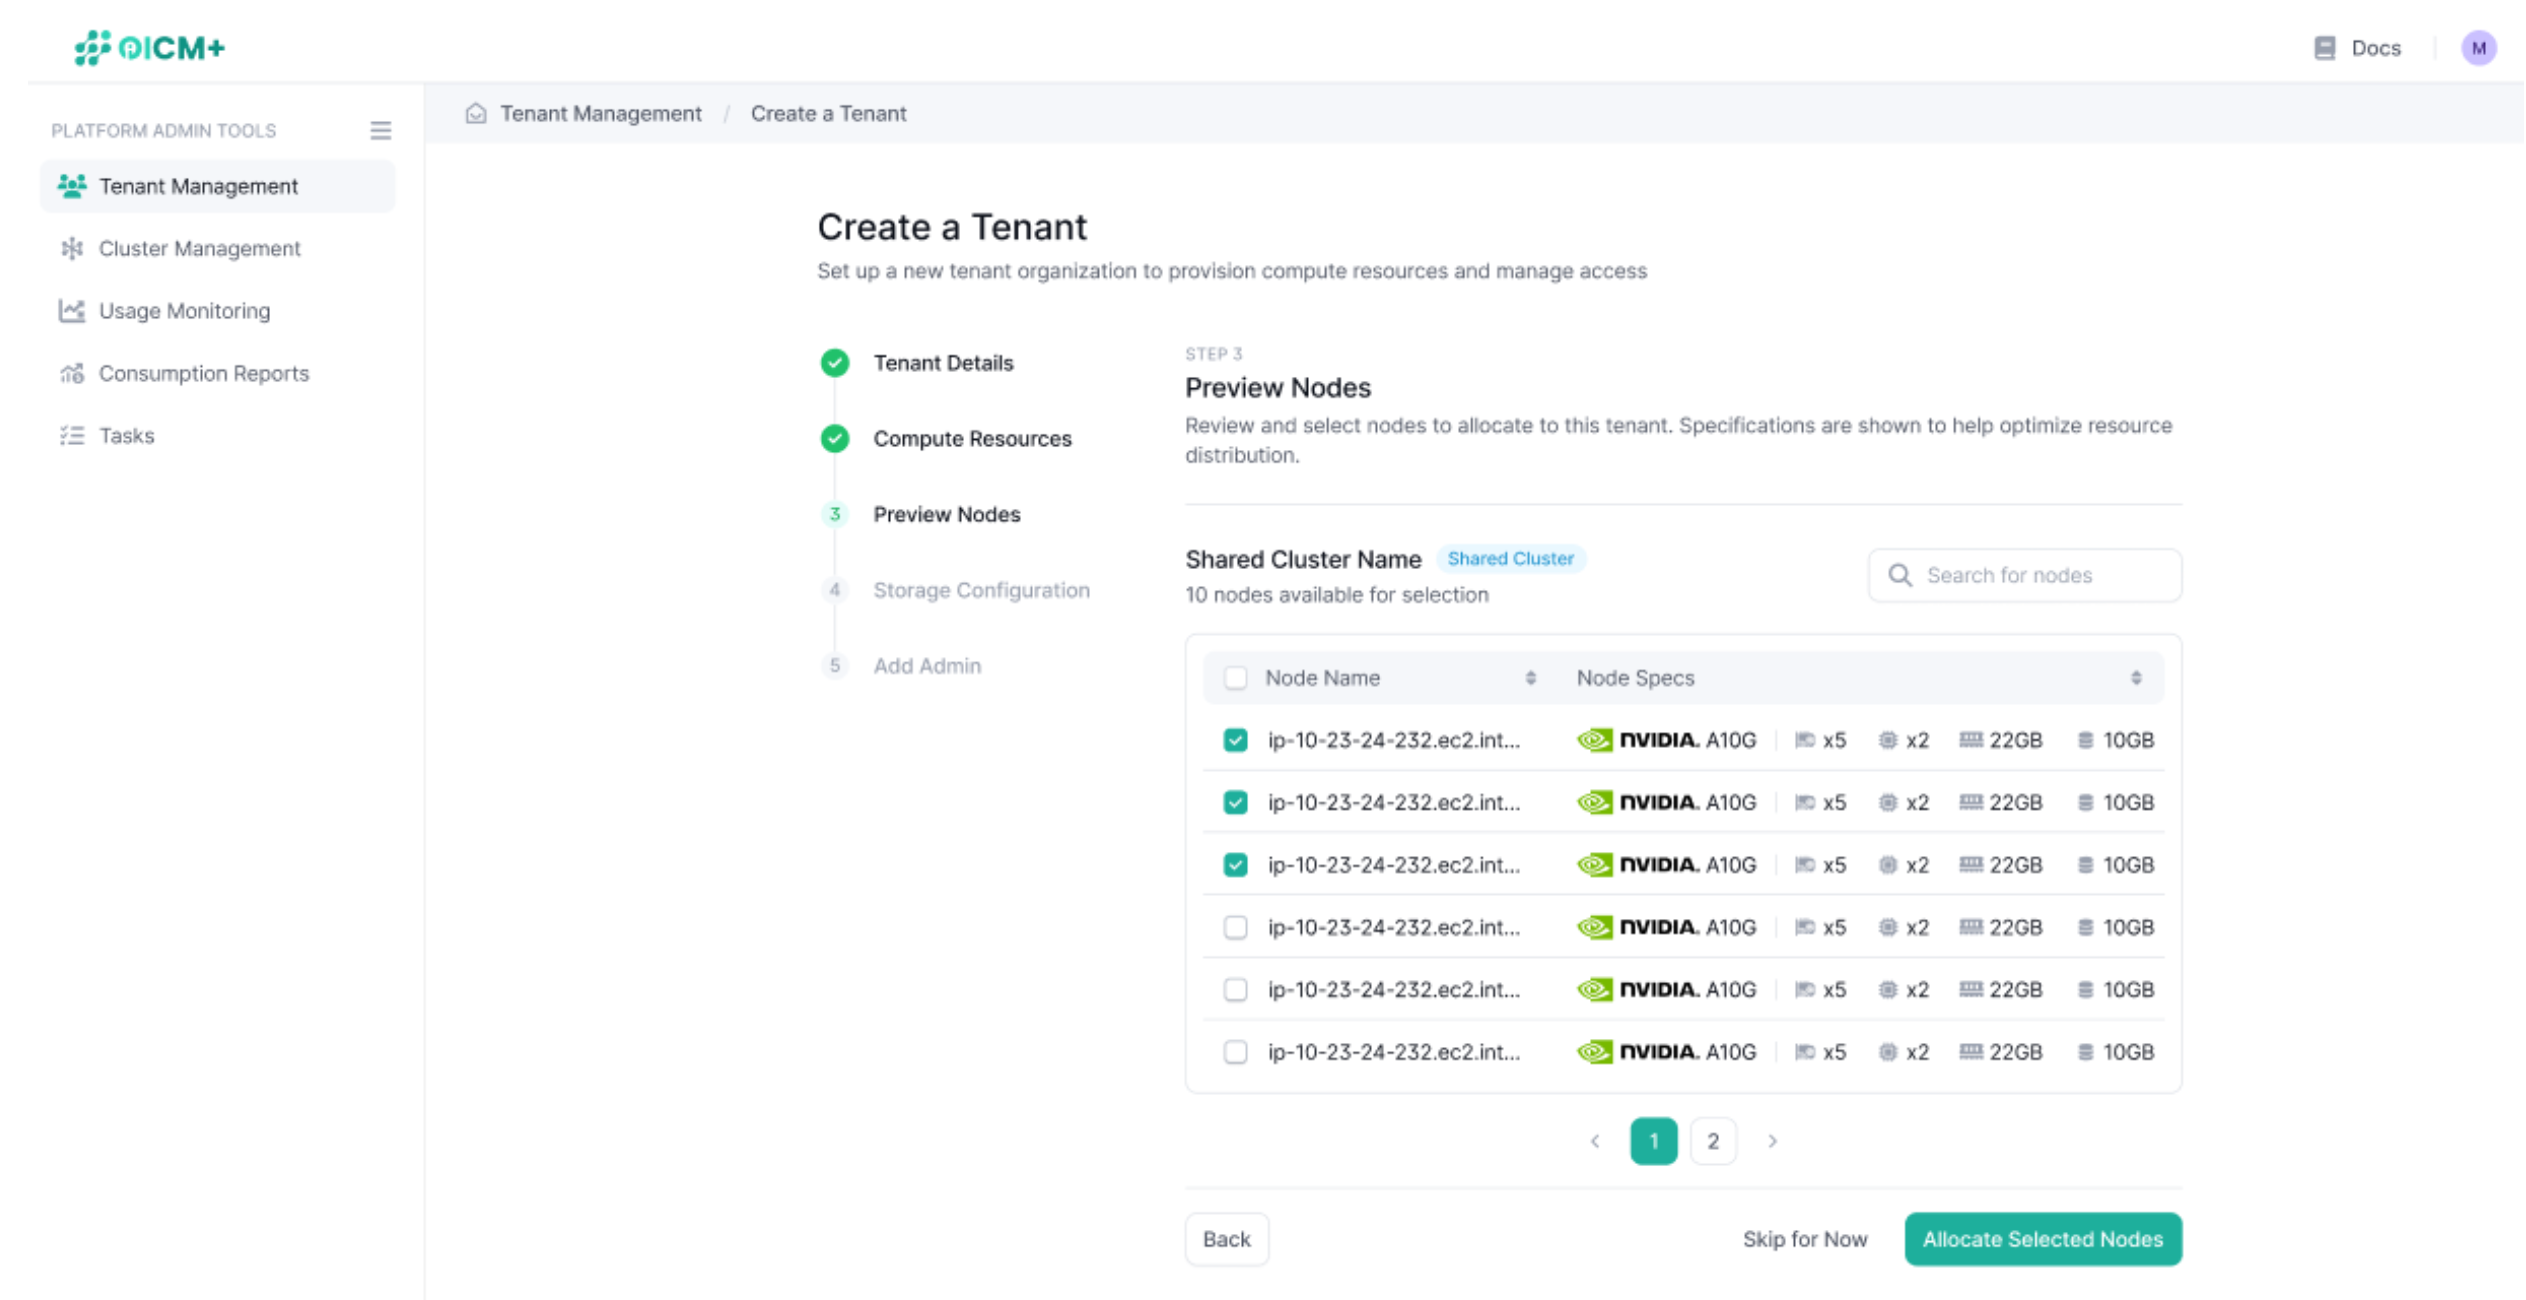
Step 2.3: Node Selection (optional)
- If you picked a shared cluster you will be now able to allocate nodes to your tenant. (note: a tenant will take all the nodes when assigned a dedicated cluster)
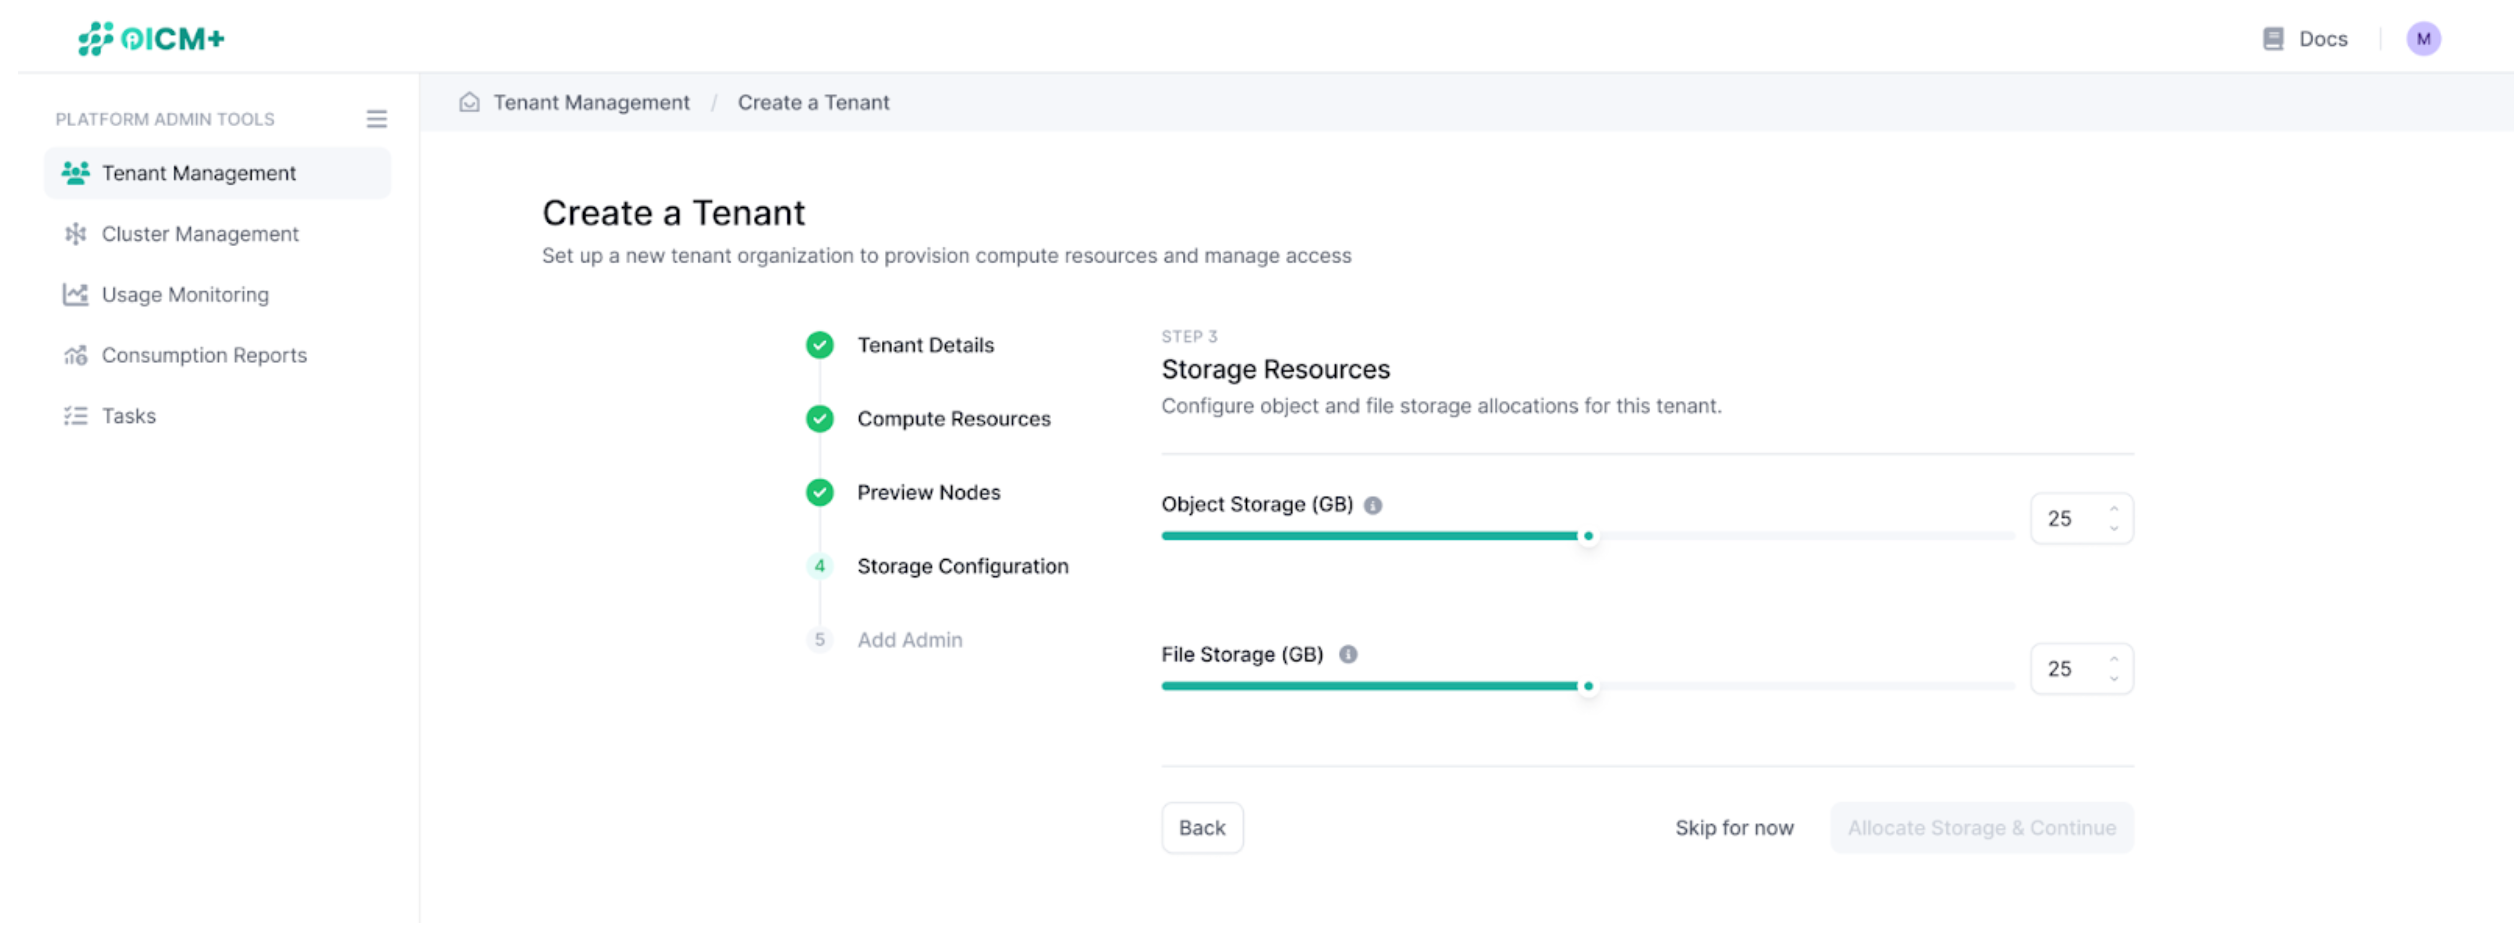
Step 2.4: Configure Storage (optional)
- On the Storage Configuration page, set the object and file storage quotas for the tenant:
- Object Storage (GB): Used to store datasets and models
- File Storage (GB): Is used at runtime by the workloads, most important for when a model is deployed, trained or fine tuned.
- Click Allocate Storage & Continue to proceed, or click Skip for now to move to the next step without setting storage quotas
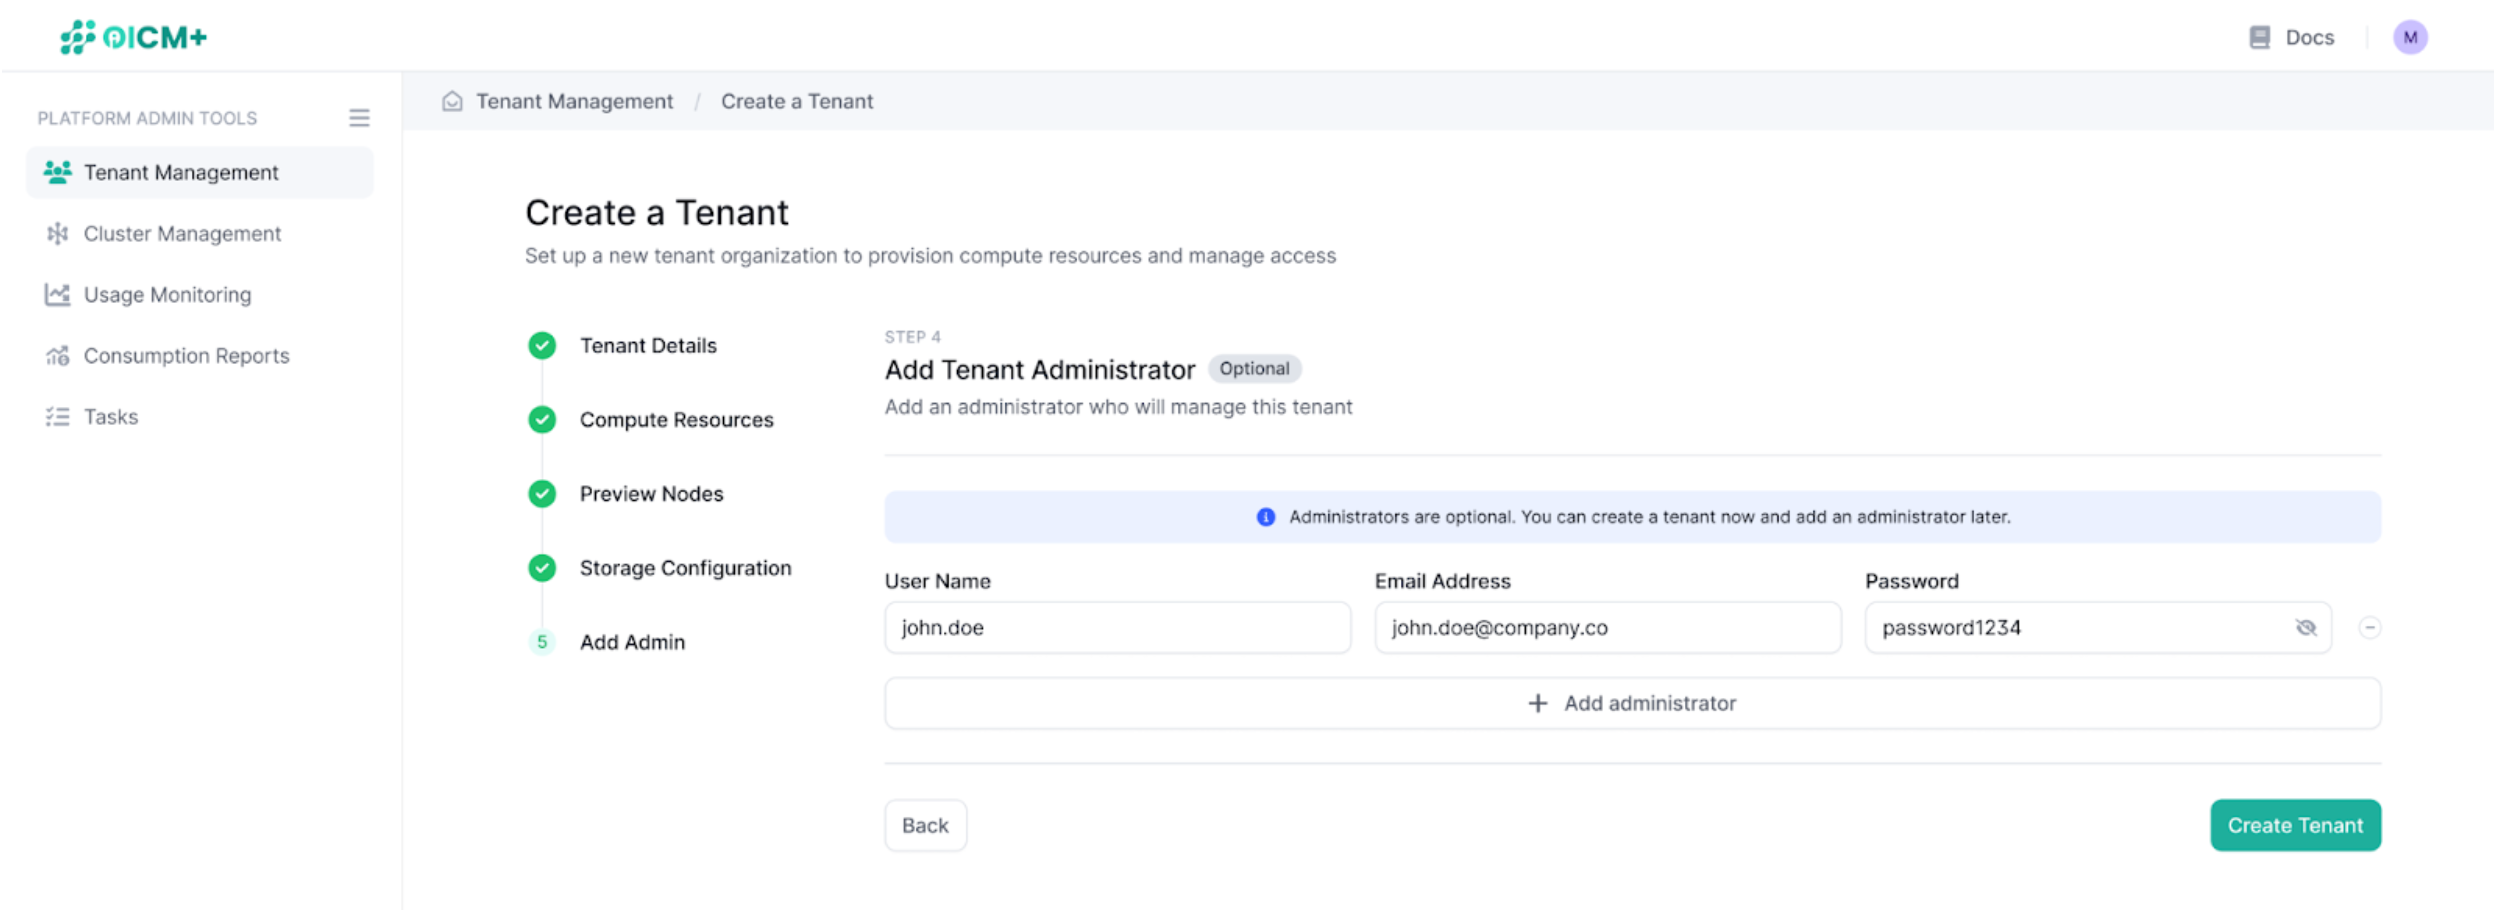
Step 2.5: Add a Tenant Administrator (Optional)
- On the Add Tenant Administrator page, optionally add an administrator to manage the tenant:
- User Name: Enter the administrator’s username (e.g., "admin_user").
- Email Address: Enter the administrator’s email address (e.g., "admin@company.com")
- Password: It’s an initial password, the tenant admin user will be prompted to change it on first login.
- Click Create Tenant to finalize the tenant creation.
Step 3: View and Manage Tenants
-
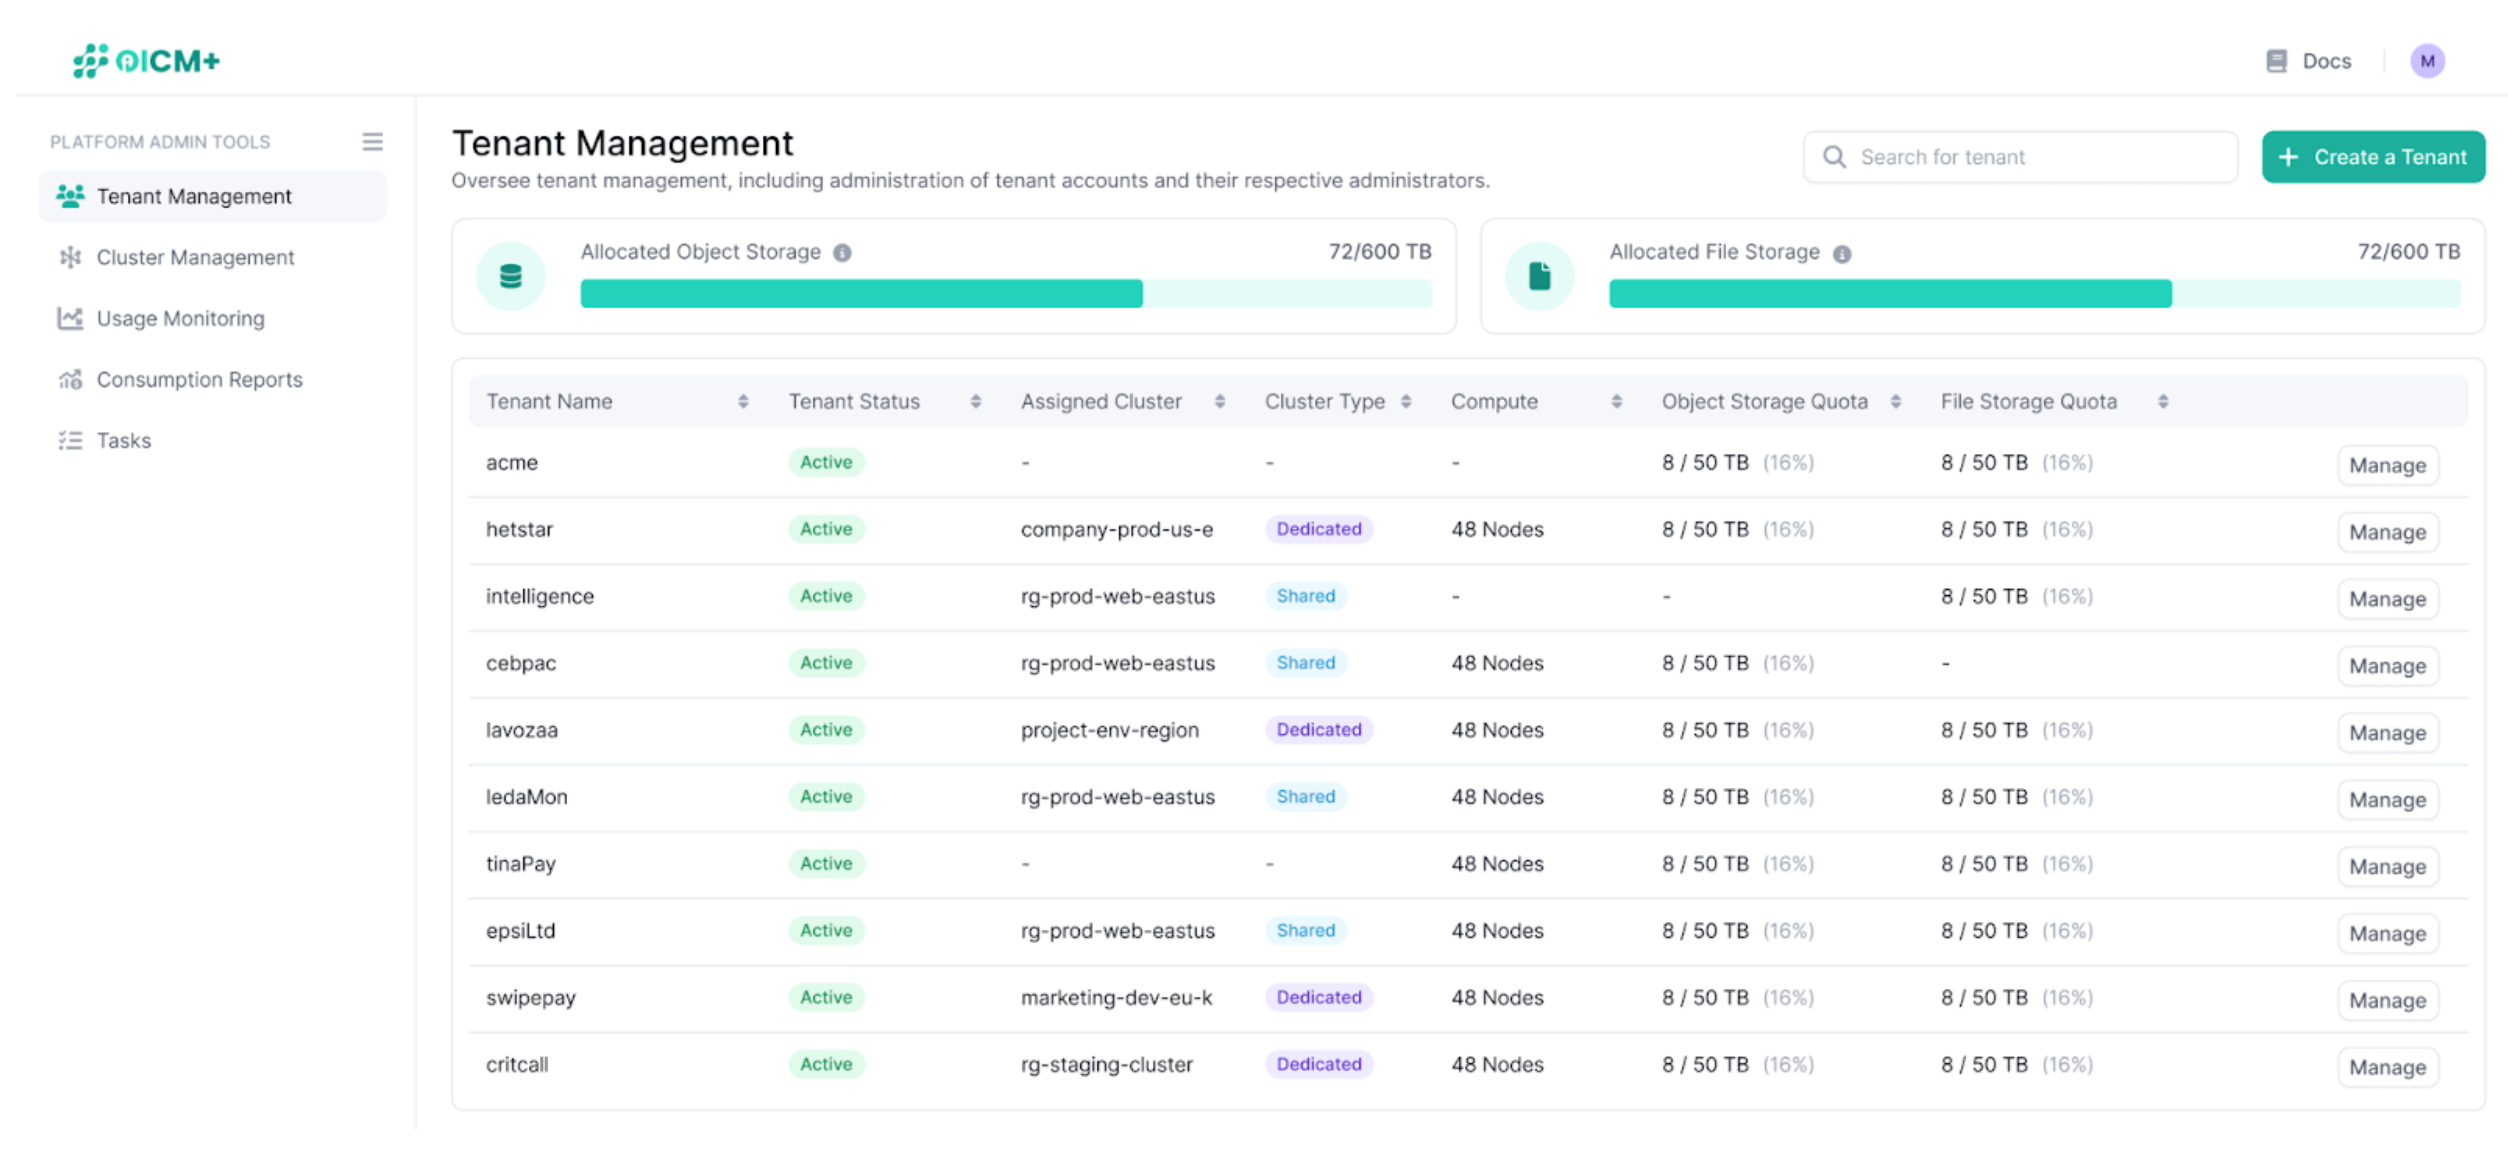
After creating the tenant, you’ll be redirected to the Tenant Management Dashboard, where the new tenant is now listed
-
The dashboard displays the following details for each tenant:
- Tenant Name: The name you provided.
- Assigned Cluster: The cluster allocated to that particular tenant, it will show unassigned if the tenant is not associated with a cluster. (note tenants need to have a shared or dedicated cluster associated to them in order to run any workload)
- Status: The tenant’s status can be enabled or disabled. Note a disabled Tenant will not be able to run any workloads. Platform admins can change this status in the tenant’s settings page
- Cluster Type: Shared or Dedicated
- Compute: The number of nodes allocated
- Object Storage Quota: The allocated object storage, used for storing datasets and models permanently
- File Storage Quota: The allocated file storage, used at run time by workloads to allow data such as models or datasets to be accessible by the kubernetes Jobs
- Last Updated: Relates when the tenant details were last updated
-
Click Manage to view or edit the tenant’s details and resources allocated to them
Step 4: Manage Tenant Resources
-
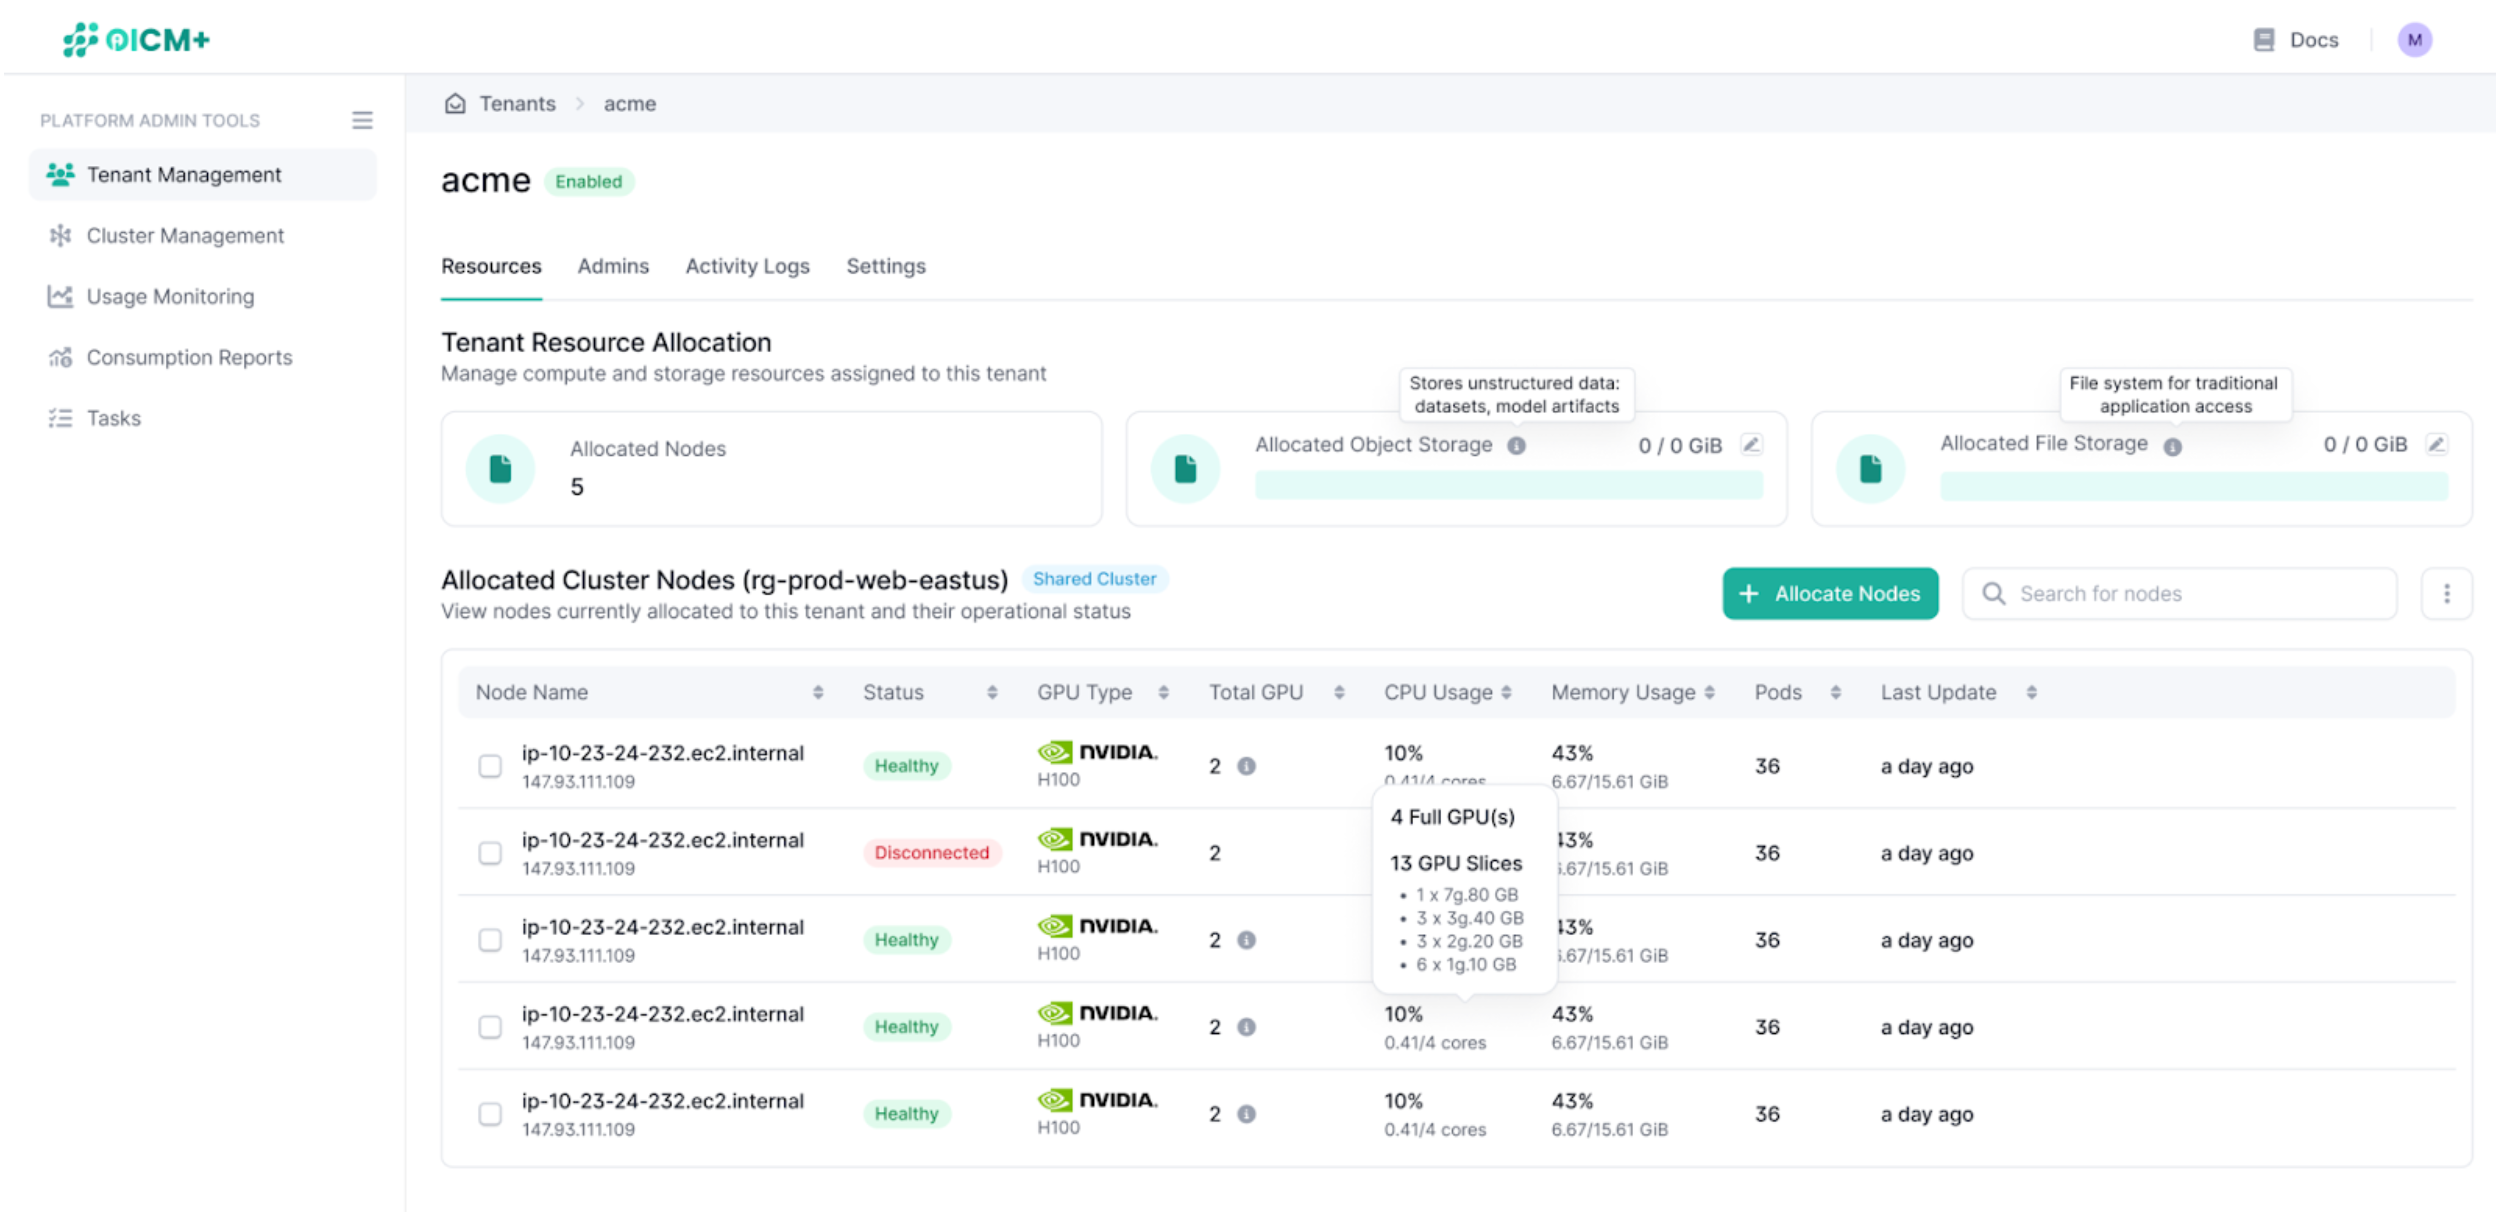
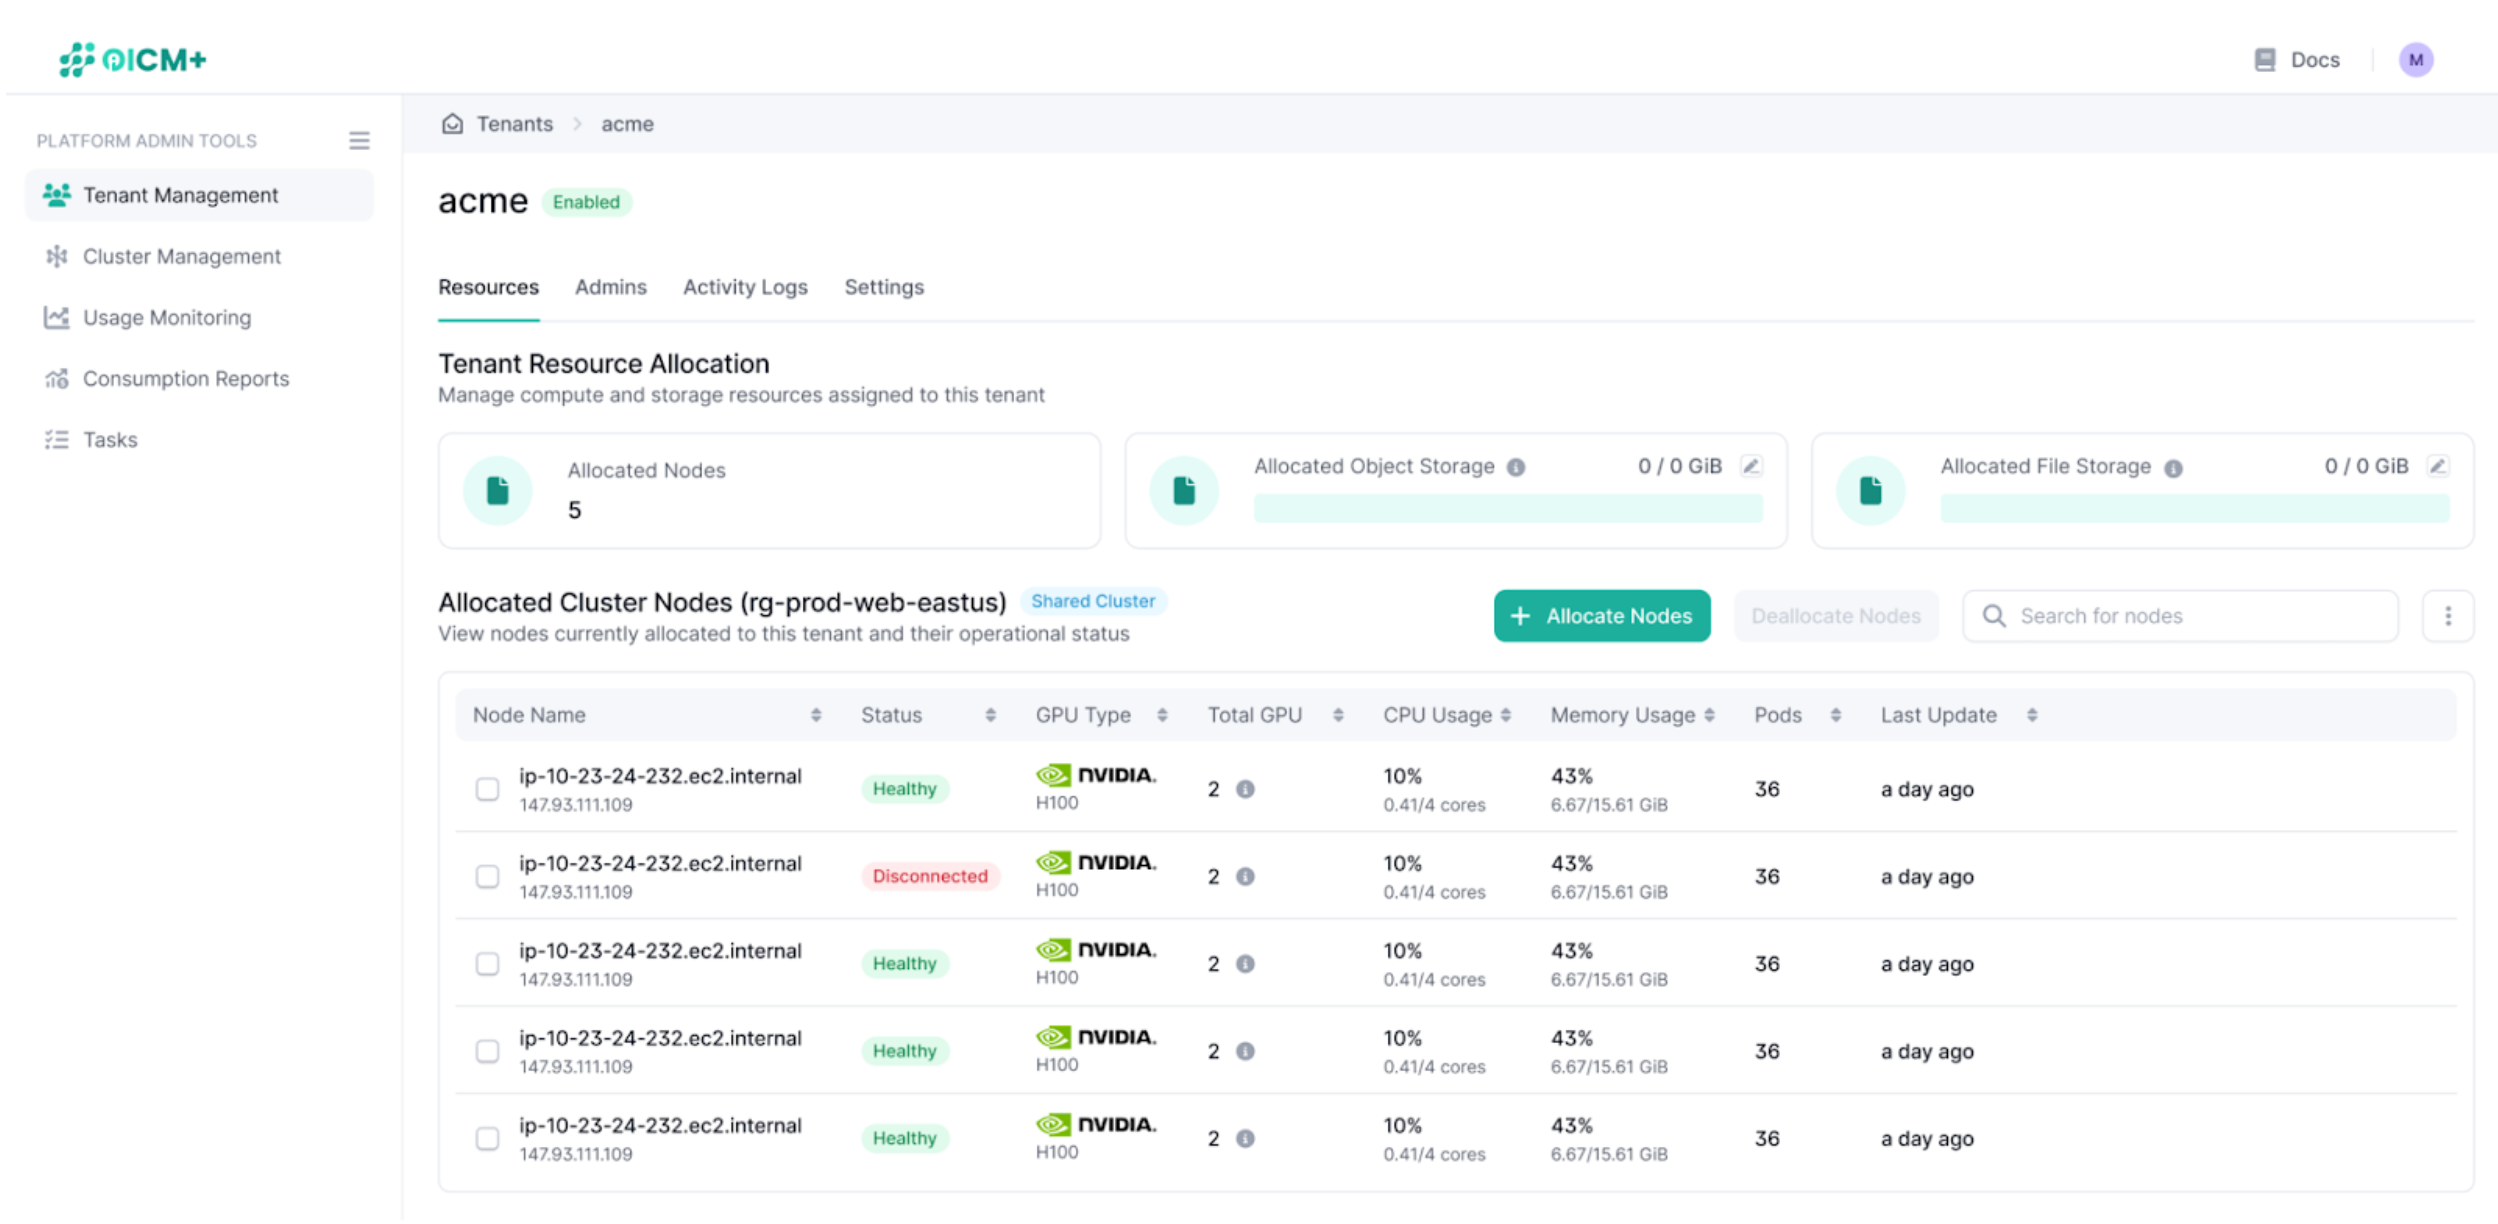
From the Tenant Management Dashboard, click Manage on a tenant to access its details page. On the tenant’s details page, navigate to the Resources tab to manage compute and storage resources:
- View Allocated Resources:
- Number of Allocated Nodes
- Allocated Object Storage (click on the pencil icon to edit this quota)
- Allocated File Storage (click on the pencil icon to edit this quota)
- View Allocated Cluster Nodes:
- See the list of nodes allocated to the tenant, including:
- Node Name (ip)
- Status, can be either healthy, unhealthy or disconnected
- GPU Type (Nvida A10G, AMD MI300, etc…)
- Total GPUs (Number of GPUs in that node)
- CPU Usage (CPU Core Usage)
- Memory Usage (Total RAM memory available and in use)
- Pods (Number of pods running in this node)
- Workloads (if there’s a workload. E.g., model training, deployment, etc… using that node.)
- Last Updated (last time this info was updated)
- See the list of nodes allocated to the tenant, including:
- View Allocated Resources:
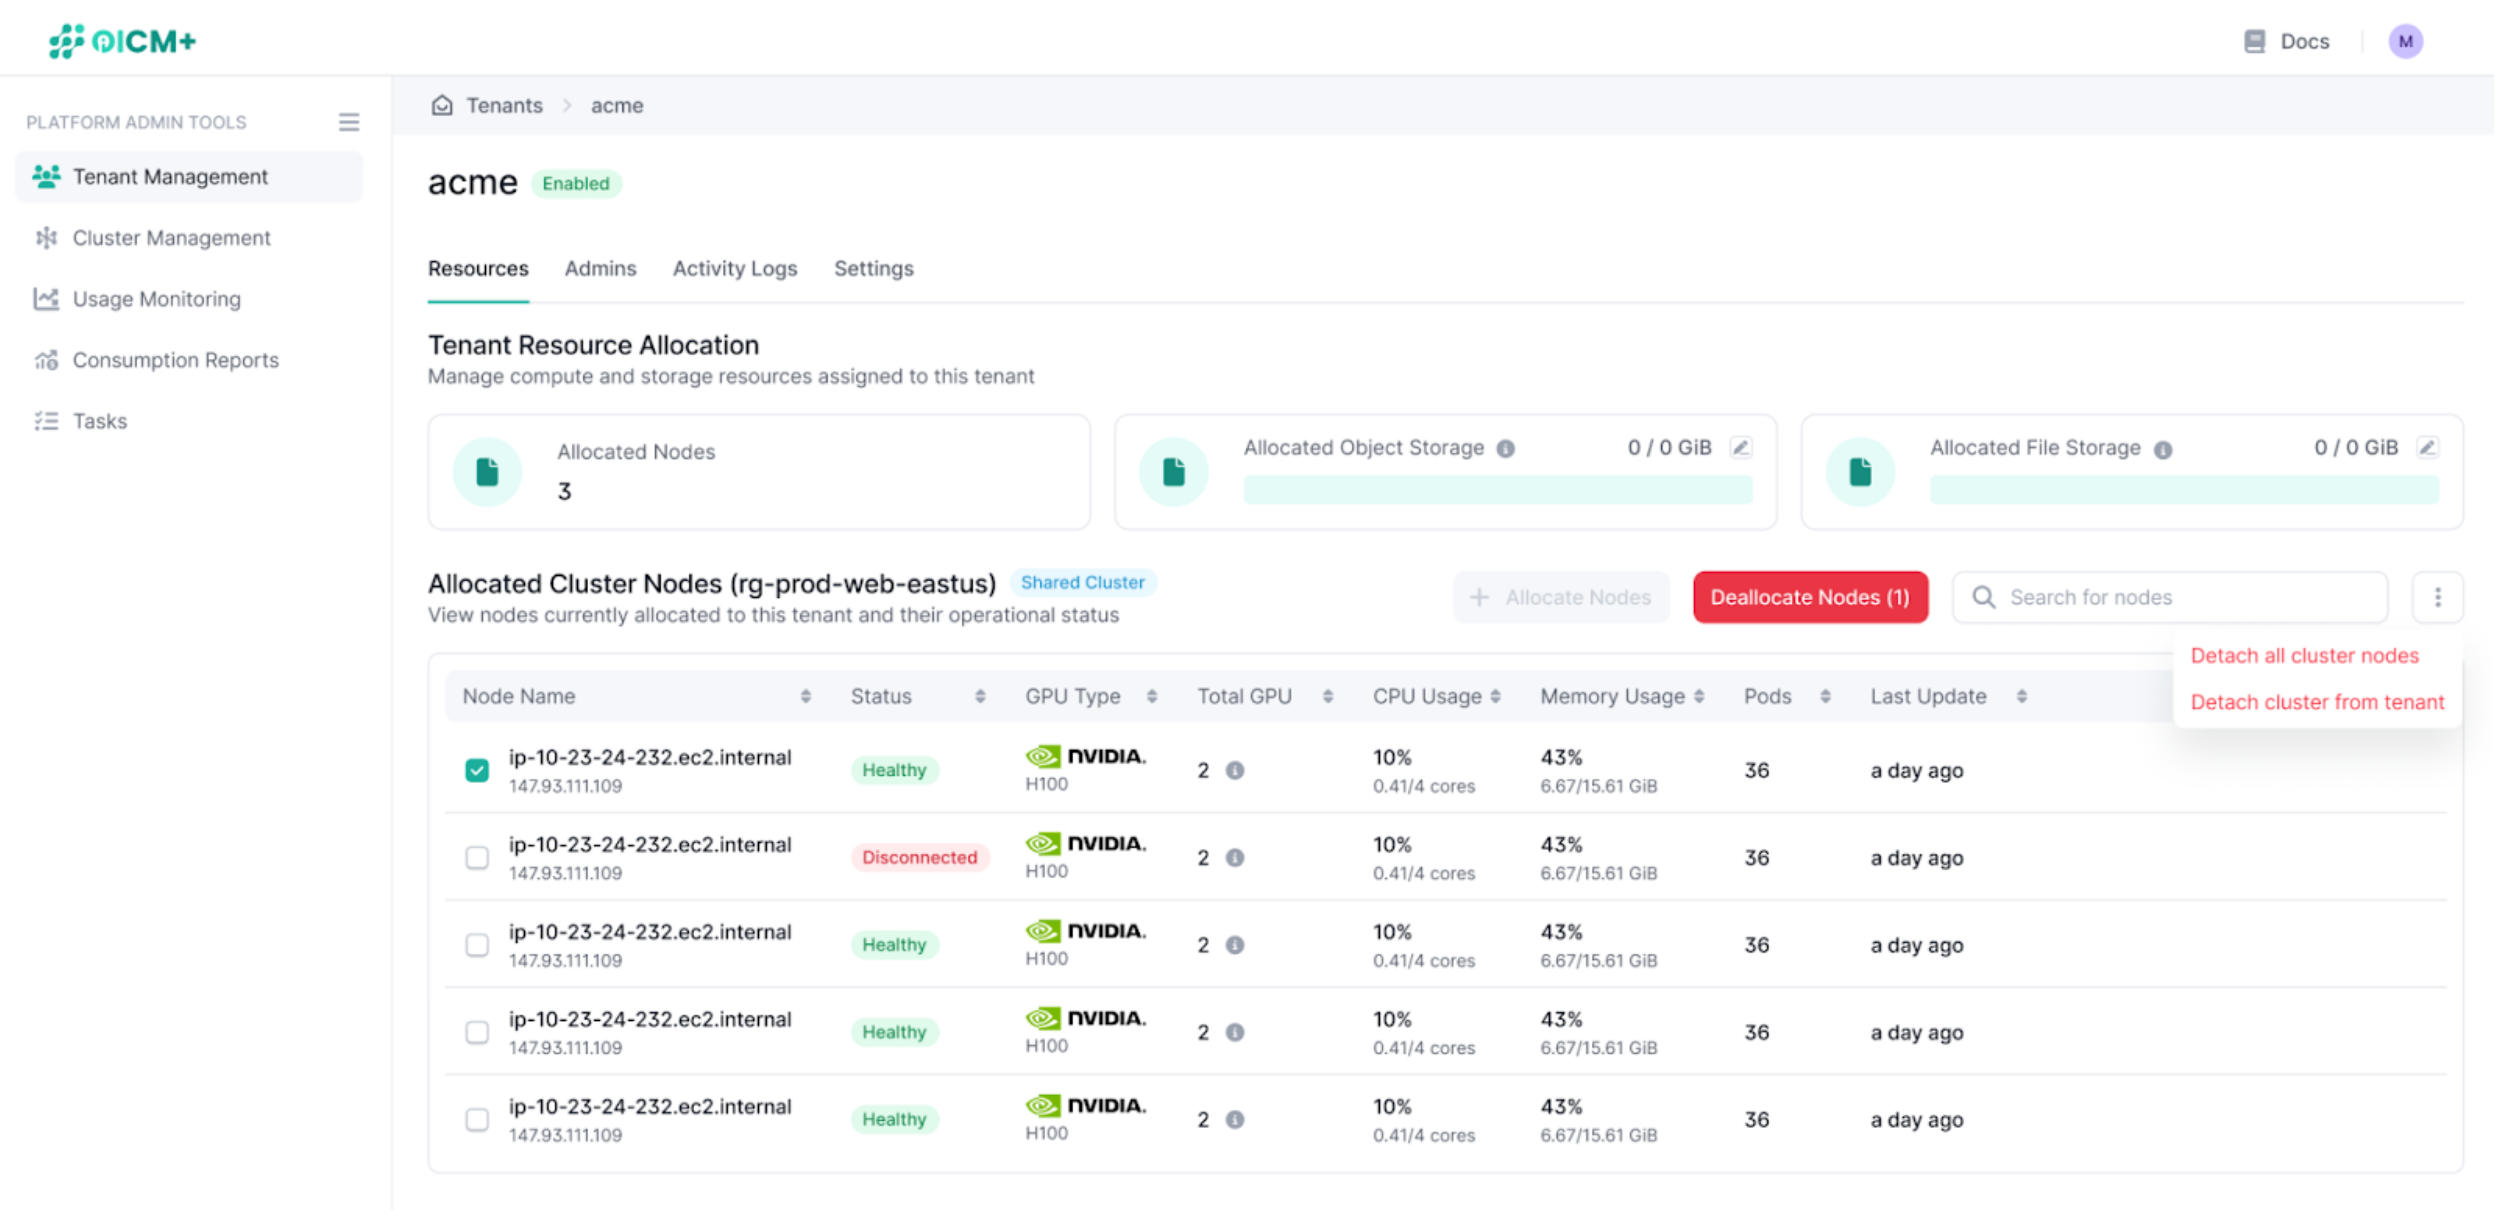
2. Allocate or Deallocate Nodes:
- Click Allocate Nodes to add more nodes from the assigned cluster (if it’s a Shared Cluster) or assign a new cluster.
- To deallocate nodes, select the nodes you want to remove and confirm the deallocation.
- You can also detach from this cluster by clicking the 3 dot icon on the right.
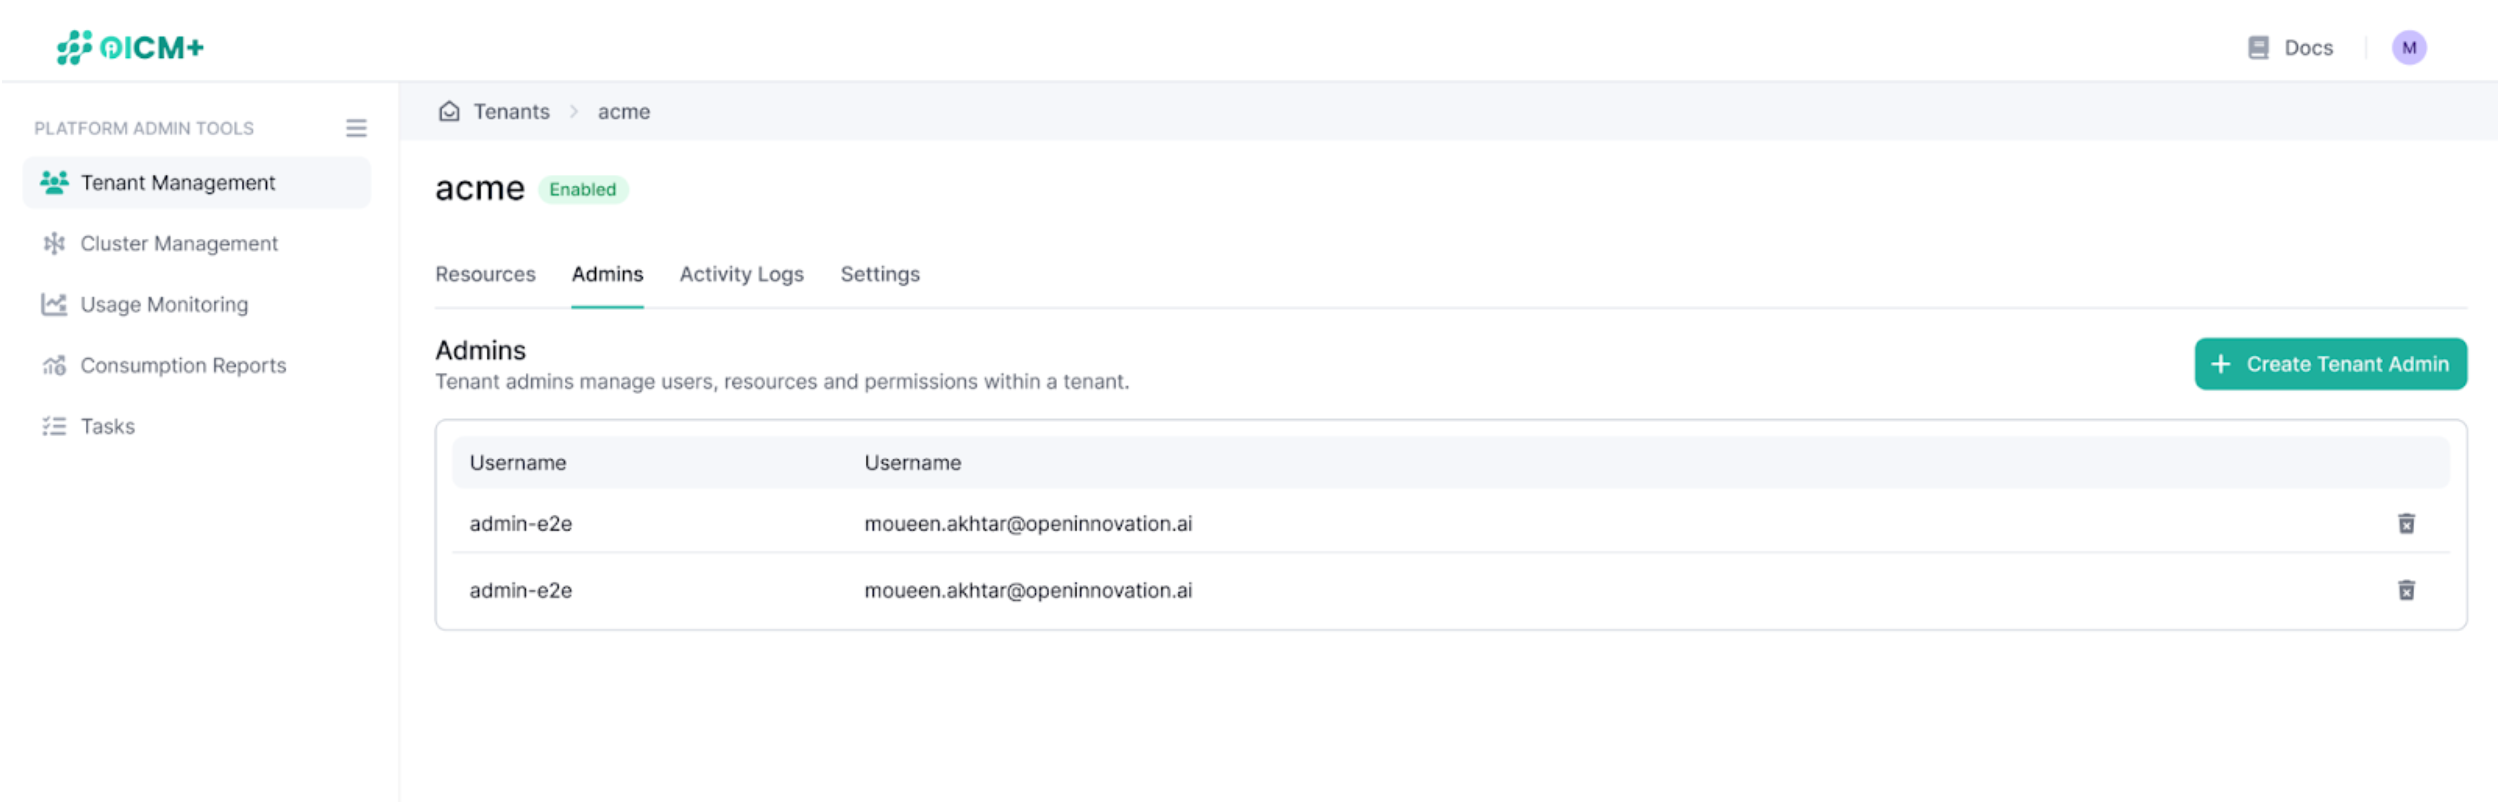
3. Tenant Admins
In the admins section you are able to add or remove tenant admins for that tenant account. Click “Create Tenant Admin” to insert username, email and password to add a new user.
4. Tenant Settings
In the tenant settings you are able to delete and disable tenants:
- Disable tenant: Allows platform admins to block access to the tenant account without deleting data. All users belonging to this account will be unable to perform any action in the platform.
- Schedule Tenant Deletion: Allows platform admins to delete tenant accounts deleting all user data as well. Deletion does not happen immediately and is instead scheduled to happen after a predefined amount of time.
Next Steps
- Tenant Admin Tools Overview – Explore tenant-level administrative capabilities.
- Cluster Management – Import, configure, and manage Kubernetes (K8s) clusters within the platform.