Getting Started with A/B Testing
Below is the step-by-step process to set up, run, and analyze an A/B test experiment.
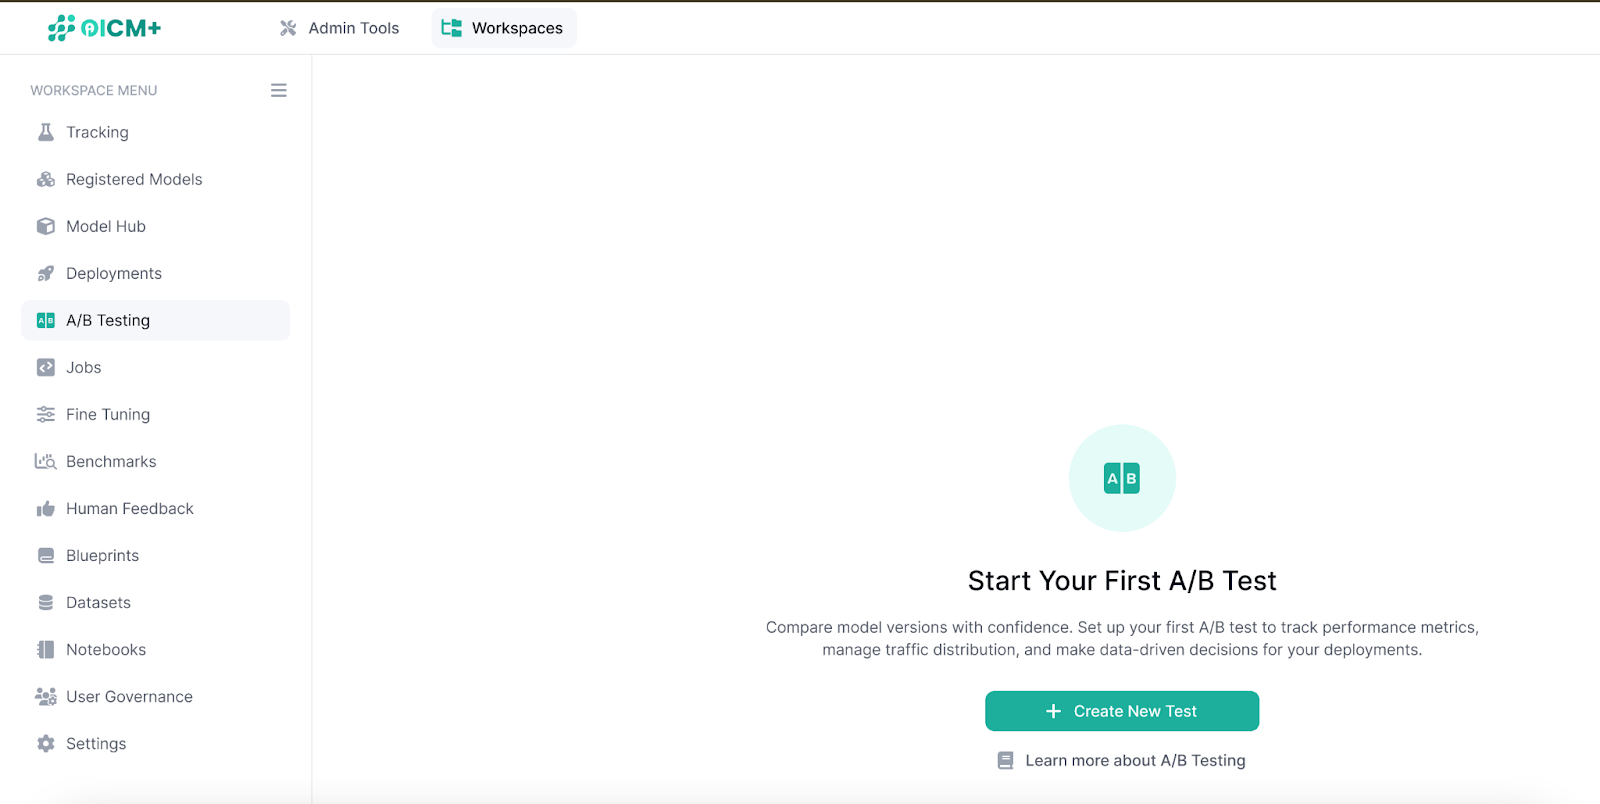
Step 1: Navigate to the A/B Test Section
- Log in to the platform and navigate to the A/B Test Section in the sidebar or main navigation menu and click create
Step 2: Create a New A/B Test
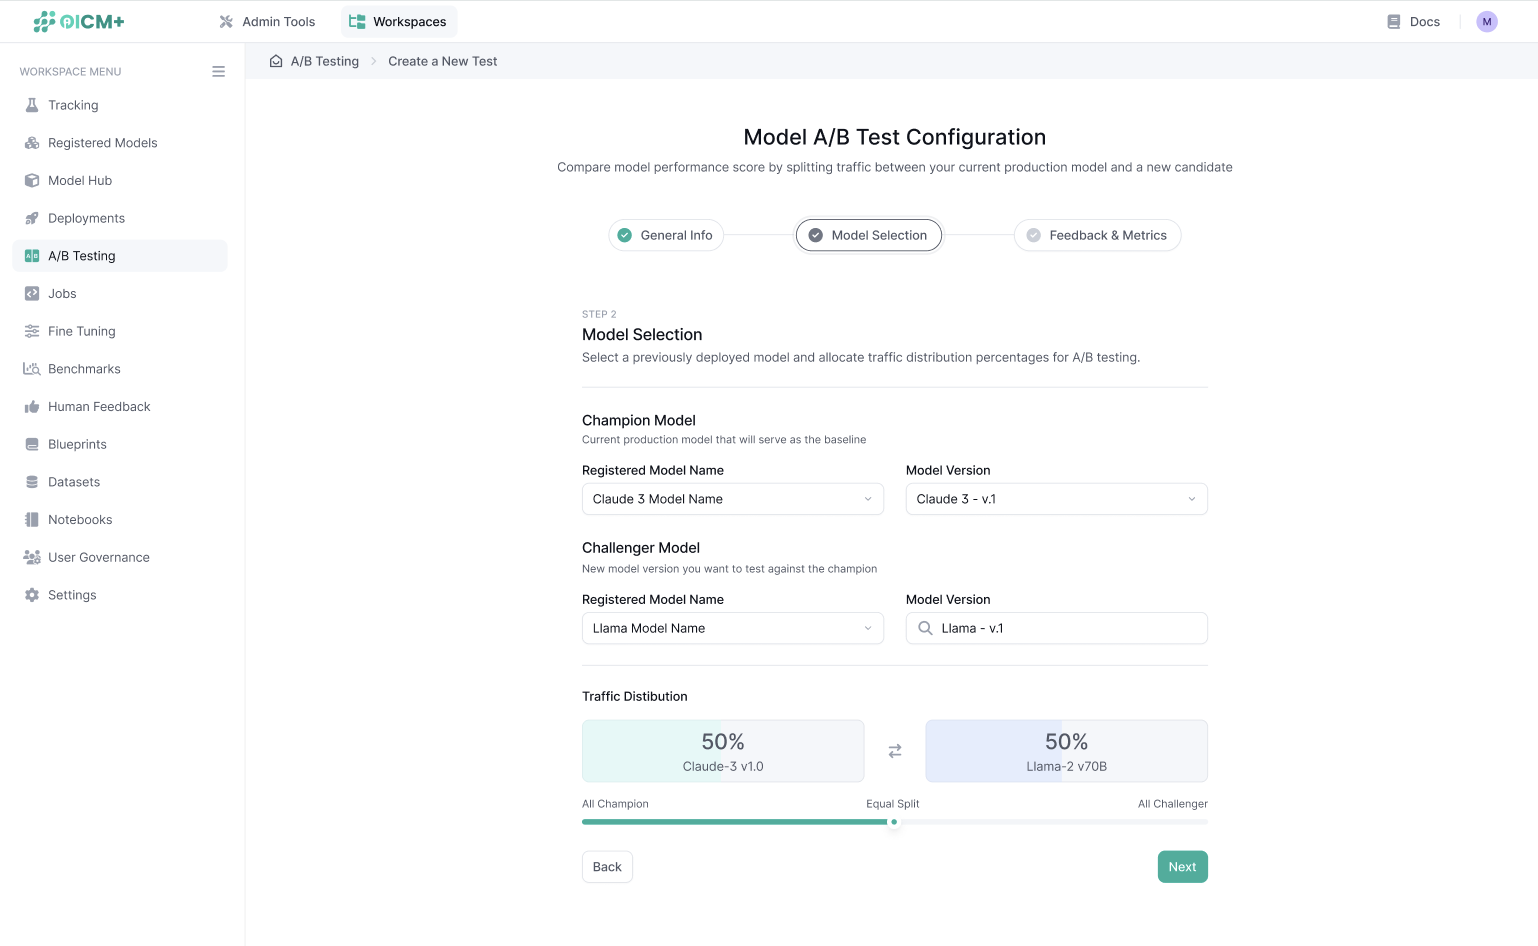
- Select Models:
- Choose the Champion Model (control) and Challenger Model (test) from a list of previously deployed models.
- Note: Models can be different versions of the same model (e.g., v1 vs. v2) or from entirely different model families (e.g., Deepseek R1 vs. Llama 3.2).
- Set Traffic Split Ratio:
- Define the percentage of incoming traffic to be routed to each model.
- Default: 50% (equal split between Champion and Challenger).
- e.g.,: Setting the split to 70%/30% routes 70% of traffic to the Champion Model and 30% to the Challenger Model.
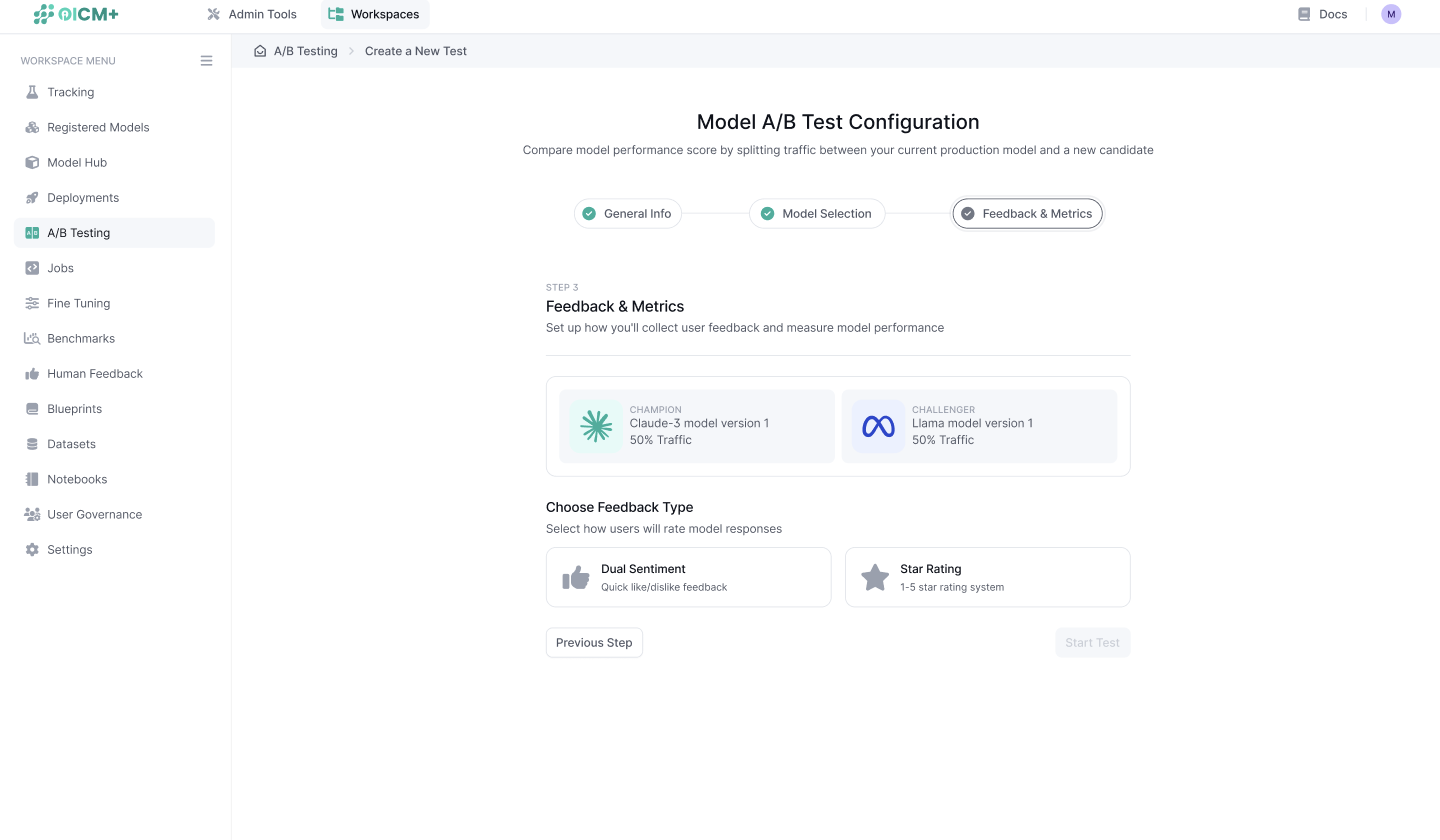
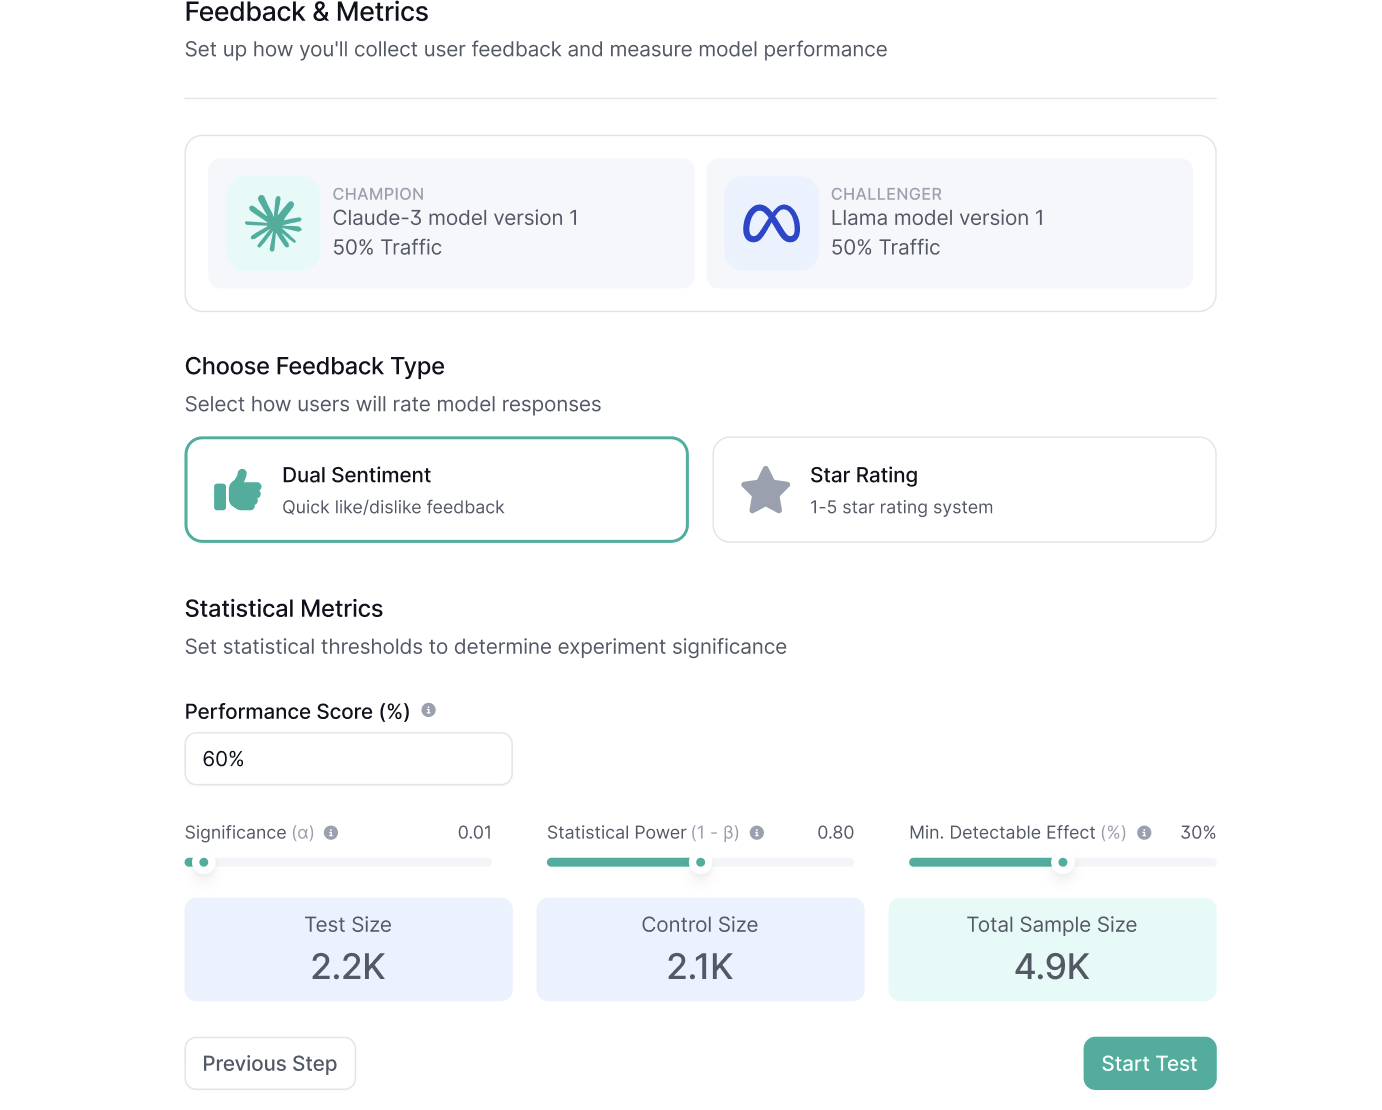
Step 3: Define Feedback Type
- Choose how feedback will be collected from end users to assess model performance. Options include:
- Dual Sentiment (Like/Dislike): Users provide binary feedback (default option).
- Rating (1–5): Users provide a numerical rating on a scale of 1 to 5.
- Note: The feedback type determines how performance metrics are aggregated and analyzed during the experiment and can’t be changed after the experiment starts
Step 4: Define Statistical Metrics
To ensure the A/B test results are statistically significant, define the following parameters
- Significance (α):
- Default: 0.05
- The significance value is the probability that a statistically significant difference is detected, given no actual difference exists. This is commonly referred to as the probability of a false positive.
- Statistical Power (1 - β):
- Default: 0.8
- The probability that the minimum detectable effect will be detected, assuming it exists. The default value is set to 0.8, but can be adjusted between 0.65 and 0.95. A higher value reduces the frequency of false negatives but requires a larger sample size
- Minimum Detectable Effect Size (δ):
- Default: 30%
- The smallest improvement threshold required to declare the test model superior.
- Baseline Performance Score:
- An estimated baseline rating for the Champion Model, based on historical data or prior experiments. This helps calculate the required sample size for the experiment. Defaults to 70%.
- For dual sentiment (like/dislike), it’s calculated as Likes / (Likes + Dislikes).
- For a 1-to-5 rating system, it’s the sum of all ratings divided by the number of rated responses.
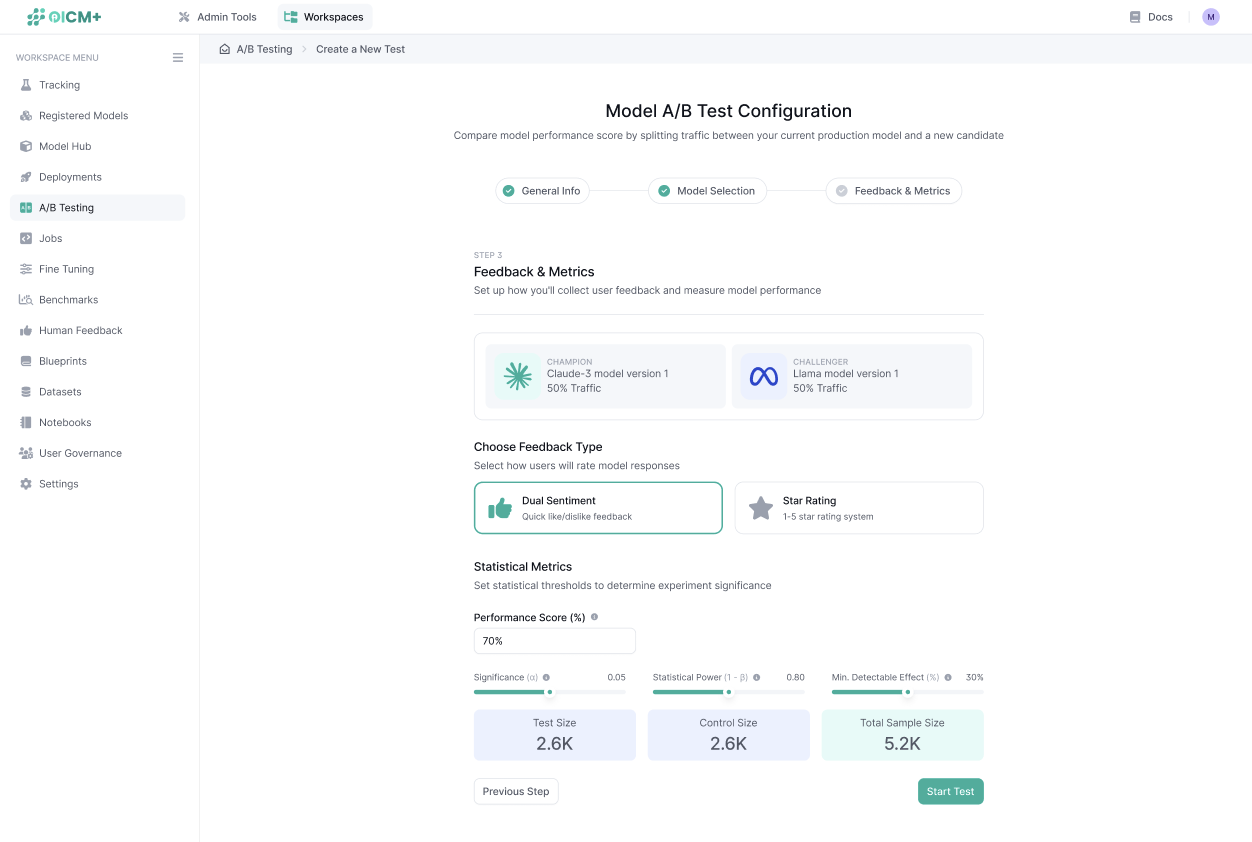
Once statistical metrics are defined, the platform calculates and displays the recommended sample size you will have to collect in order to achieve statistical significance. This ensures the experiment provides results that are accurate. You will be able to end the experiment earlier without reaching the total sample size, with the risk of course of the results potentially being less accurate.
Step 5: Start the A/B Test
- Review all settings (models, traffic split, feedback type, statistical metrics, and sample size).
- Click the Start button to begin the A/B test experiment.
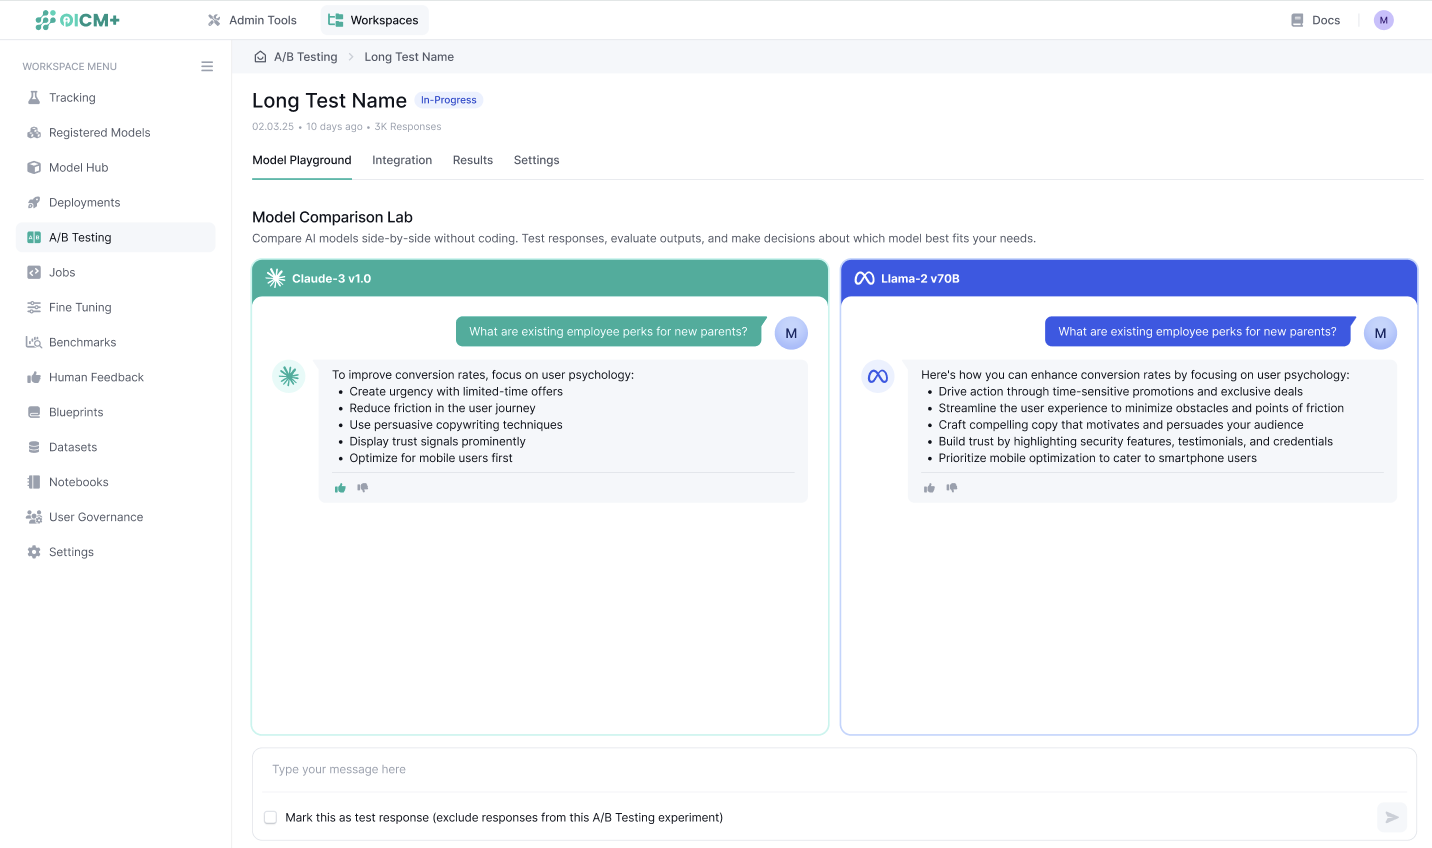
Step 6: Test Models in the A/B Test Playground
- To manually test and compare model responses, navigate to the A/B Test Playground.
- Send test messages and view the responses of both models side by side.
- Optional you can also provide feedback (e.g., like/dislike or rating) to evaluate the models.
- By default, responses and feedback in the playground are not included in the A/B test experiment. To include them, uncheck the Exclude Playground Feedback box.
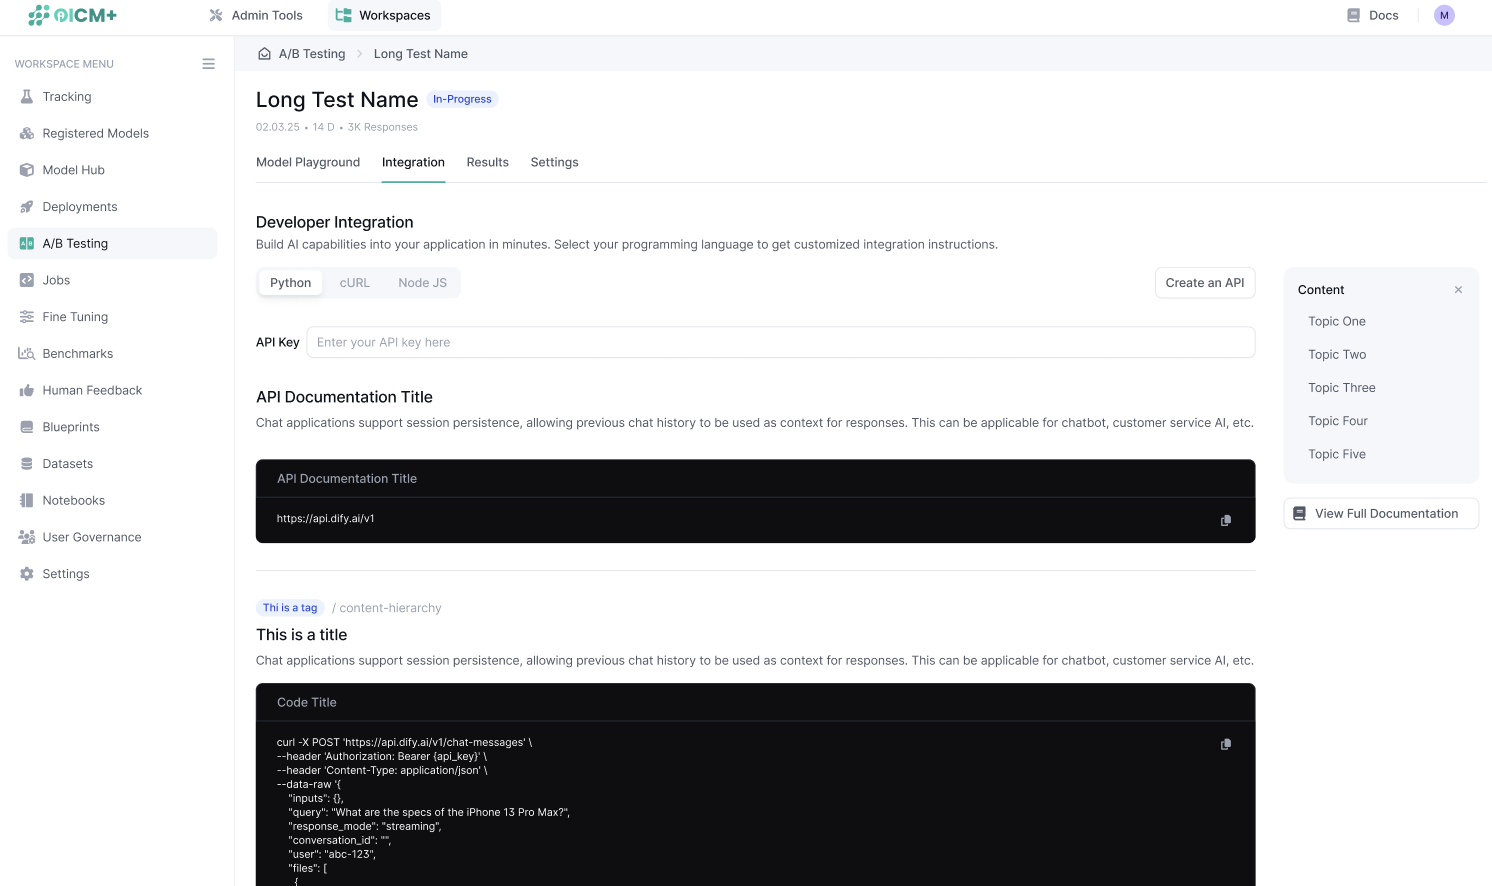
Step 7: Integrate with Your Application
- After starting the test, you can go ahead to the Integration Page, which provides instructions on how to integrate the A/B test inference endpoint into your application.
- Copy the provided endpoint URL and follow the integration instructions to route traffic to the A/B test.
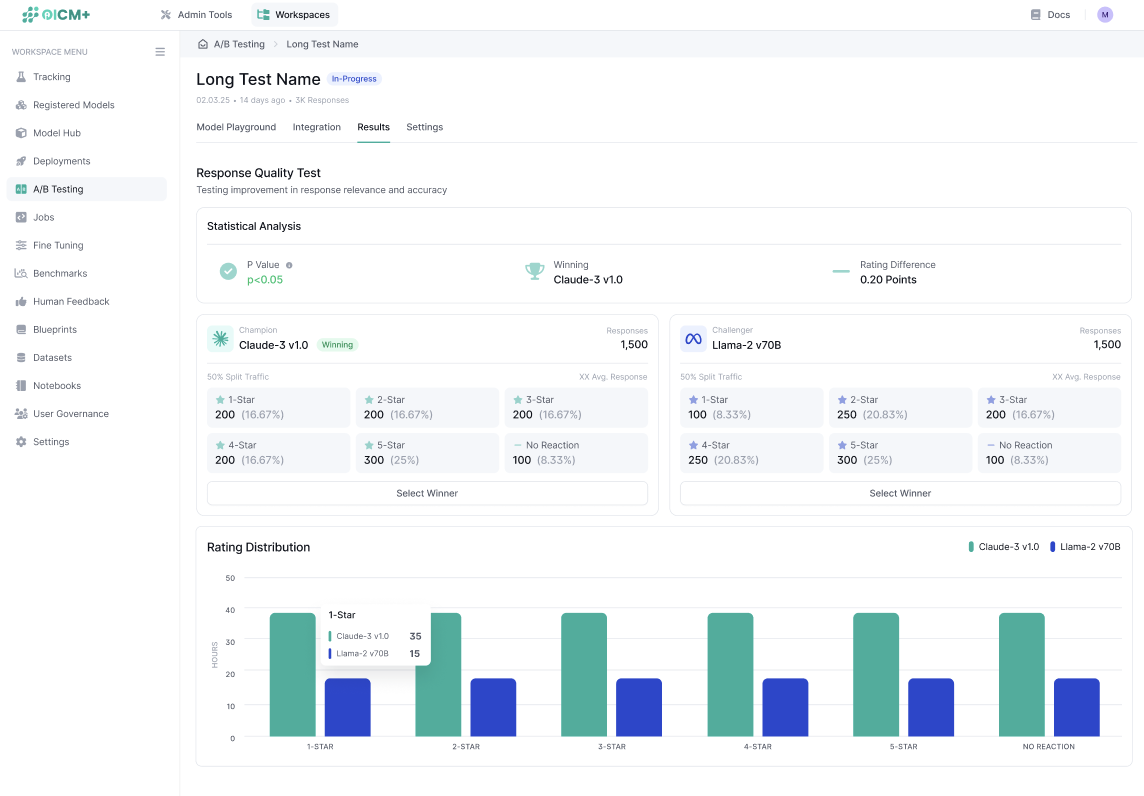
Step 8: Monitor Results in Real Time
- Navigate to the A/B Test Results Page to monitor the experiment in real time.
- View key metrics, including:
- Traffic split and request counts for each model.
- Feedback aggregated by type (e.g., like/dislike counts or average ratings).
- Statistical significance indicators to track progress toward declaring a winner.
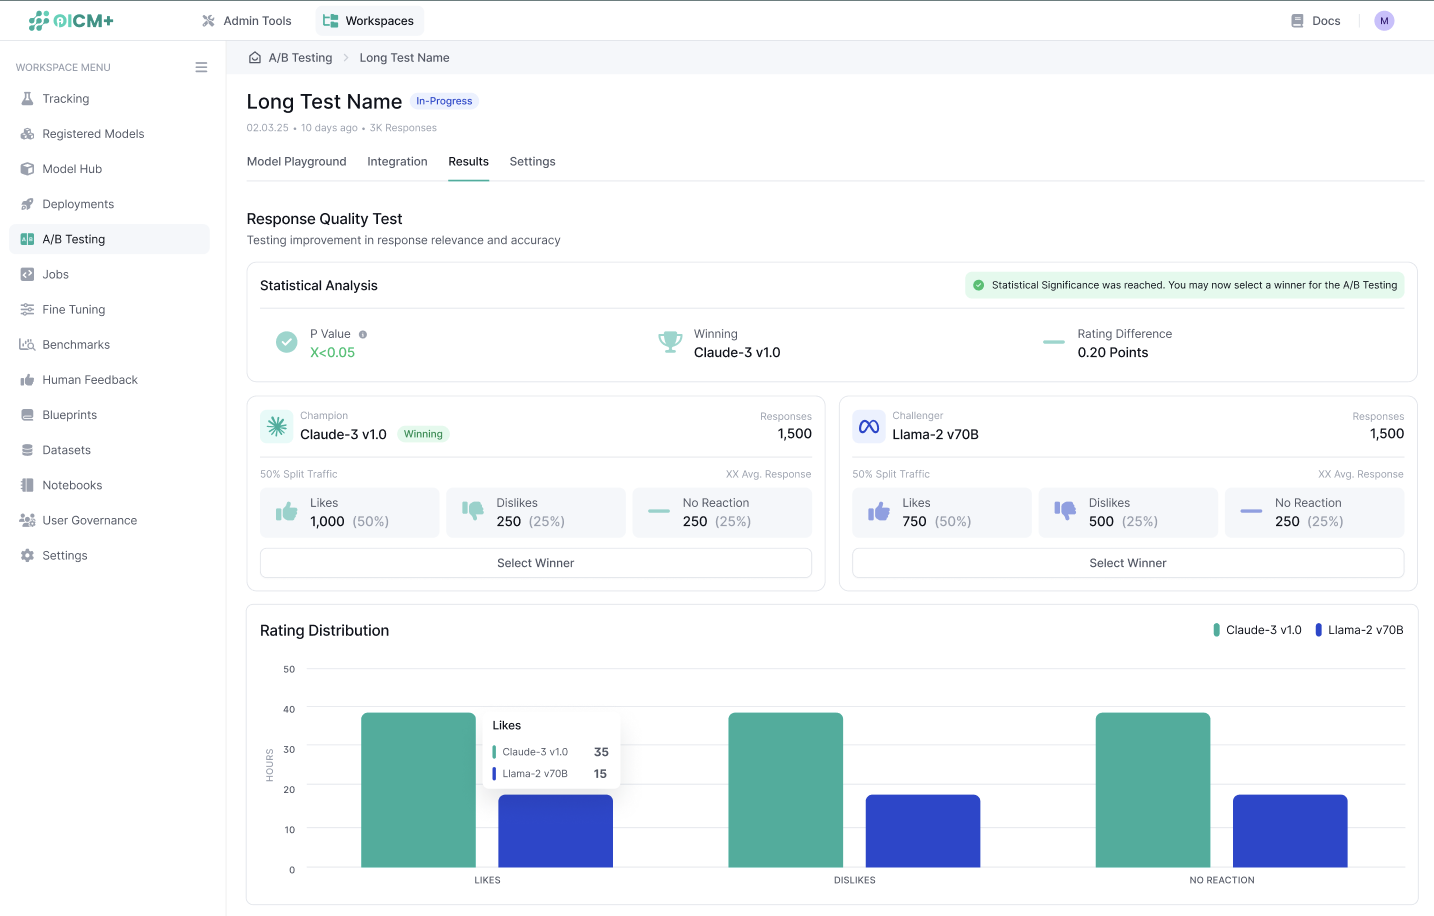
Step 9: Declare a Winner and Finalize the Experiment
- The platform will let you know the model that is currently winning at all times. It’s recommended to wait until statistical significance is reached in order to declare the final winner but you can declare the winner at any time.
- Navigate back to the A/B Test Results Page and click Declare Winner to select the superior model (Champion or Challenger).
- If desired, redirect all traffic to the winning model. The existing inference endpoint will continue to function as usual, now routing 100% of traffic to the selected model.
Next Steps
- Experiments – Design, launch, and monitor broader experiment workflows that complement A/B testing.
- Registered Models & Versions – Track model lineage and seamlessly promote the winning challenger to production.
- Inference REST API – Integrate your A/B‑test endpoint into external applications via secure, token‑based calls.
- Human Feedback Fundamentals – Learn best practices for collecting and managing real‑time user feedback to strengthen experiment results.