Resource Management
Cluster admins can assign computing nodes, object storage, and network file storage (NFS) quotas to tenants. This helps distribute resources effectively across multiple tenants.
1. Main Page Overview
The Resource Management page offers a high-level view of node allocations:
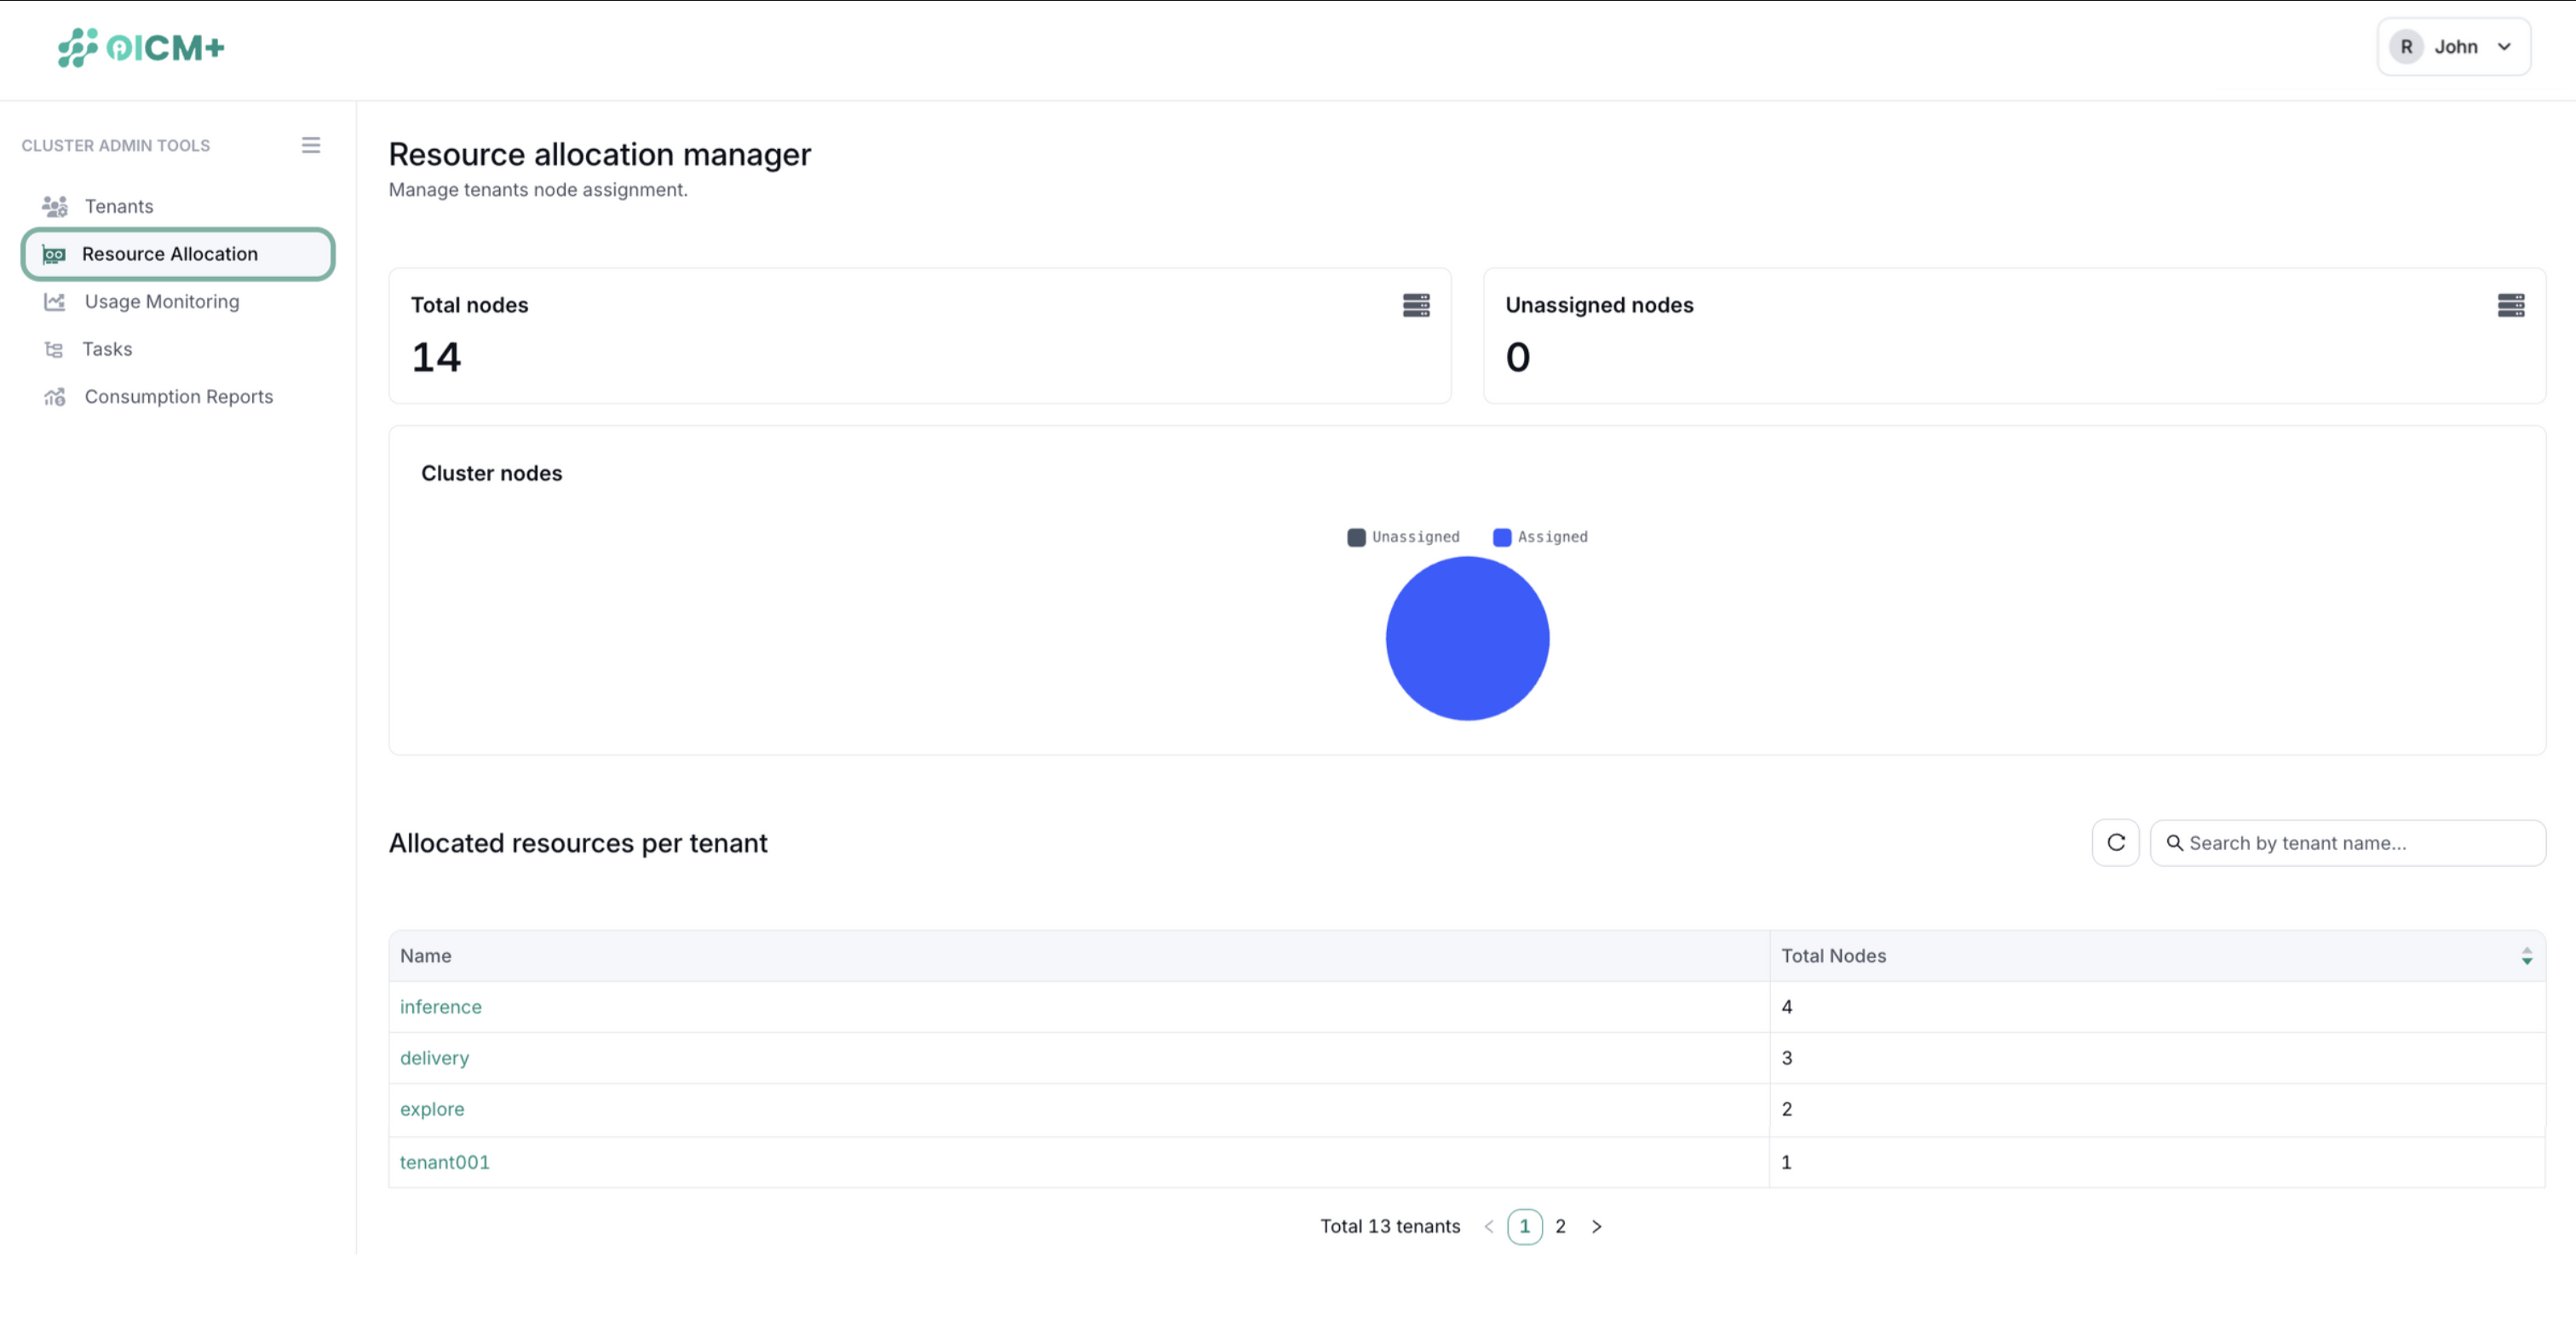
1.1 Dashboard
- Total Nodes – The overall number of available computing nodes.
- Unassigned Nodes – Nodes not yet allocated to any tenant.
- Pie Chart – Visual breakdown of assigned vs. unassigned nodes.
1.2 Tenants List
A table displays each tenant’s allocated nodes:
- Tenant Name
- Total Nodes
2. Tenant Node Management
Clicking a tenant entry opens the Tenant Node Management interface:
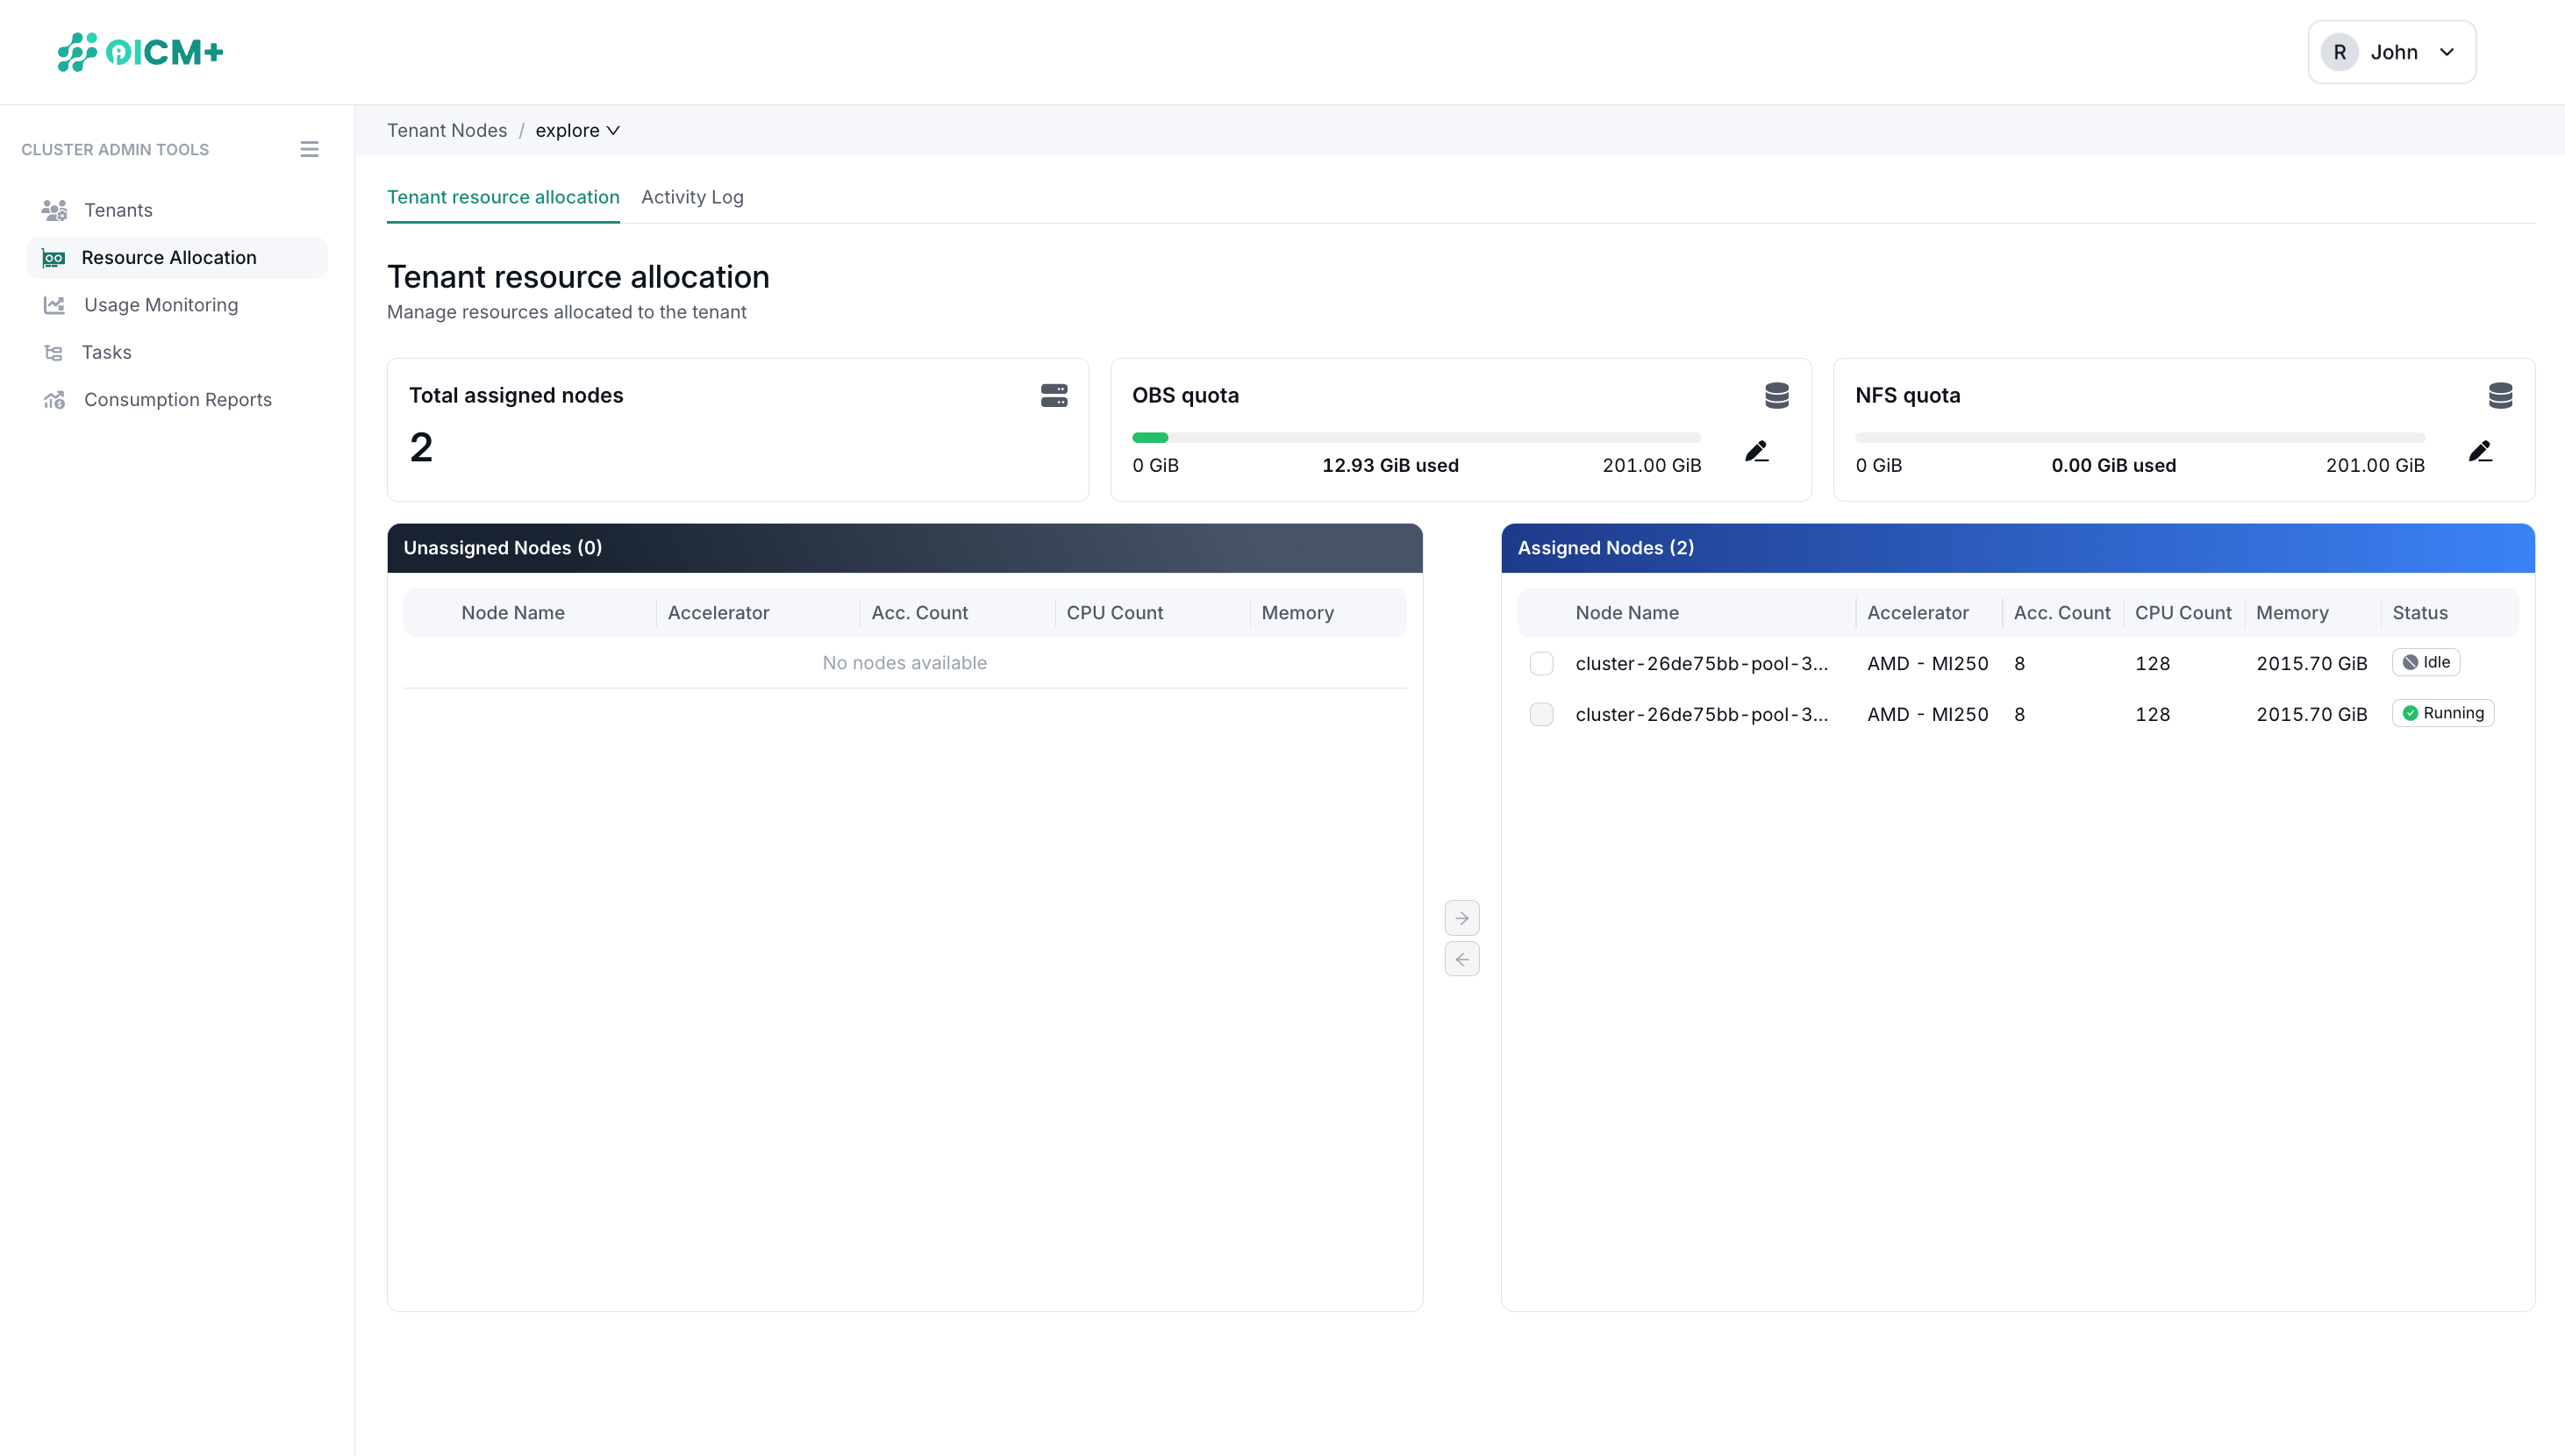
2.1 Node Allocation
- Unassigned Nodes – Select desired nodes, then move them to the assigned list.
- Assigned Nodes – Similarly, remove assigned nodes by moving them back to unassigned.
Node Properties
- Accelerator – GPU vendor and model.
- Accelerator Count – Number of GPUs per node.
- CPU Count – Total CPUs on each node.
- Status – Indicates node usage (Idle or Running). Prefer unassigning idle nodes to avoid disrupting active workloads.
3. Object Storage & NFS Allocation
Super admins can allocate object storage (OBS) and network file storage (NFS) quotas for each tenant:
- Edit OBS/NFS fields in the tenant’s detail section.
- Update to save changes.
Next Steps
- Tenant Management – Create or delete tenants and manage tenant admins.
- Cluster Monitoring – Track node health and GPU usage to ensure balanced allocation.
- Tenant Admin Tools Overview – Explore tenant-level administrative capabilities.